Getting started
Send your first email sequence
Before you start
A few things need to be in place before a sequence can send:
- the Marketing Pack. Without it, Sequences shows a padlock. Add it from Settings → Subscription & billing (see pricing),
- permission to manage sequences, which the built-in Admin role has,
- at least one email template, in Documents → Templates, and
- a connected Microsoft 365 mailbox (Settings → Integrations, then Connect Microsoft 365).
Sequence emails send from the mailbox of each company’s Relationship Owner, so make sure the owners of the companies you enrol have connected theirs.
Open Sequences
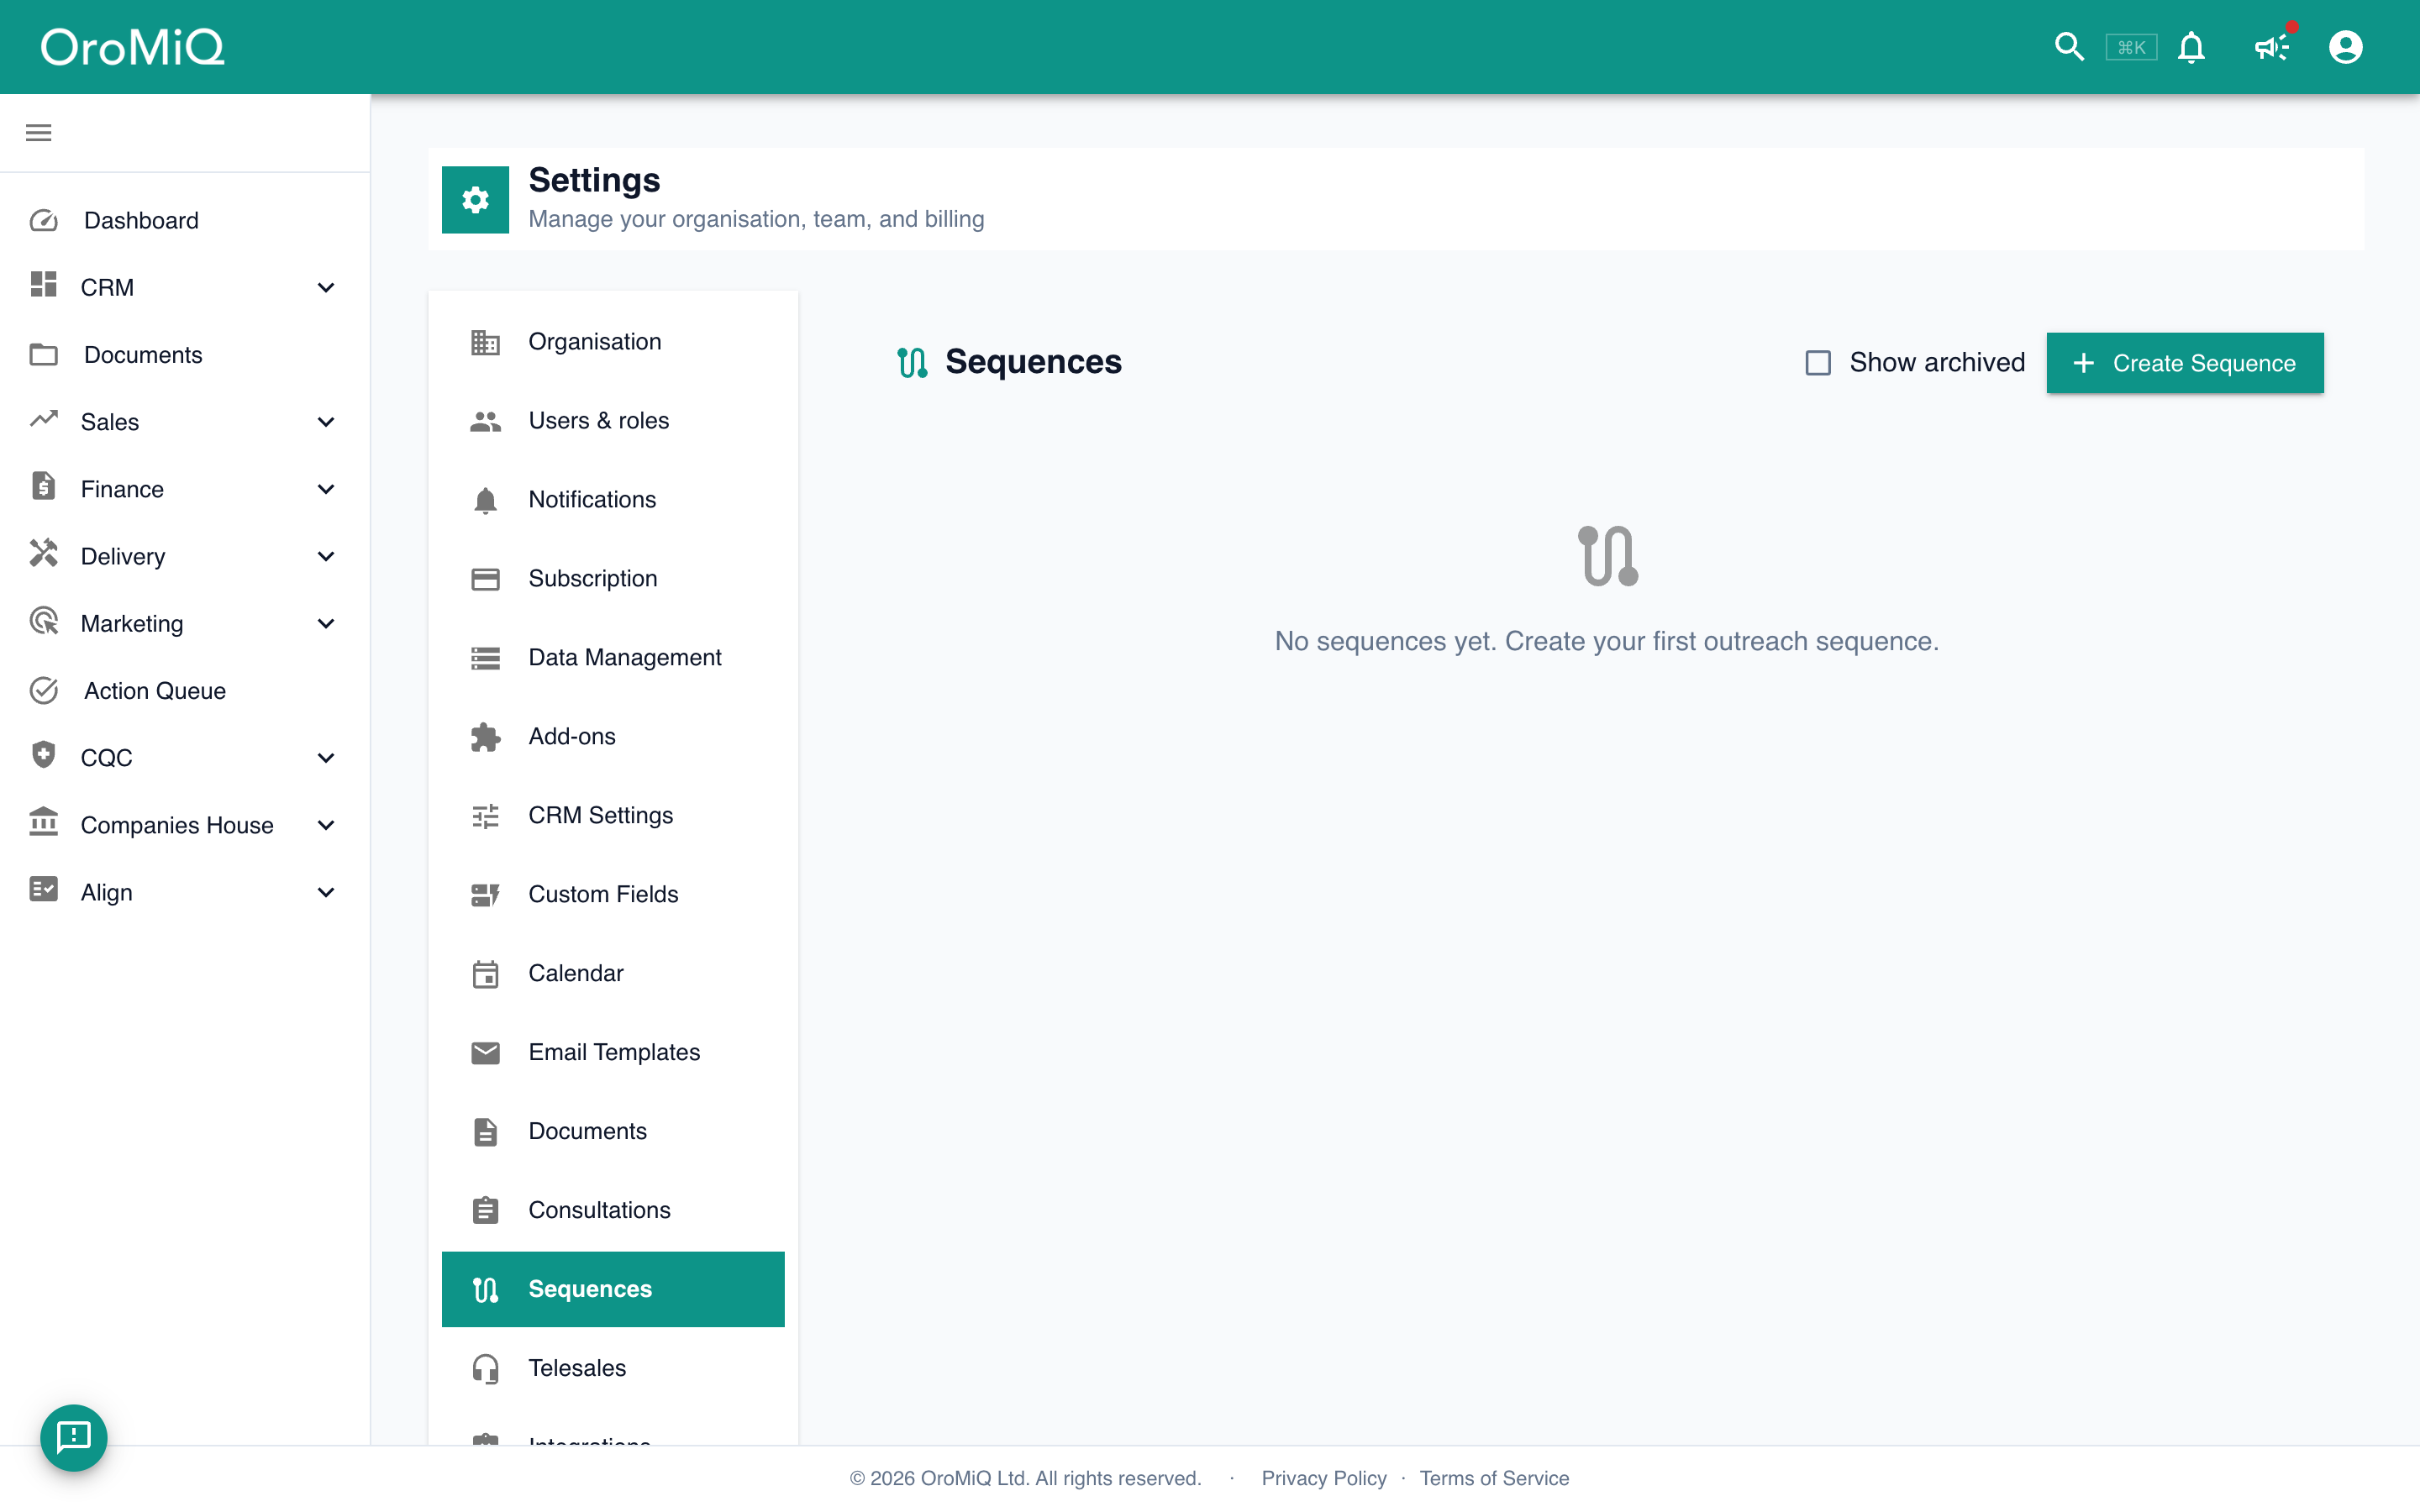
In the main sidebar, open Marketing, then Sequences. Click Create Sequence to open the editor.
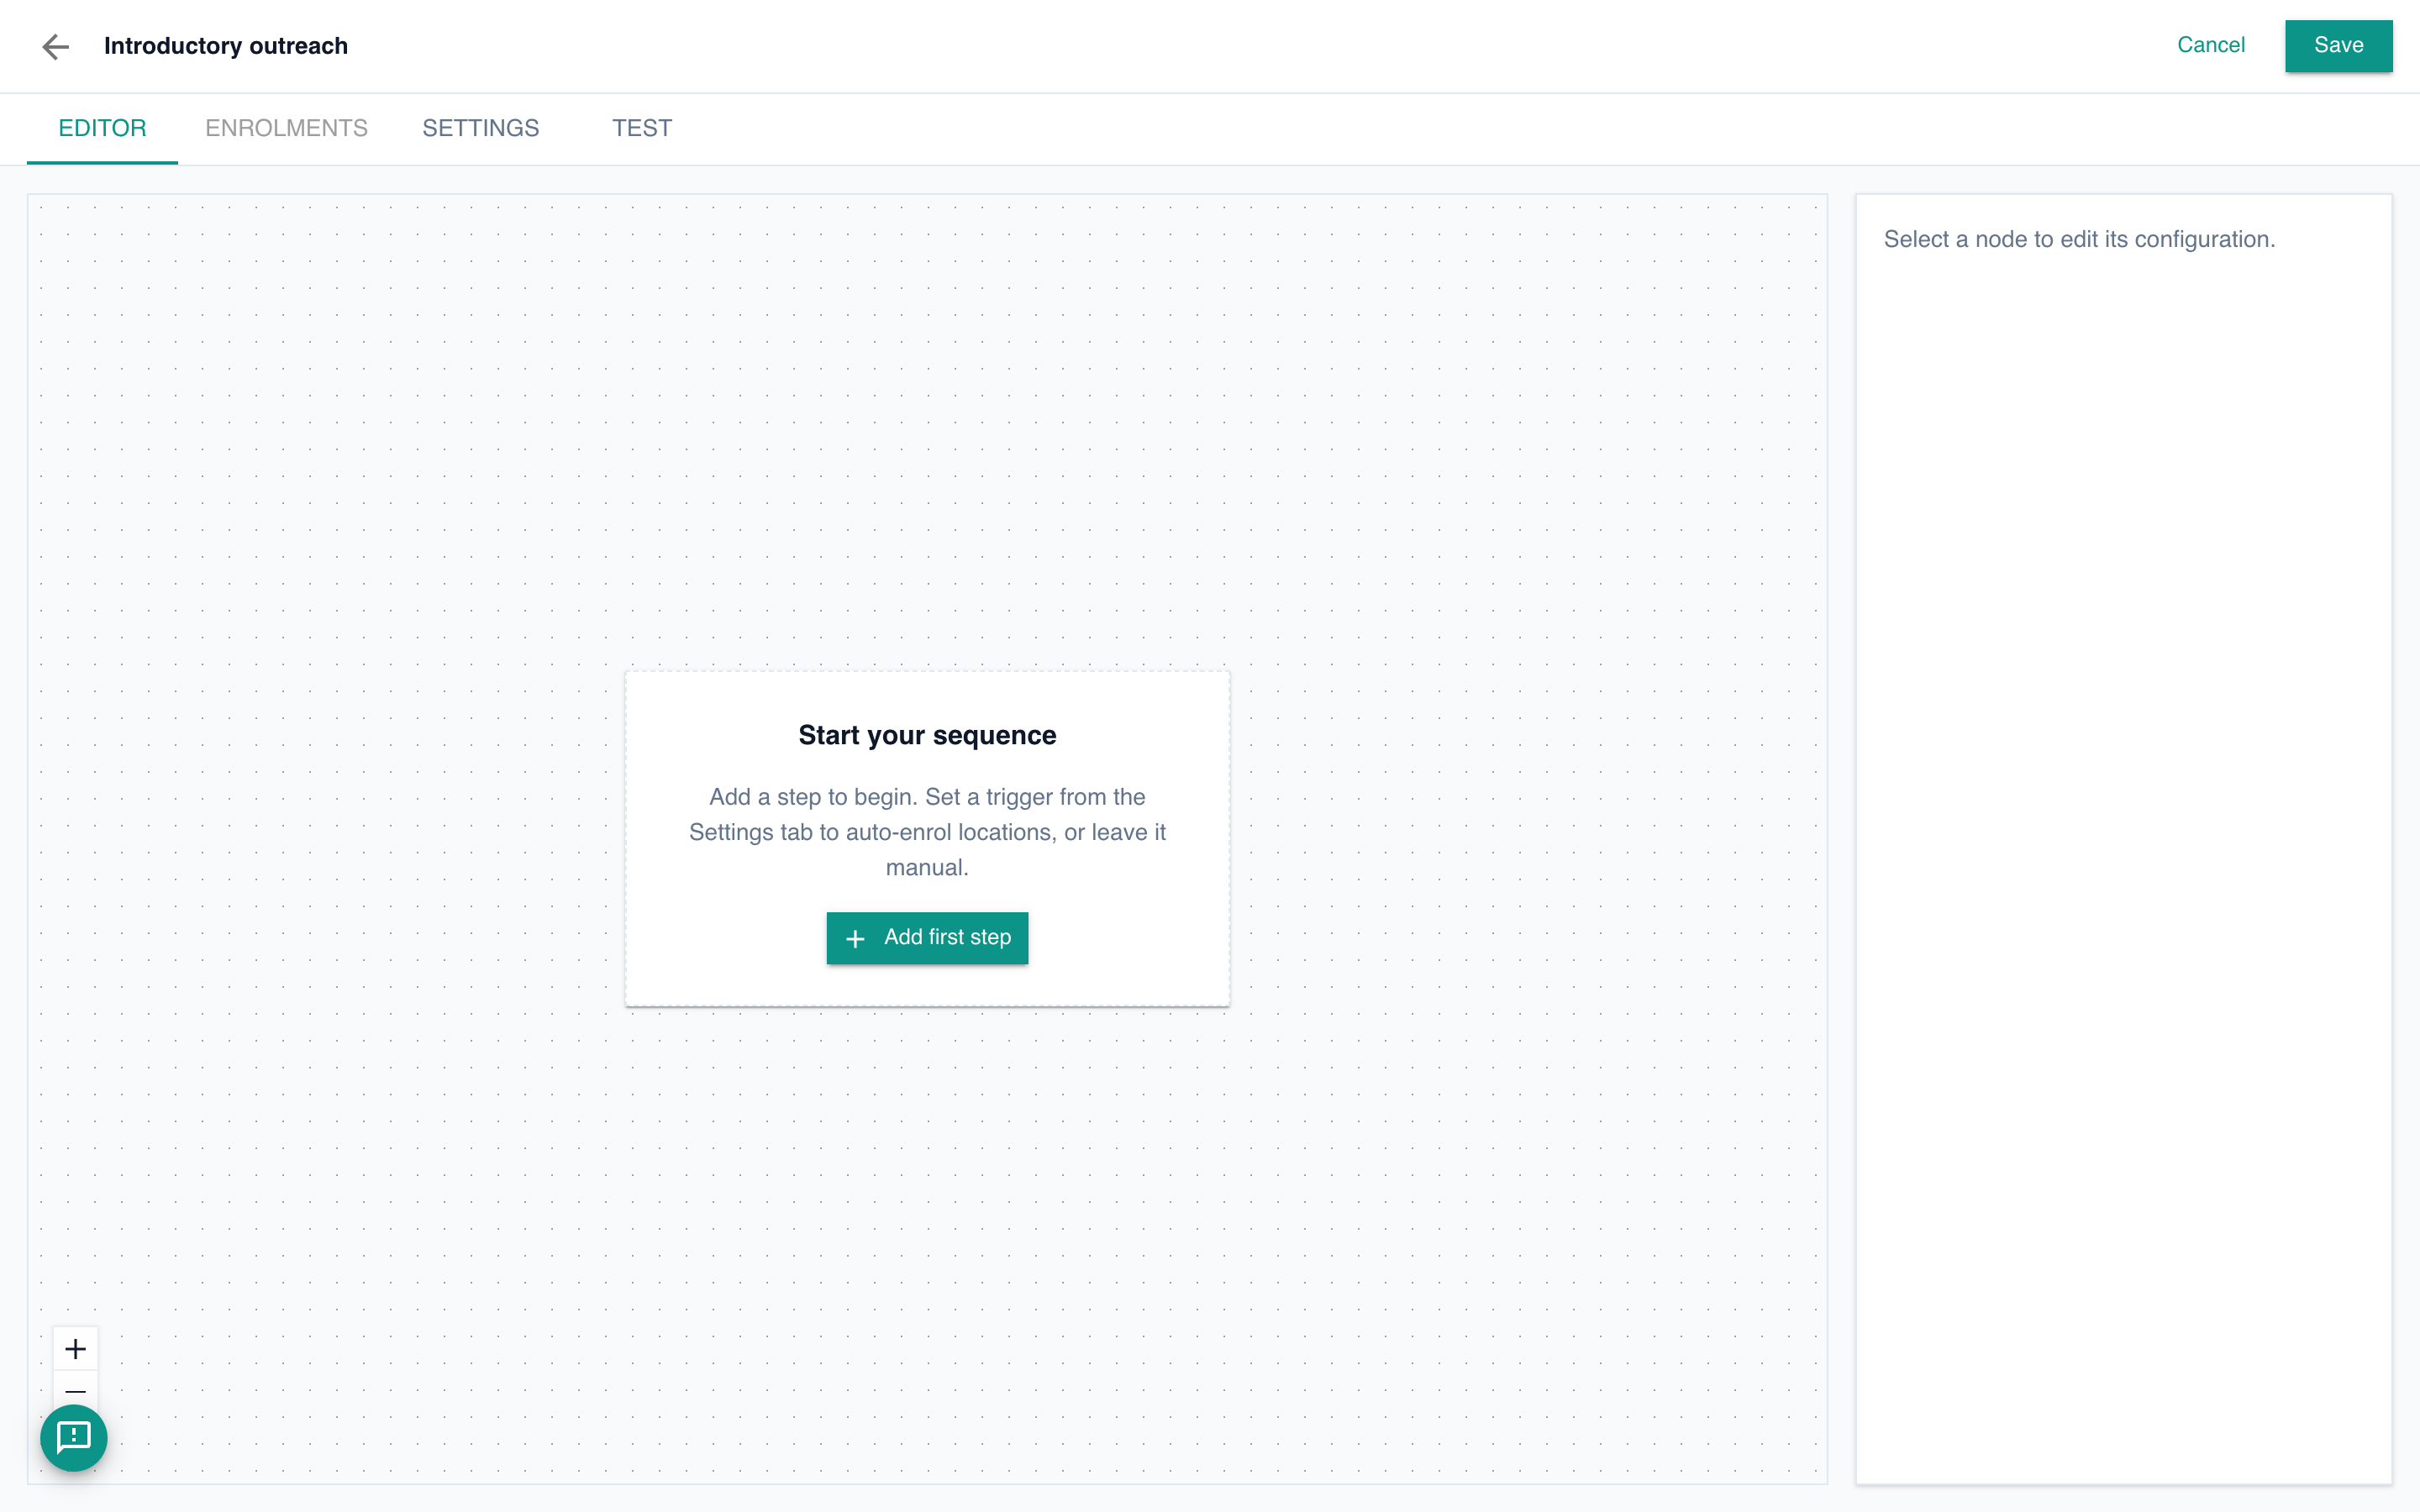
Name your sequence
Give the sequence a clear name at the top (for example Introductory outreach) so you can find it later. The blank canvas is where you lay out your steps.
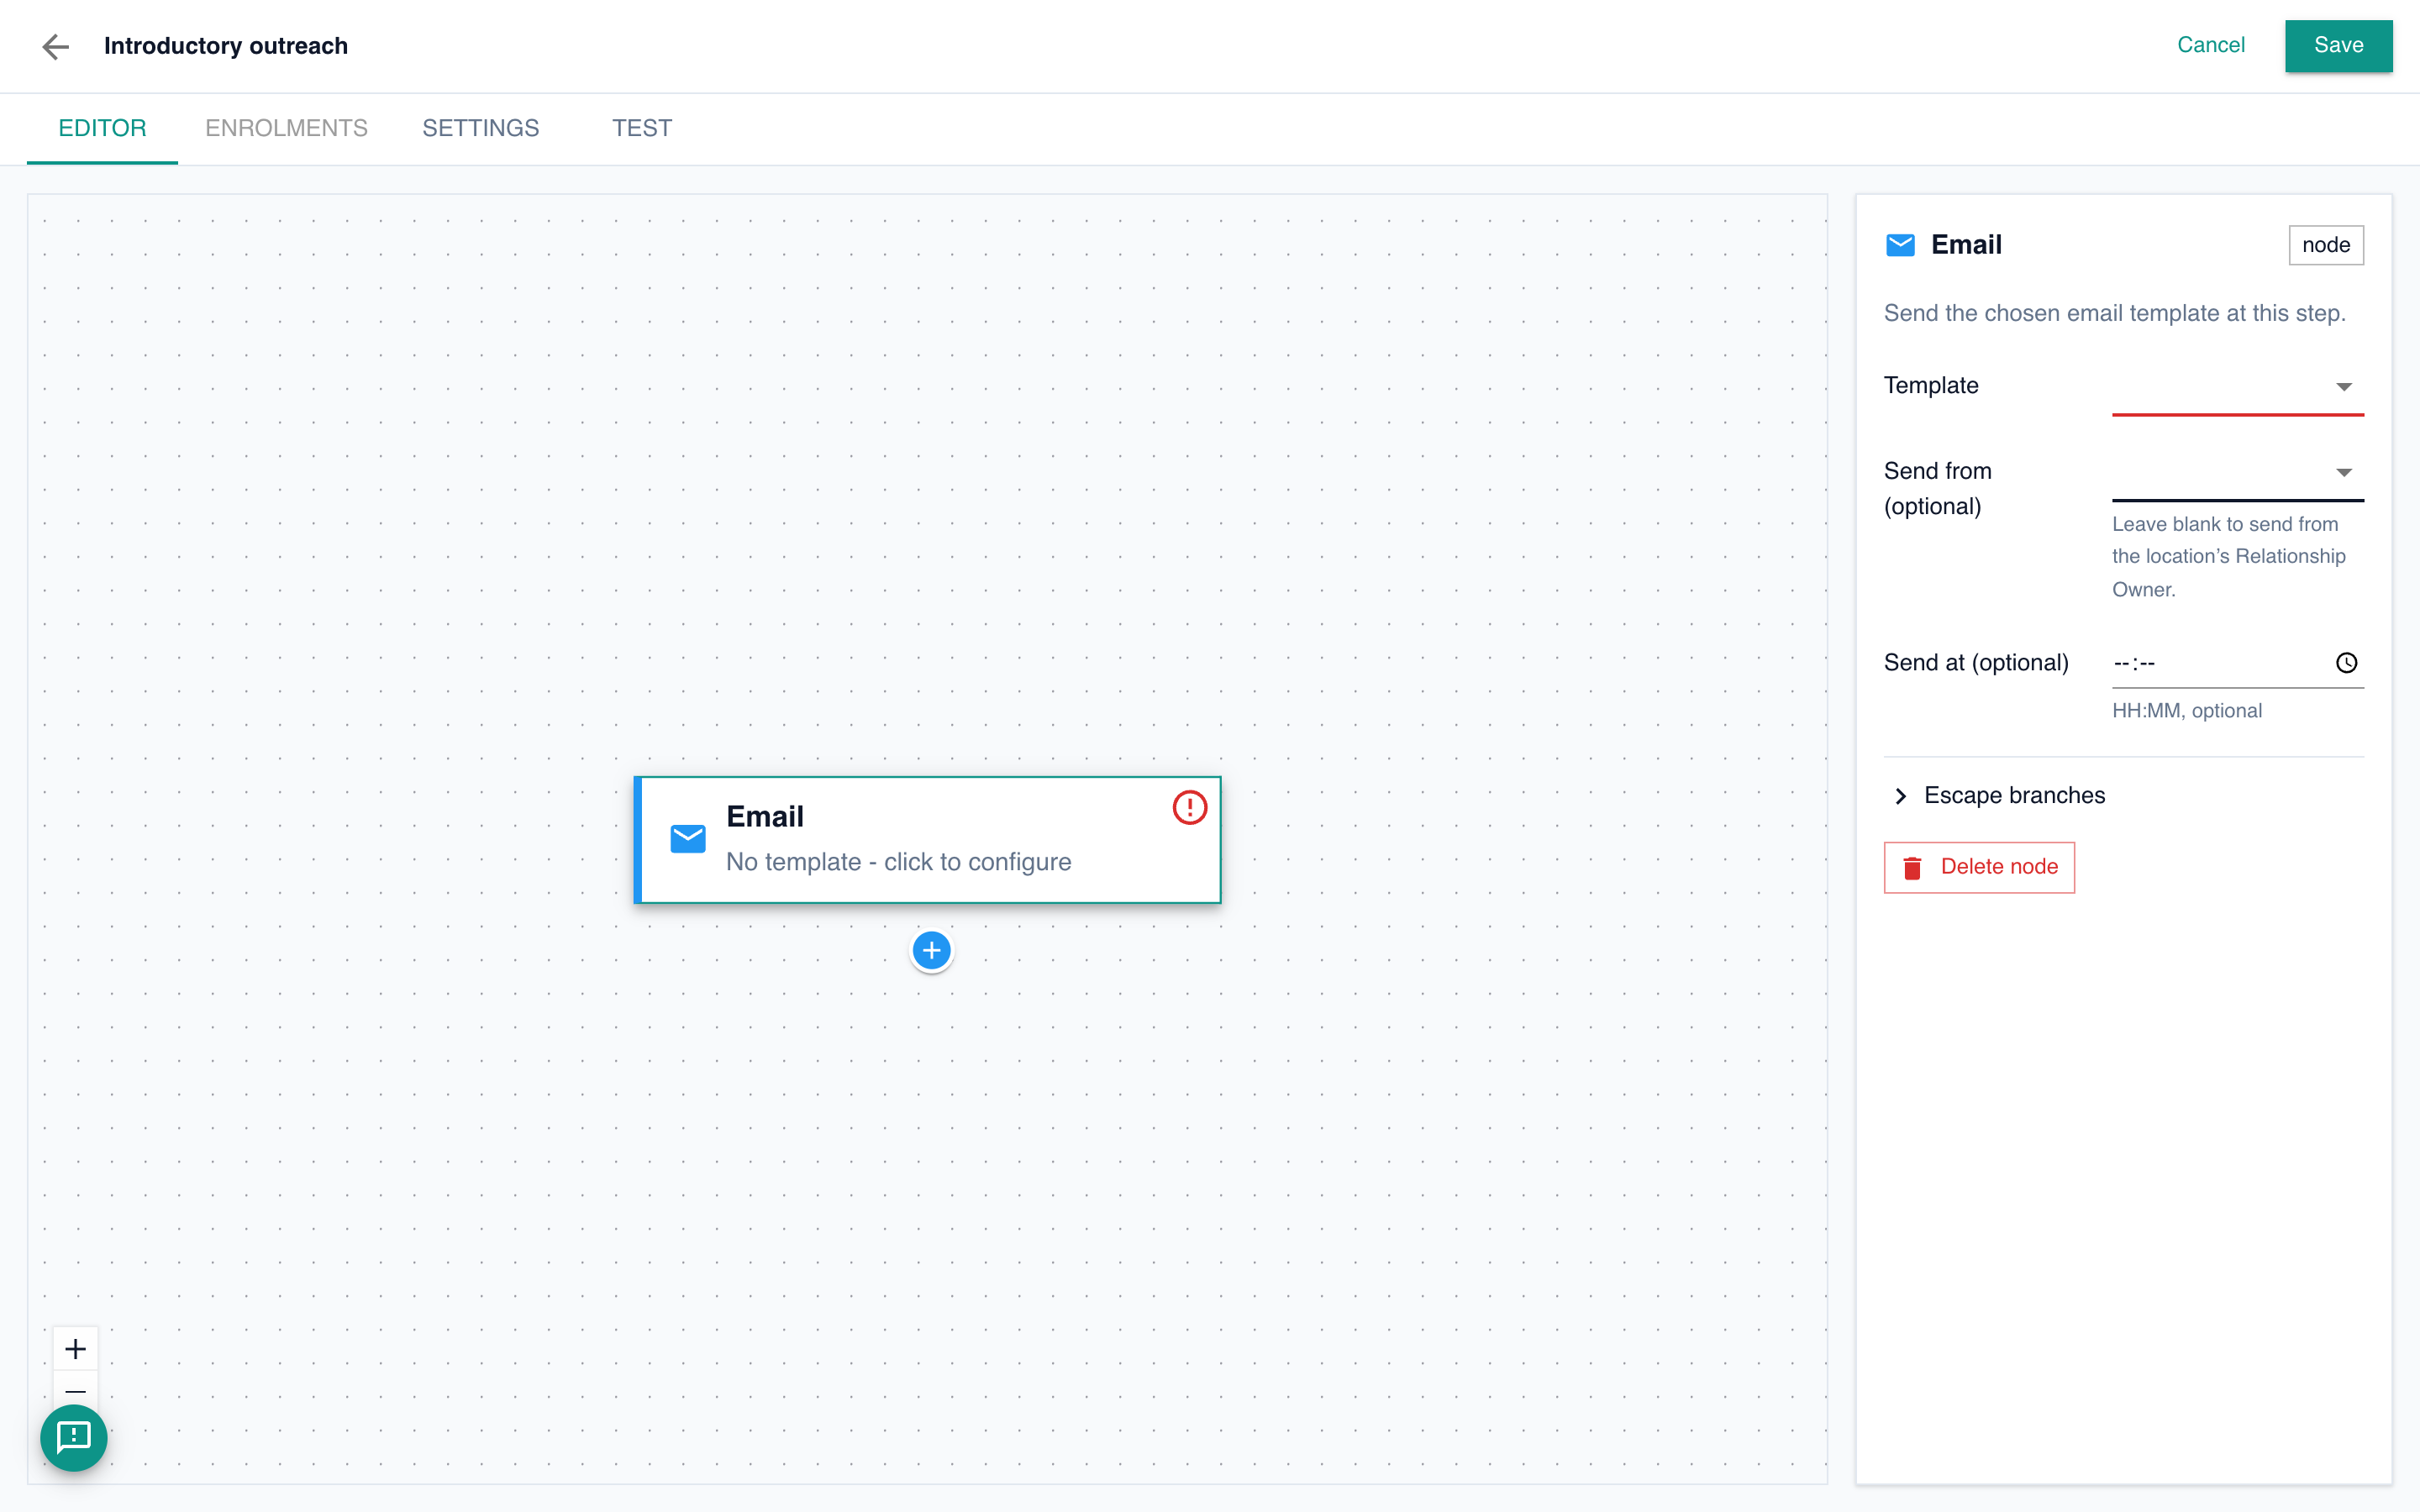
Add your steps
Click Add first step and choose Email. In the panel on the right, pick the email Template to send. Leave Send from blank to use the company’s Relationship Owner, or pick a shared mailbox. Send at sets a time of day.
Keep going to build a drip: add a Wait step to pause a few days, then another Email. Other steps include Task, Postal, Wait for reply, Change stage, Notify and Condition, which can branch on whether a link was clicked or someone replied.
Note
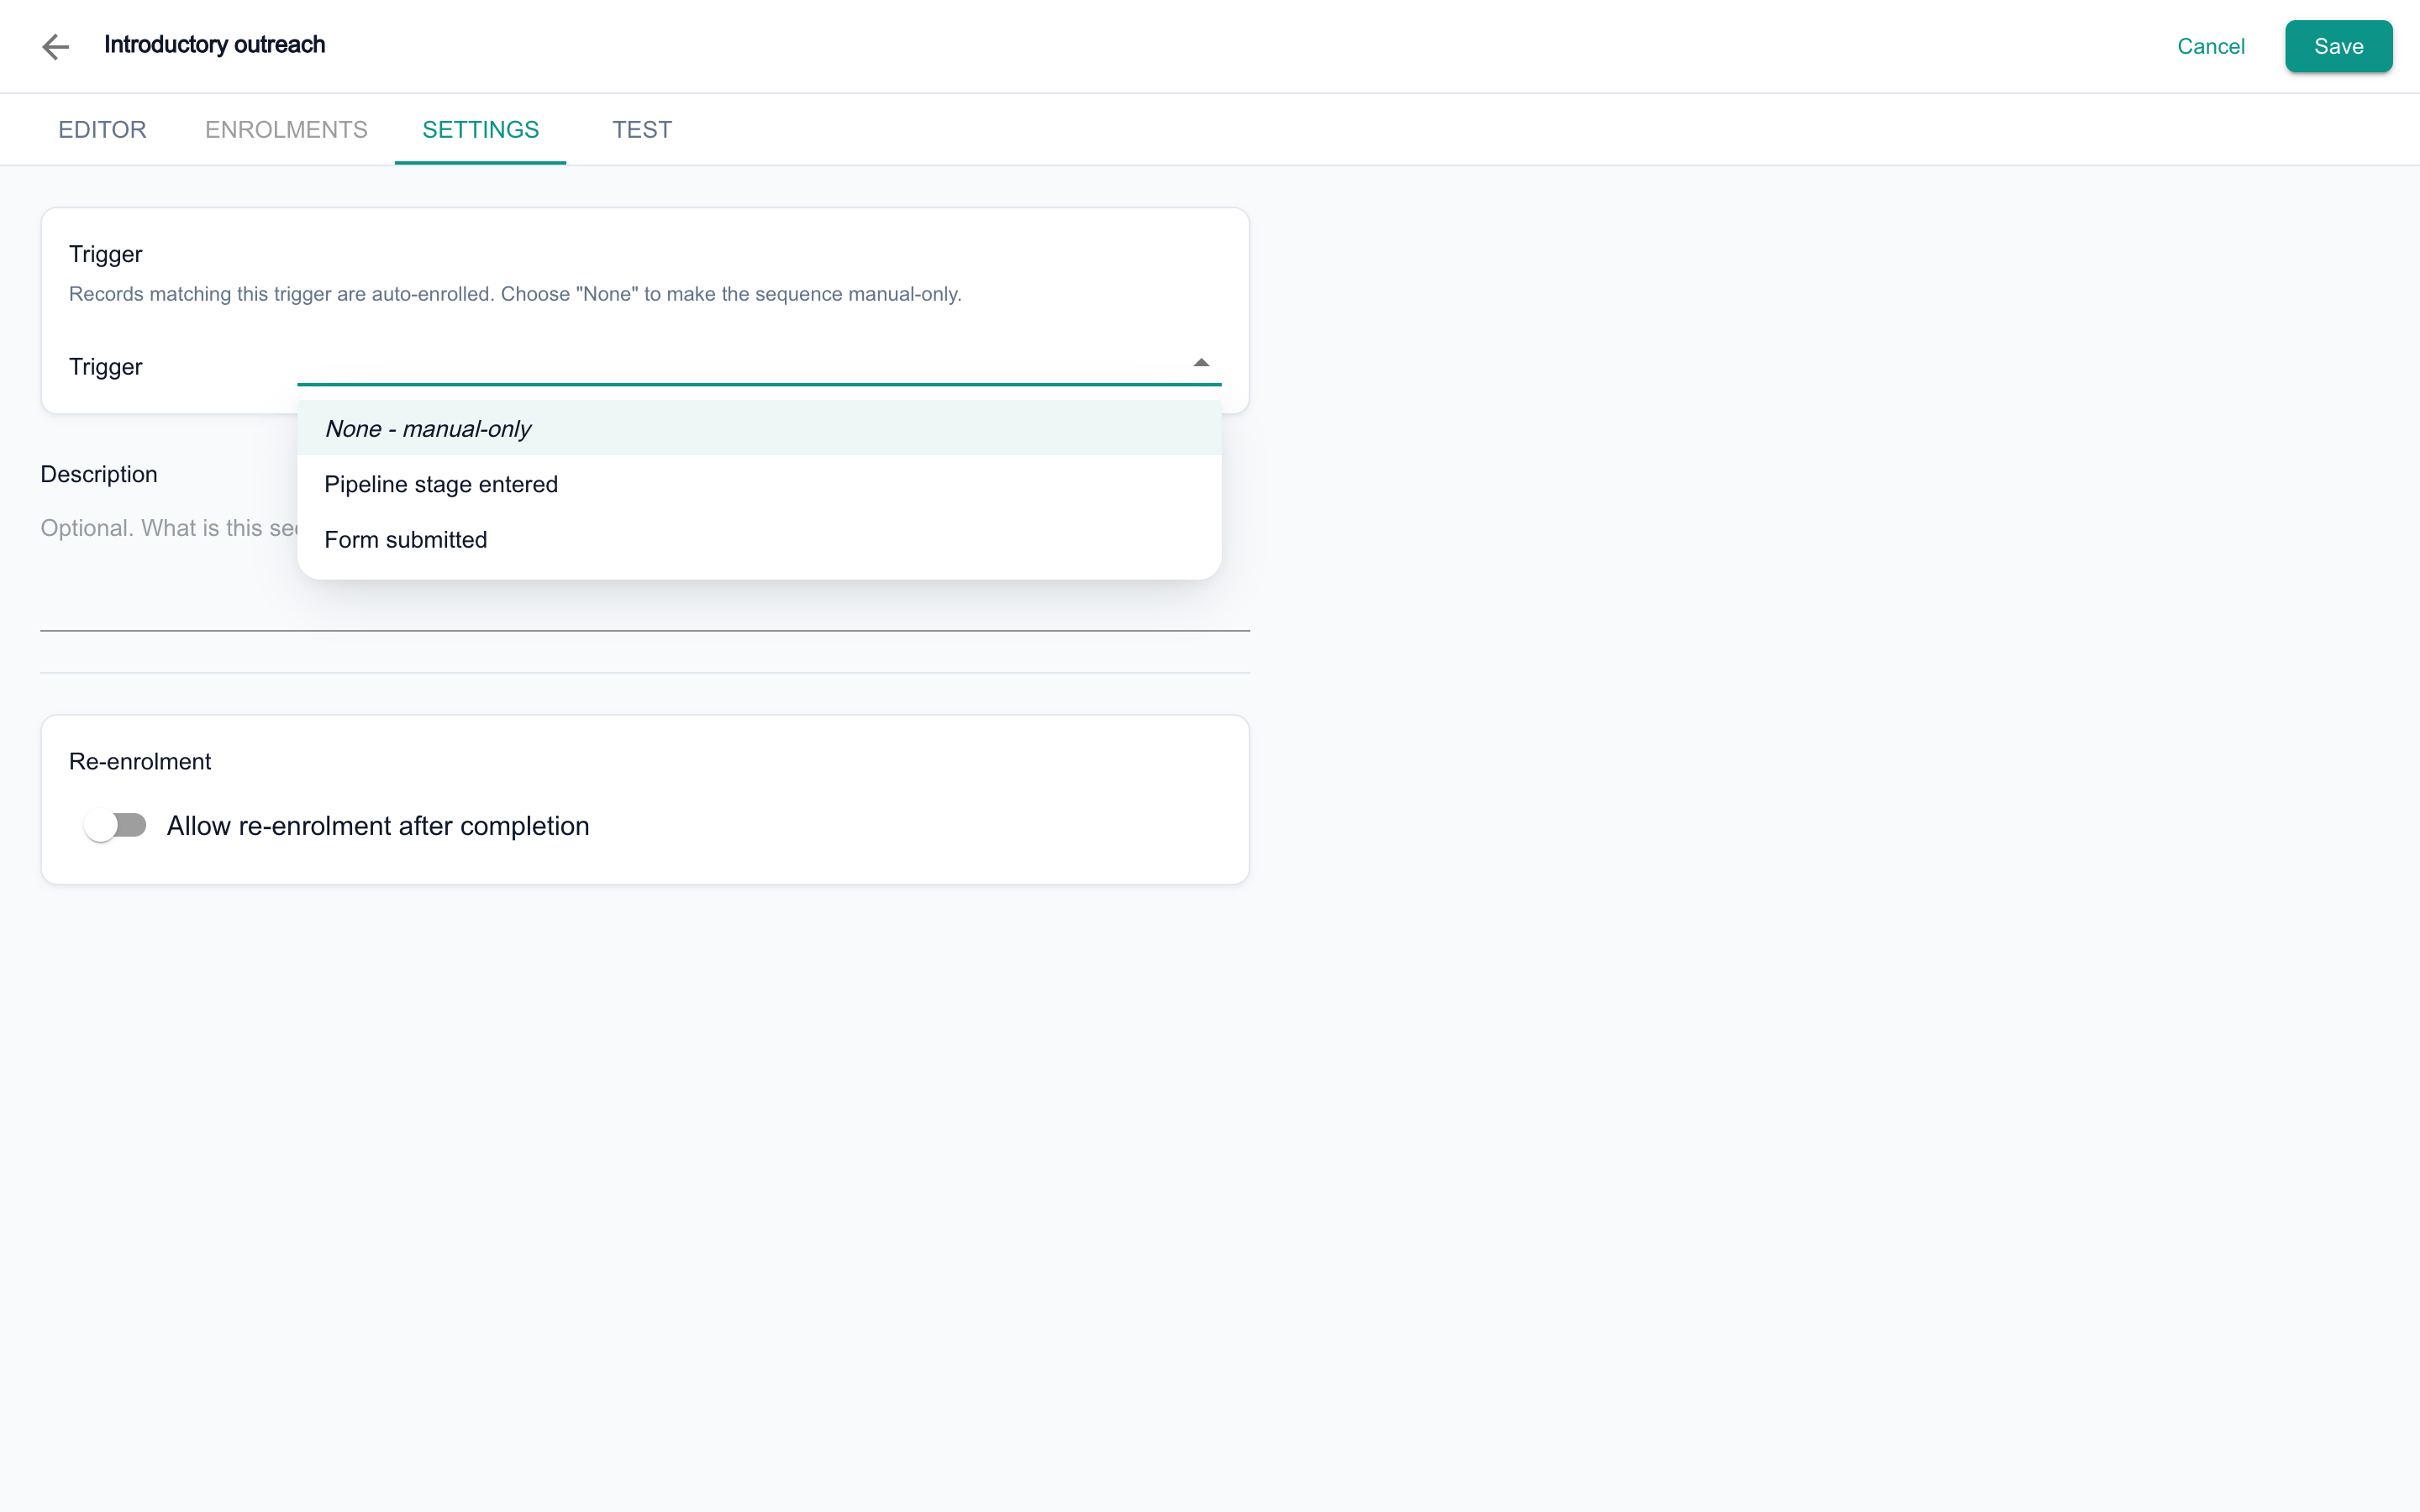
Choose how companies are enrolled
Open the Settings tab. Under Trigger, leave None - manual-only to enrol companies yourself, or choose Pipeline stage entered or Form submitted to enrol them automatically.
A sequence with a trigger only enrols automatically. It shows as Trigger-only when you enrol by hand, and cannot be picked.
Save and publish
Click Save. New sequences save as a Draft, and a draft cannot enrol anyone. When you are ready, click Publish.
Use the Test tab to try your steps first. Once companies are running through it, the Enrolments tab shows where each one is.

Enrol a company
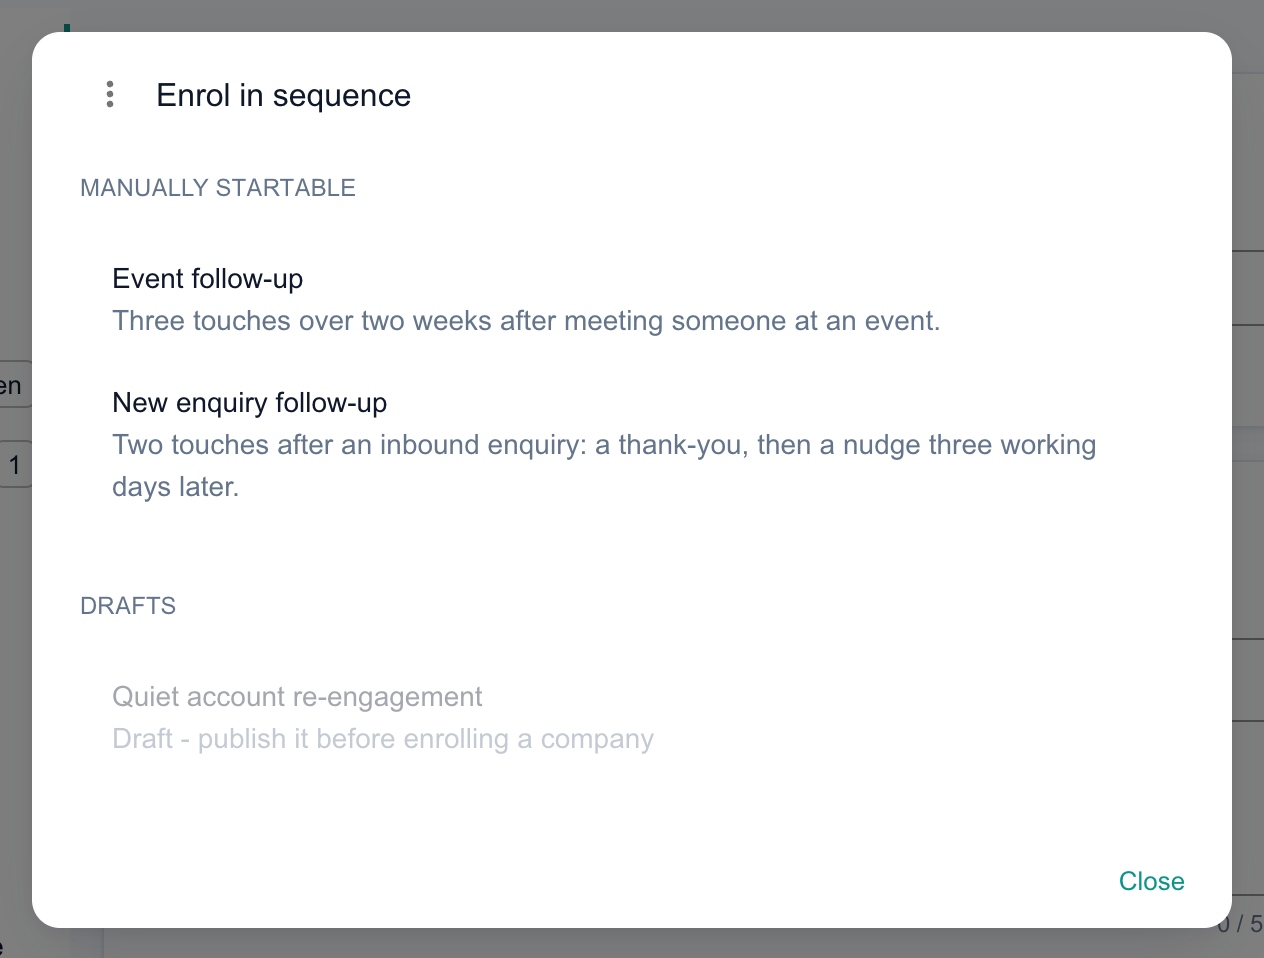
Open a company, click Quick Actions, then Enrol in sequence. Pick your published sequence under Manually startable, then choose Start from the beginning. Drafts are listed too, but cannot be picked until they are published. You can also attach the sequence to a campaign to enrol its companies.
Who receives your emails
What next
Cannot find what you need? Browse the Help Centre or submit a support ticket.