Getting started

Add your contacts and companies

6 min read
Companies and the people at them are the heart of your CRM. Here you will add a company, add a named contact, and link them, so every conversation has somewhere to live.

Open your Companies list

In the sidebar, open CRM then Companies. This is where every company you work with lives. Use the Search companies box to find one quickly.

You may also see two tabs: All companies and Unrouted enquiries. Unrouted enquiries are companies nobody owns yet (see step 8).
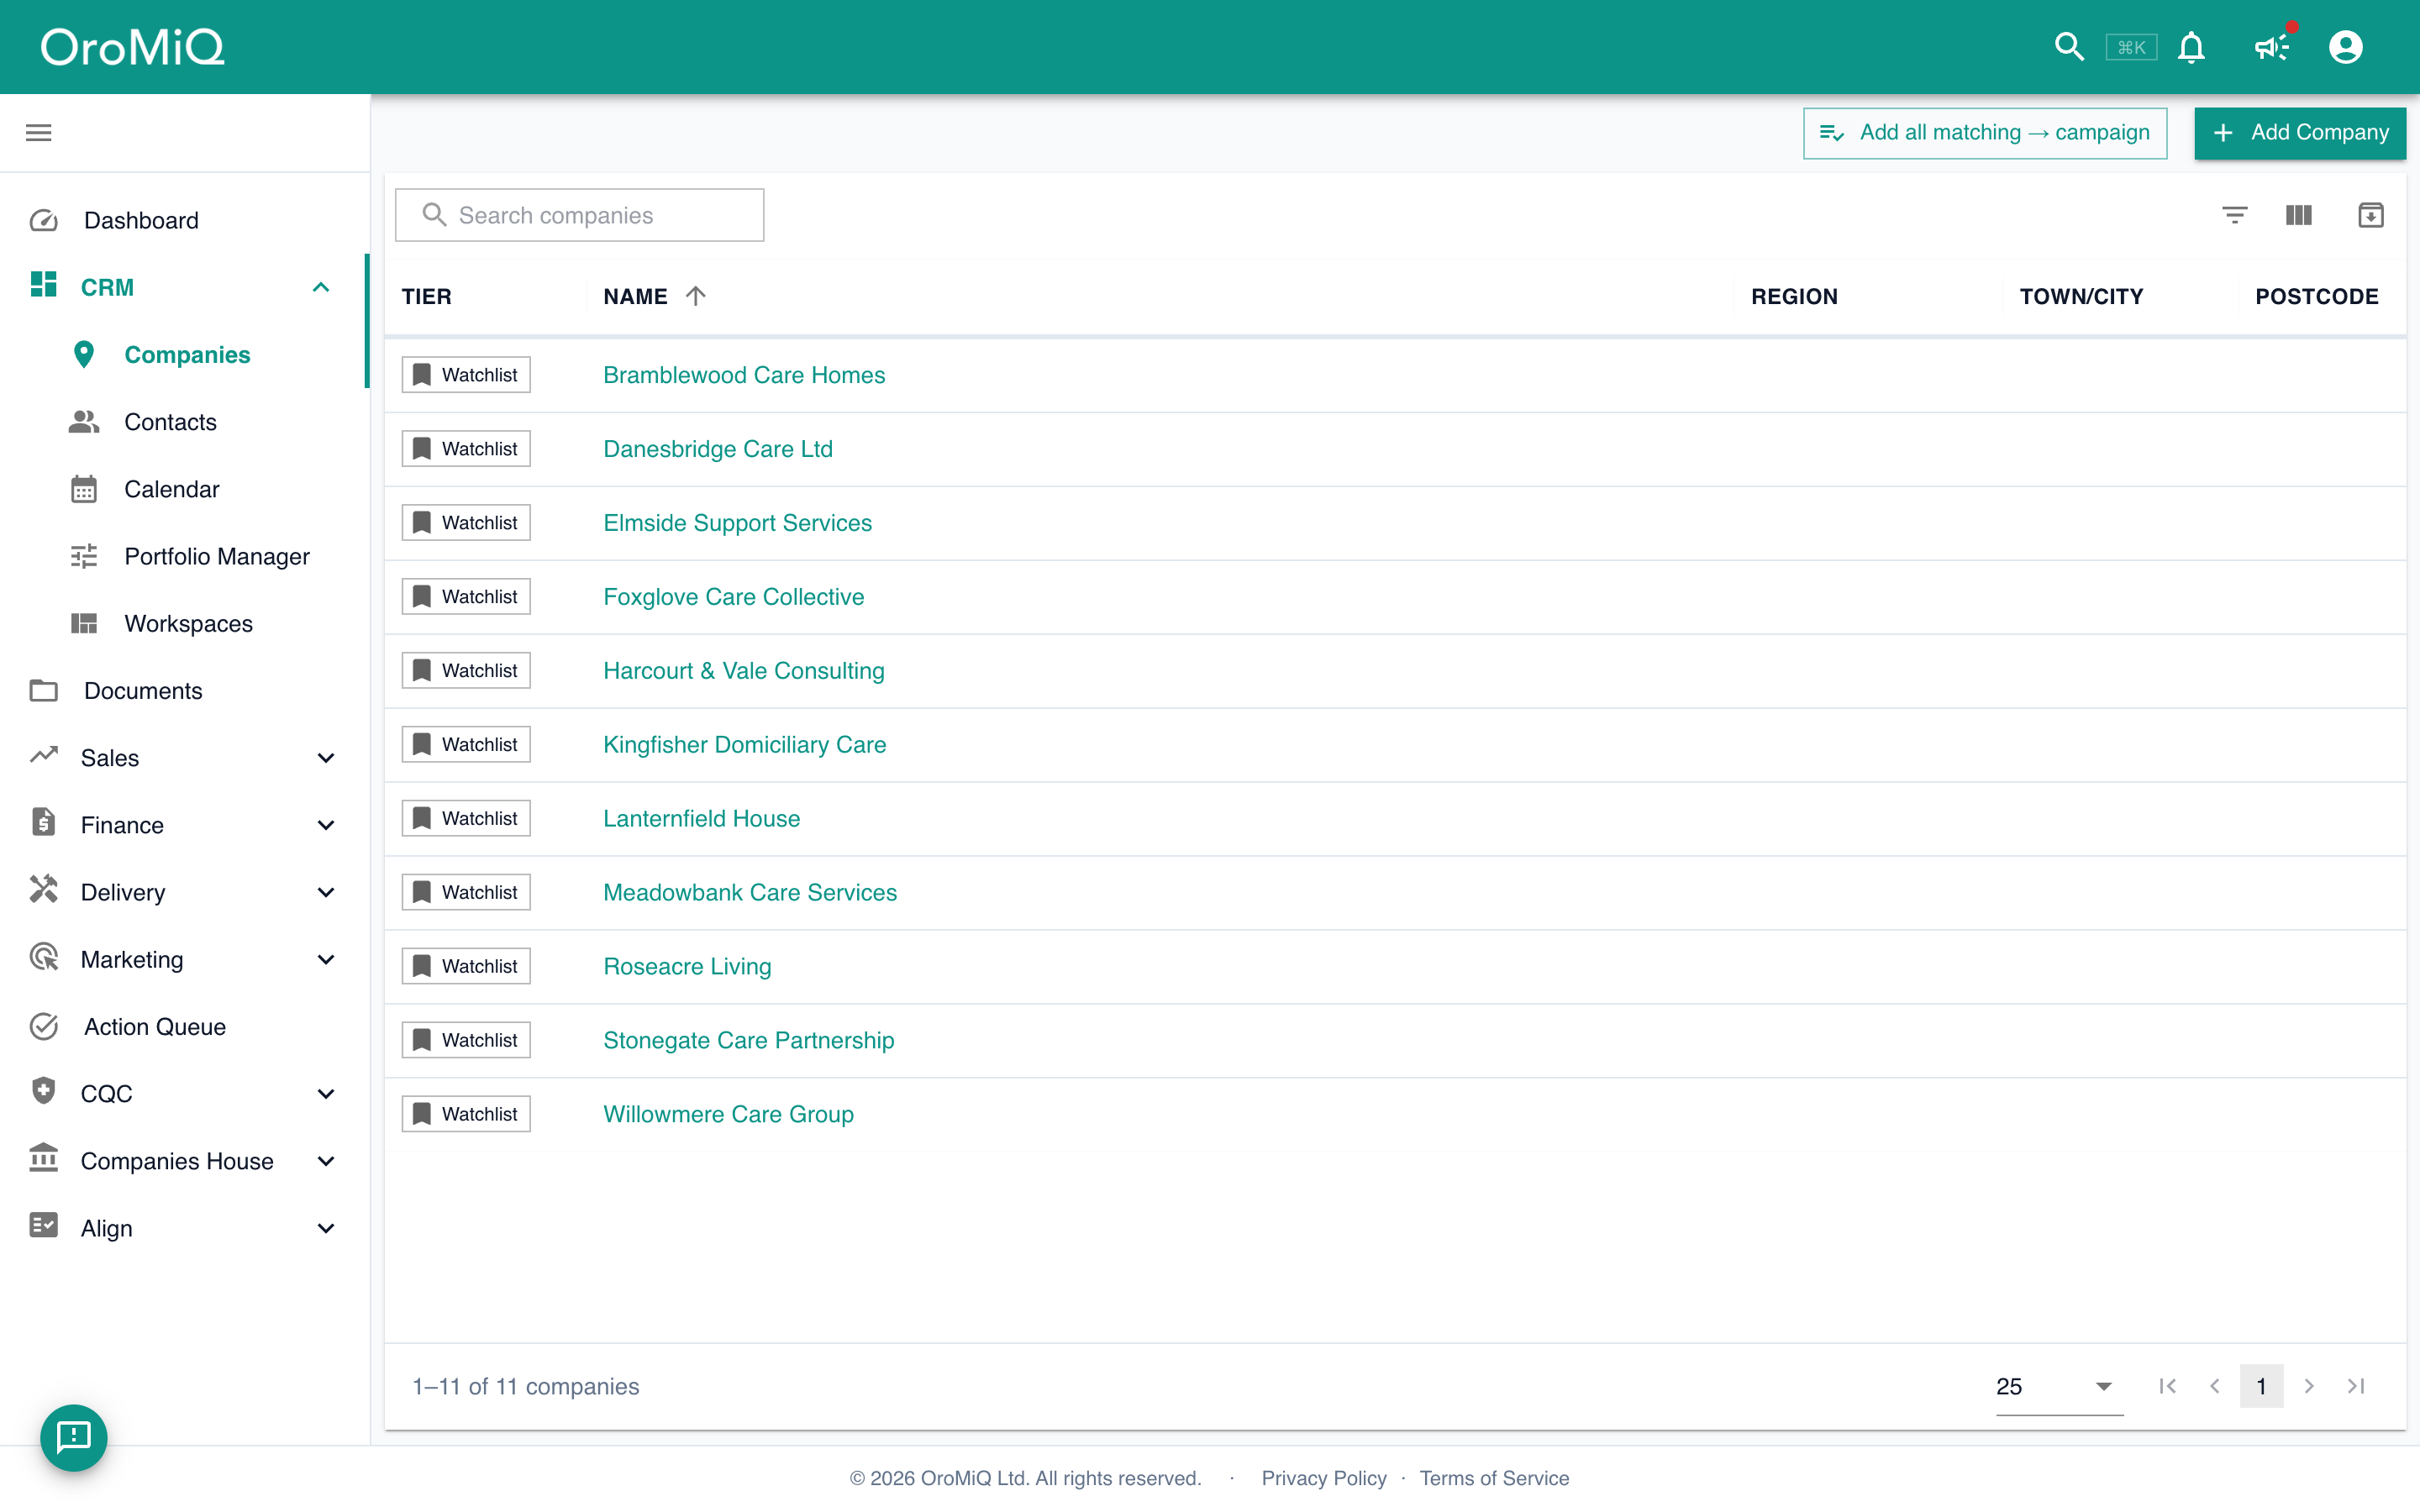
The Companies page on the All companies tab, with an Unrouted enquiries tab beside it, a Search companies box and an Add Company button in the grid toolbar above a list of companies with their tier, region, town or city and postcode.

Start a new company

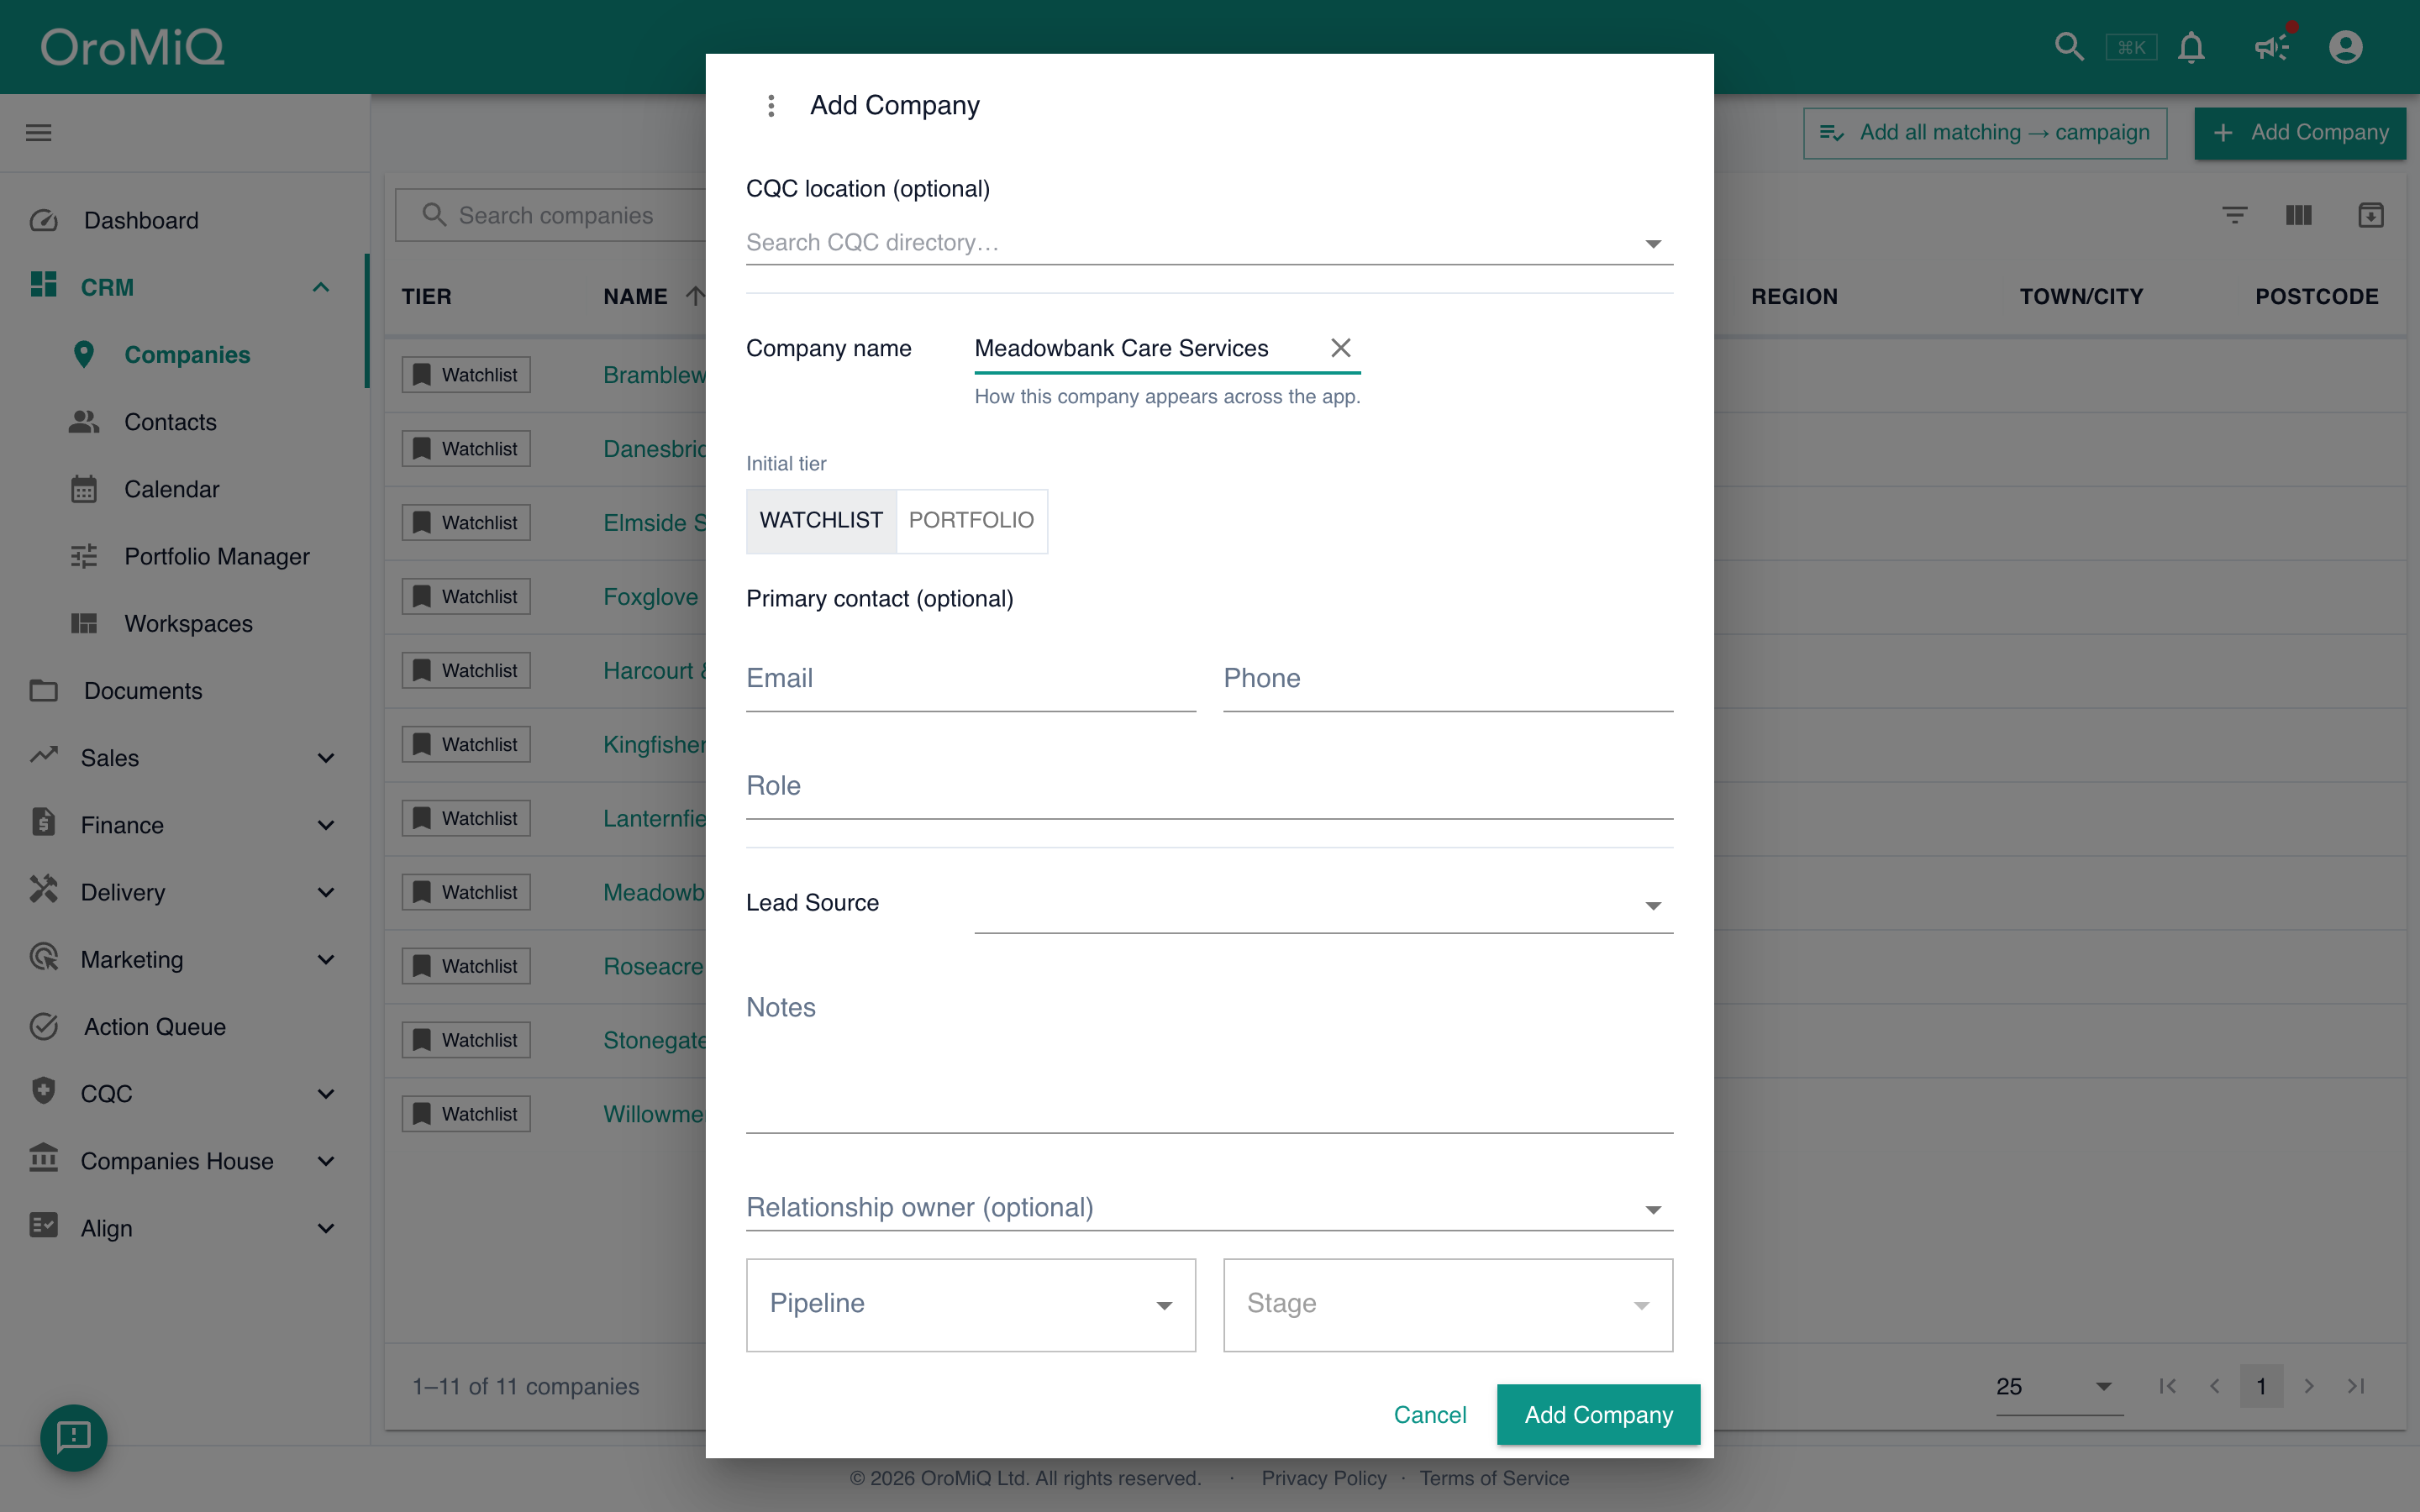
Click Add Company in the toolbar next to the search box. In the dialog, type the Company name. This is the only required field.

Choose an Initial tier (Watchlist or Portfolio). If you have pipelines set up, you can also pick a Pipeline and Stage straight away.

Note
Add Company always creates a standard company. If you have an optional data layer switched on and want to start from one of its register entries, find it in Intelligence and choose Add as company. The same dialog opens with that record already attached.
The Add Company dialog with the Company name filled in, the Initial tier toggle set to Watchlist, empty Pipeline and Stage pickers, and a More details link.

Add people and details, then create it

To add people now, click More details, then Add contact in the People section. Each row has Name, Email, Phone and Role. The first row is your Primary contact. A row needs a name once you fill in anything else.

More details also has Lead Source, account type, segment, Initial note, Relationship owner and Campaign. When you are ready, click Add Company.
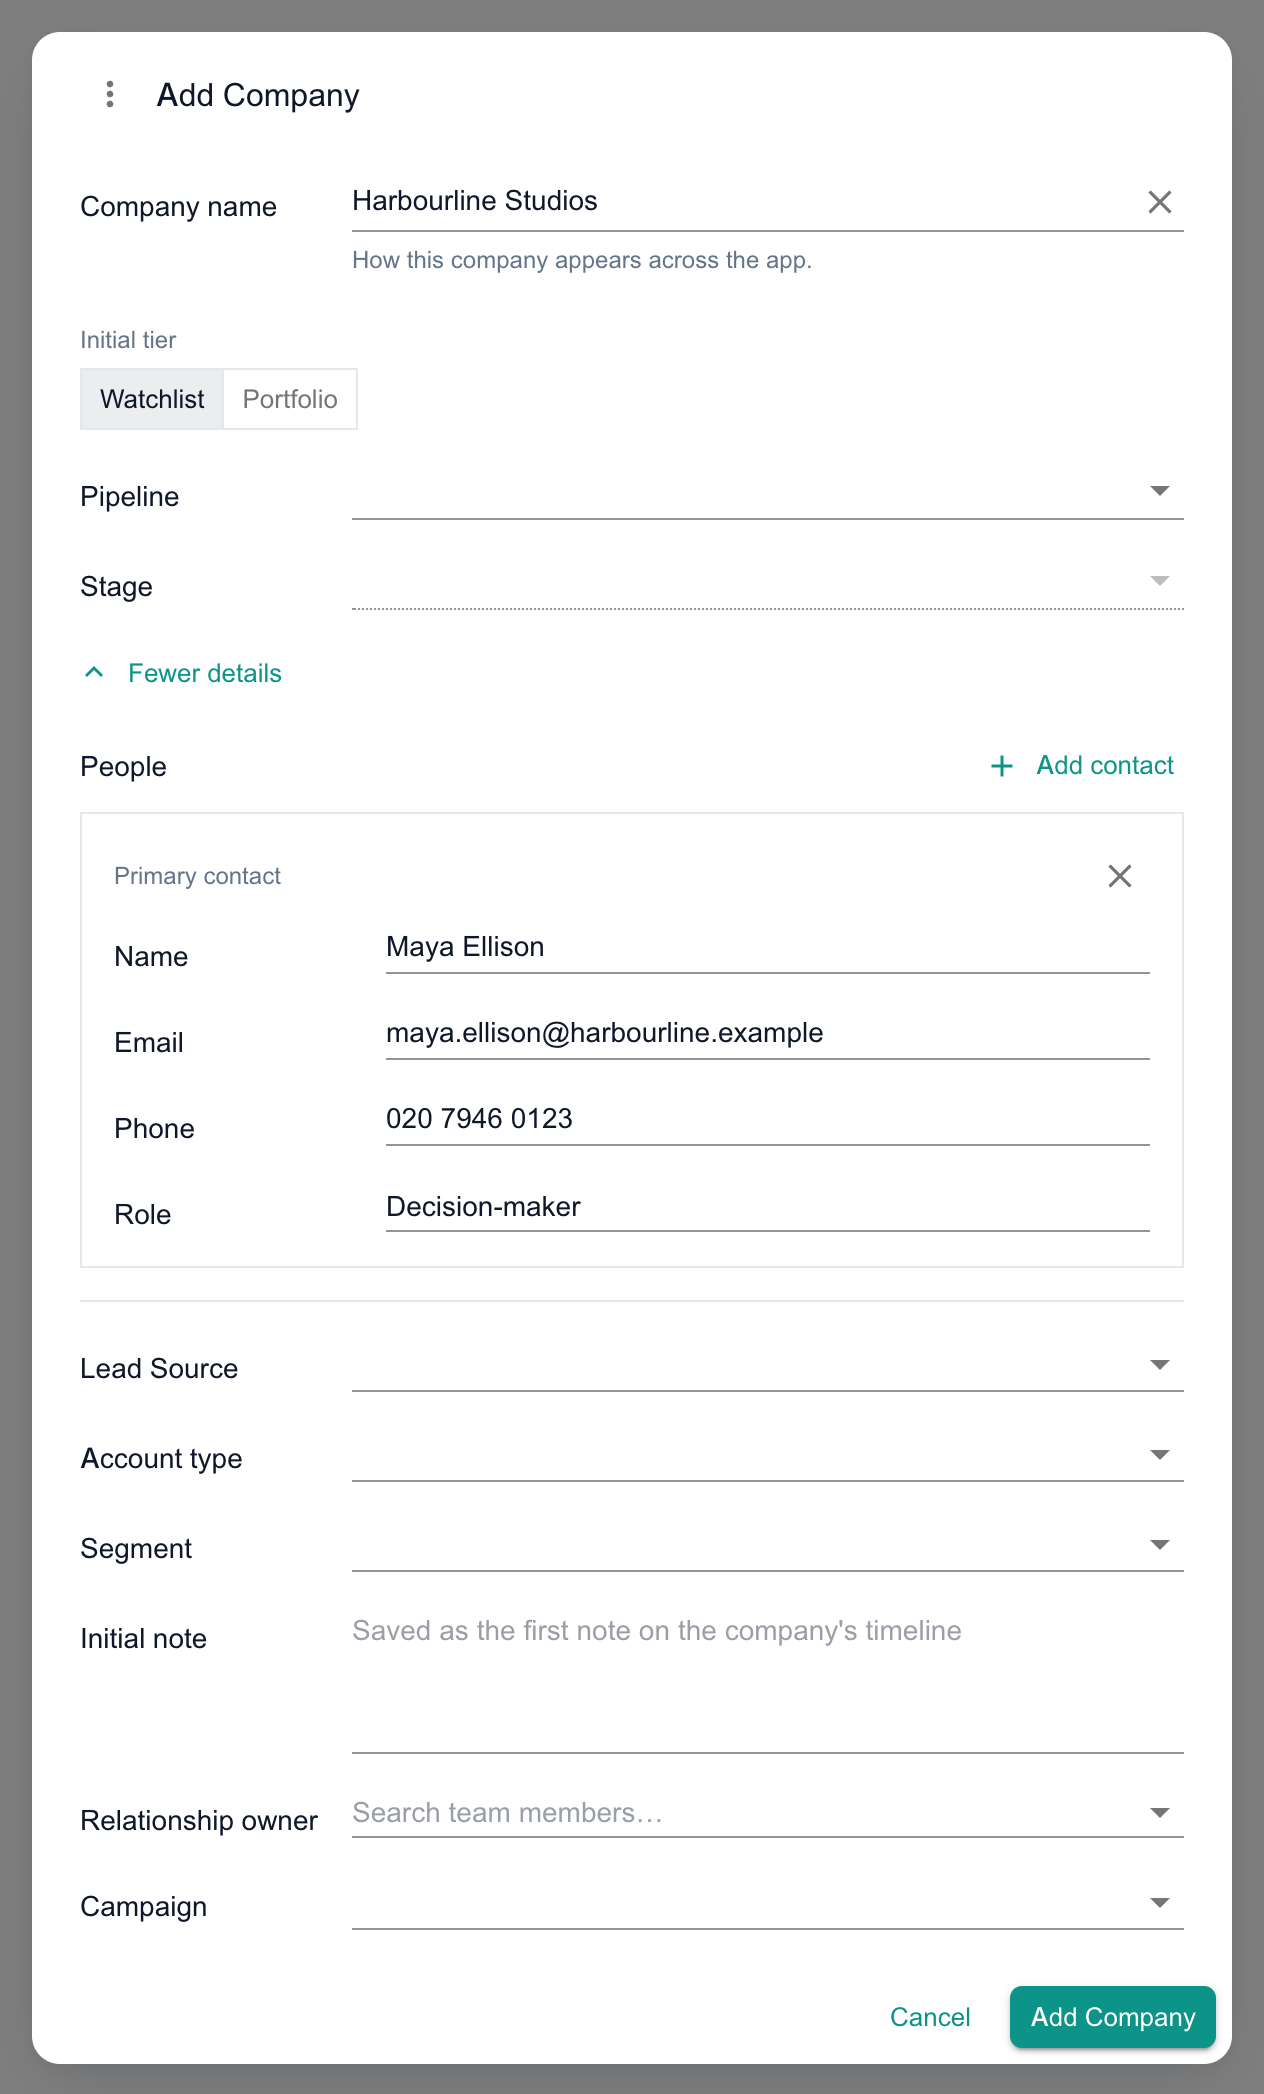
The Add Company dialog with More details open: the People section has a filled Primary contact row of Name, Email, Phone and Role, followed by Lead Source, Account type, Segment, Initial note, Relationship owner and Campaign, and the Cancel and Add Company buttons.

Your company's record opens

OroMiQ opens the new company’s record. This is the home for that company: its details, its people, its activity, and any deals, all in one place.

Tip
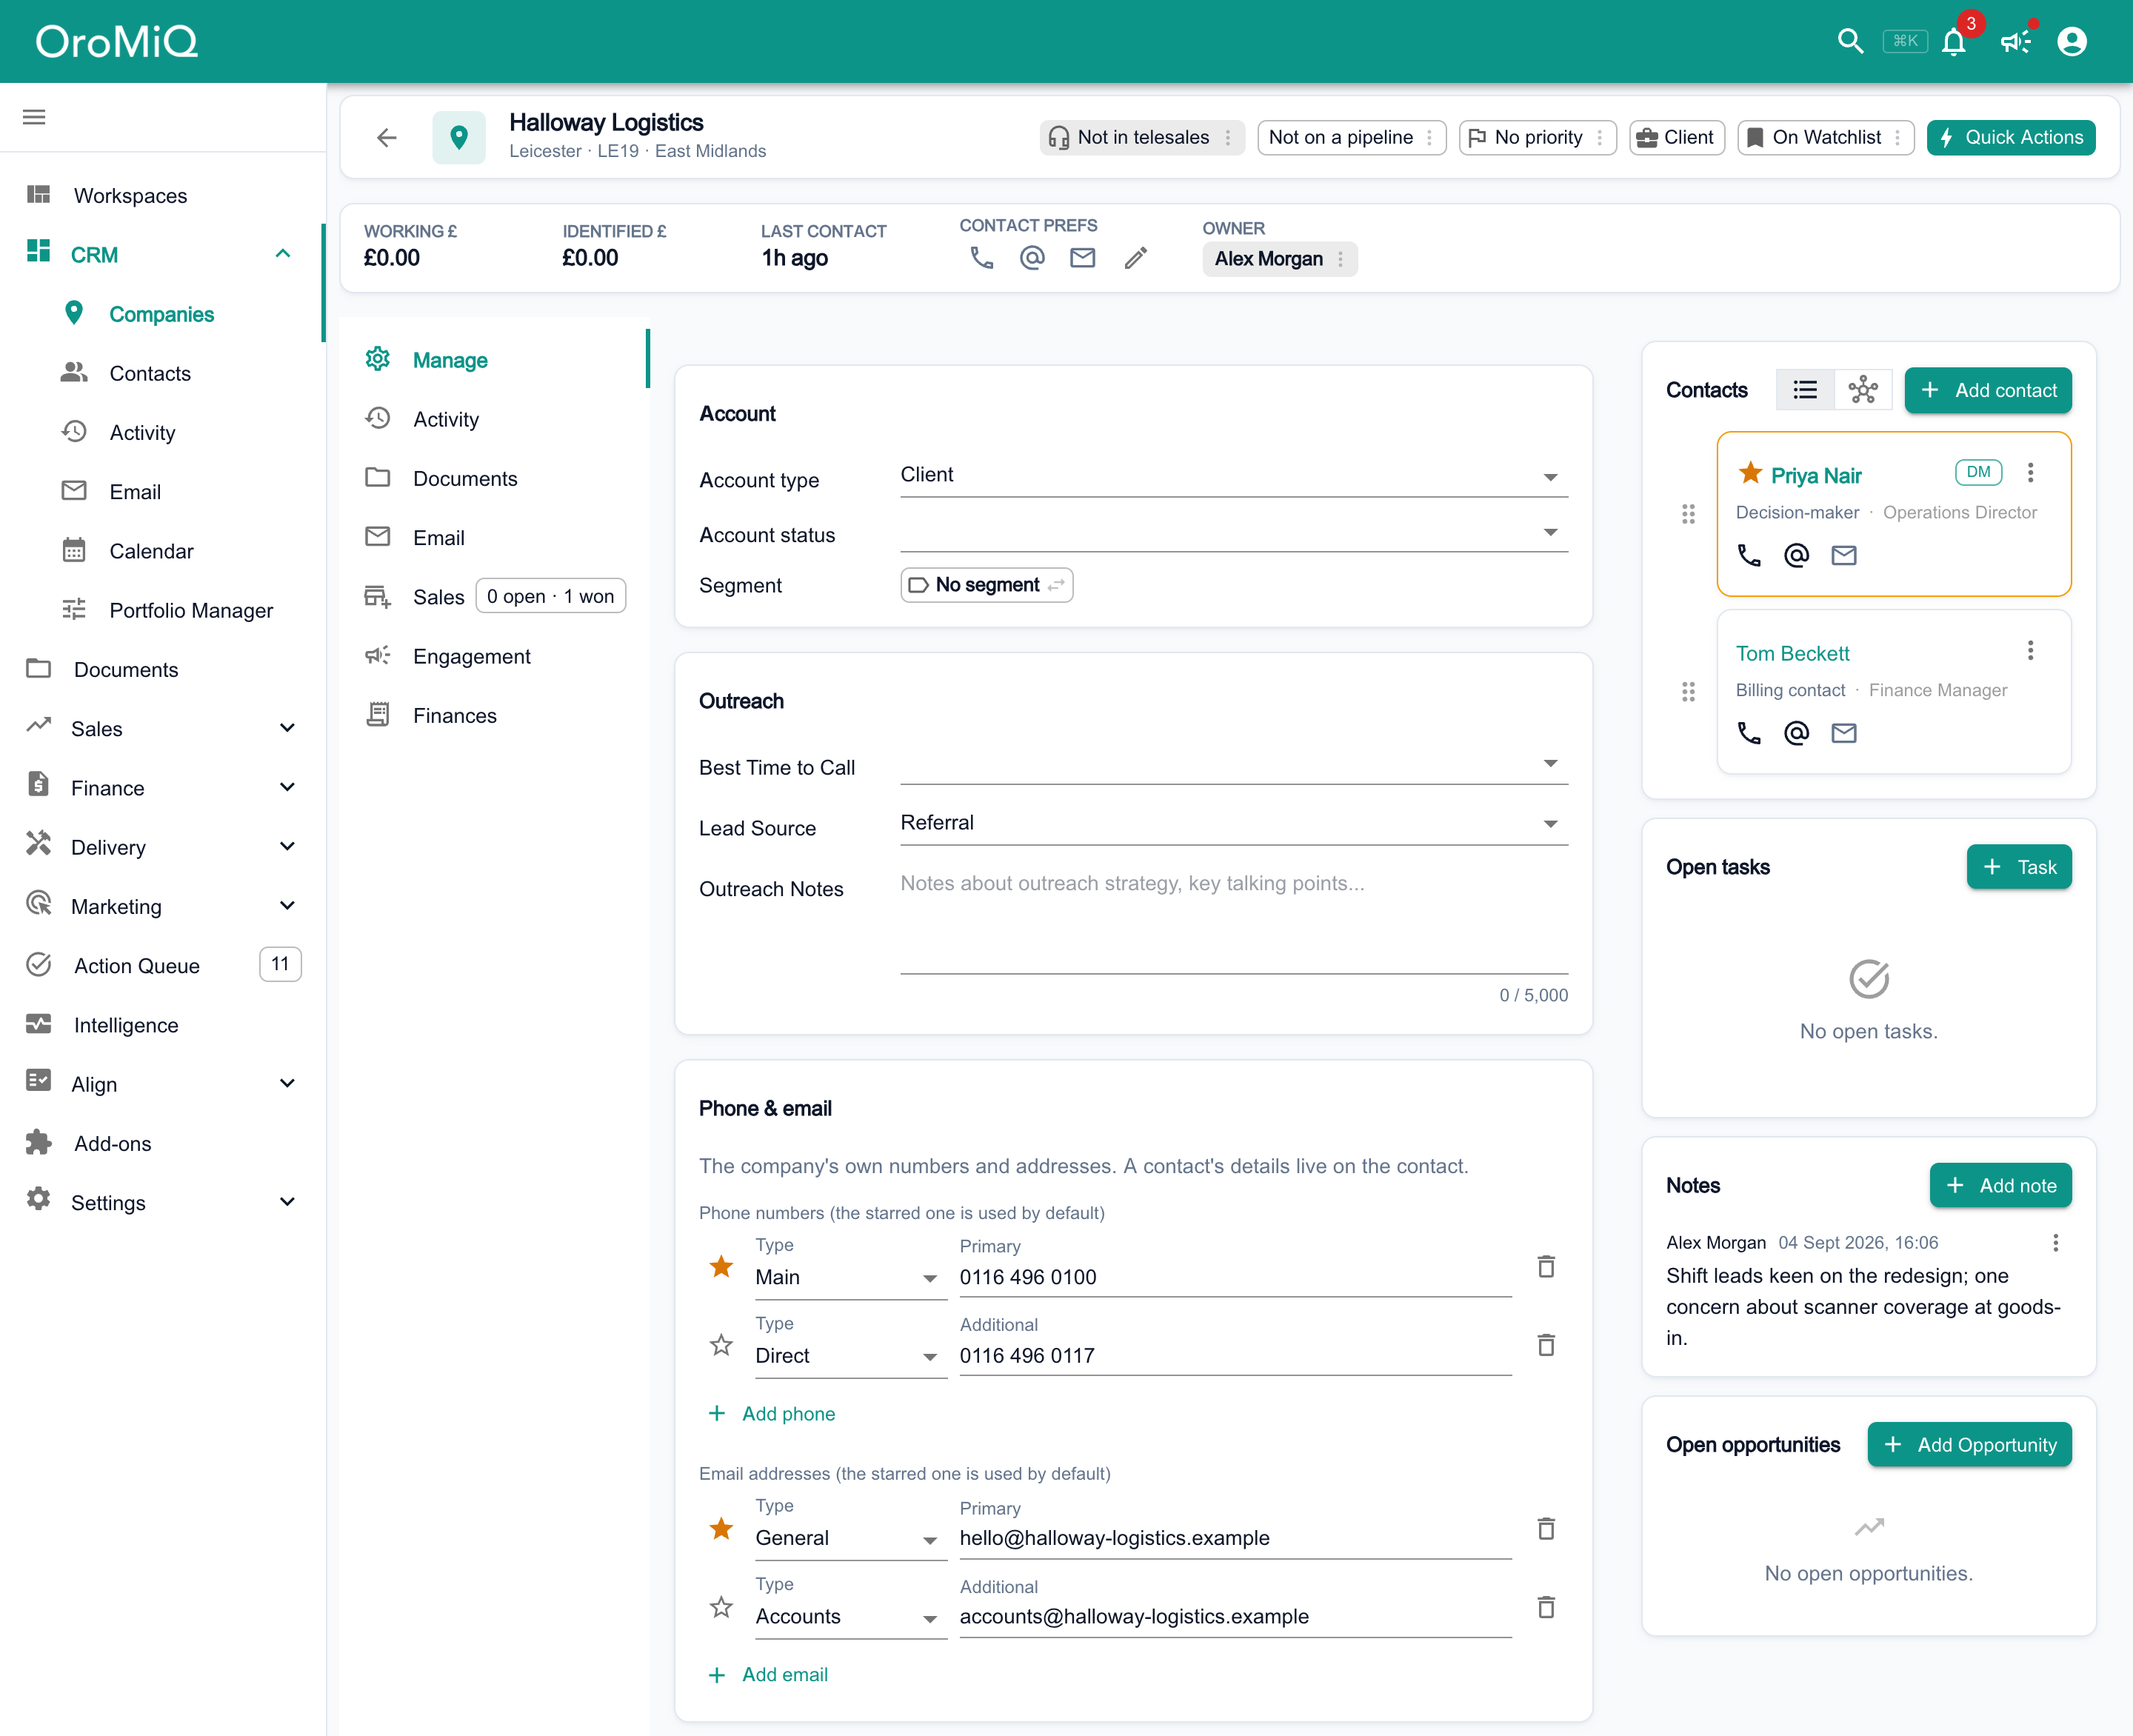
A company has its own phone numbers, email addresses and addresses, separate from its people. Add them under Manage in the record’s left-hand menu, in the Phone & email and Address cards.
A company's record with Manage selected in the left-hand menu of Manage, Activity, Documents, Email, Sales, Engagement and Finances; the Account, Outreach and Phone & email cards in the centre, with the company's own phone numbers and email addresses; and the Contacts, Open tasks, Notes and Open opportunities panels on the right.

Add a named contact

On a company record, find the Contacts panel and click Add contact, then New contact.

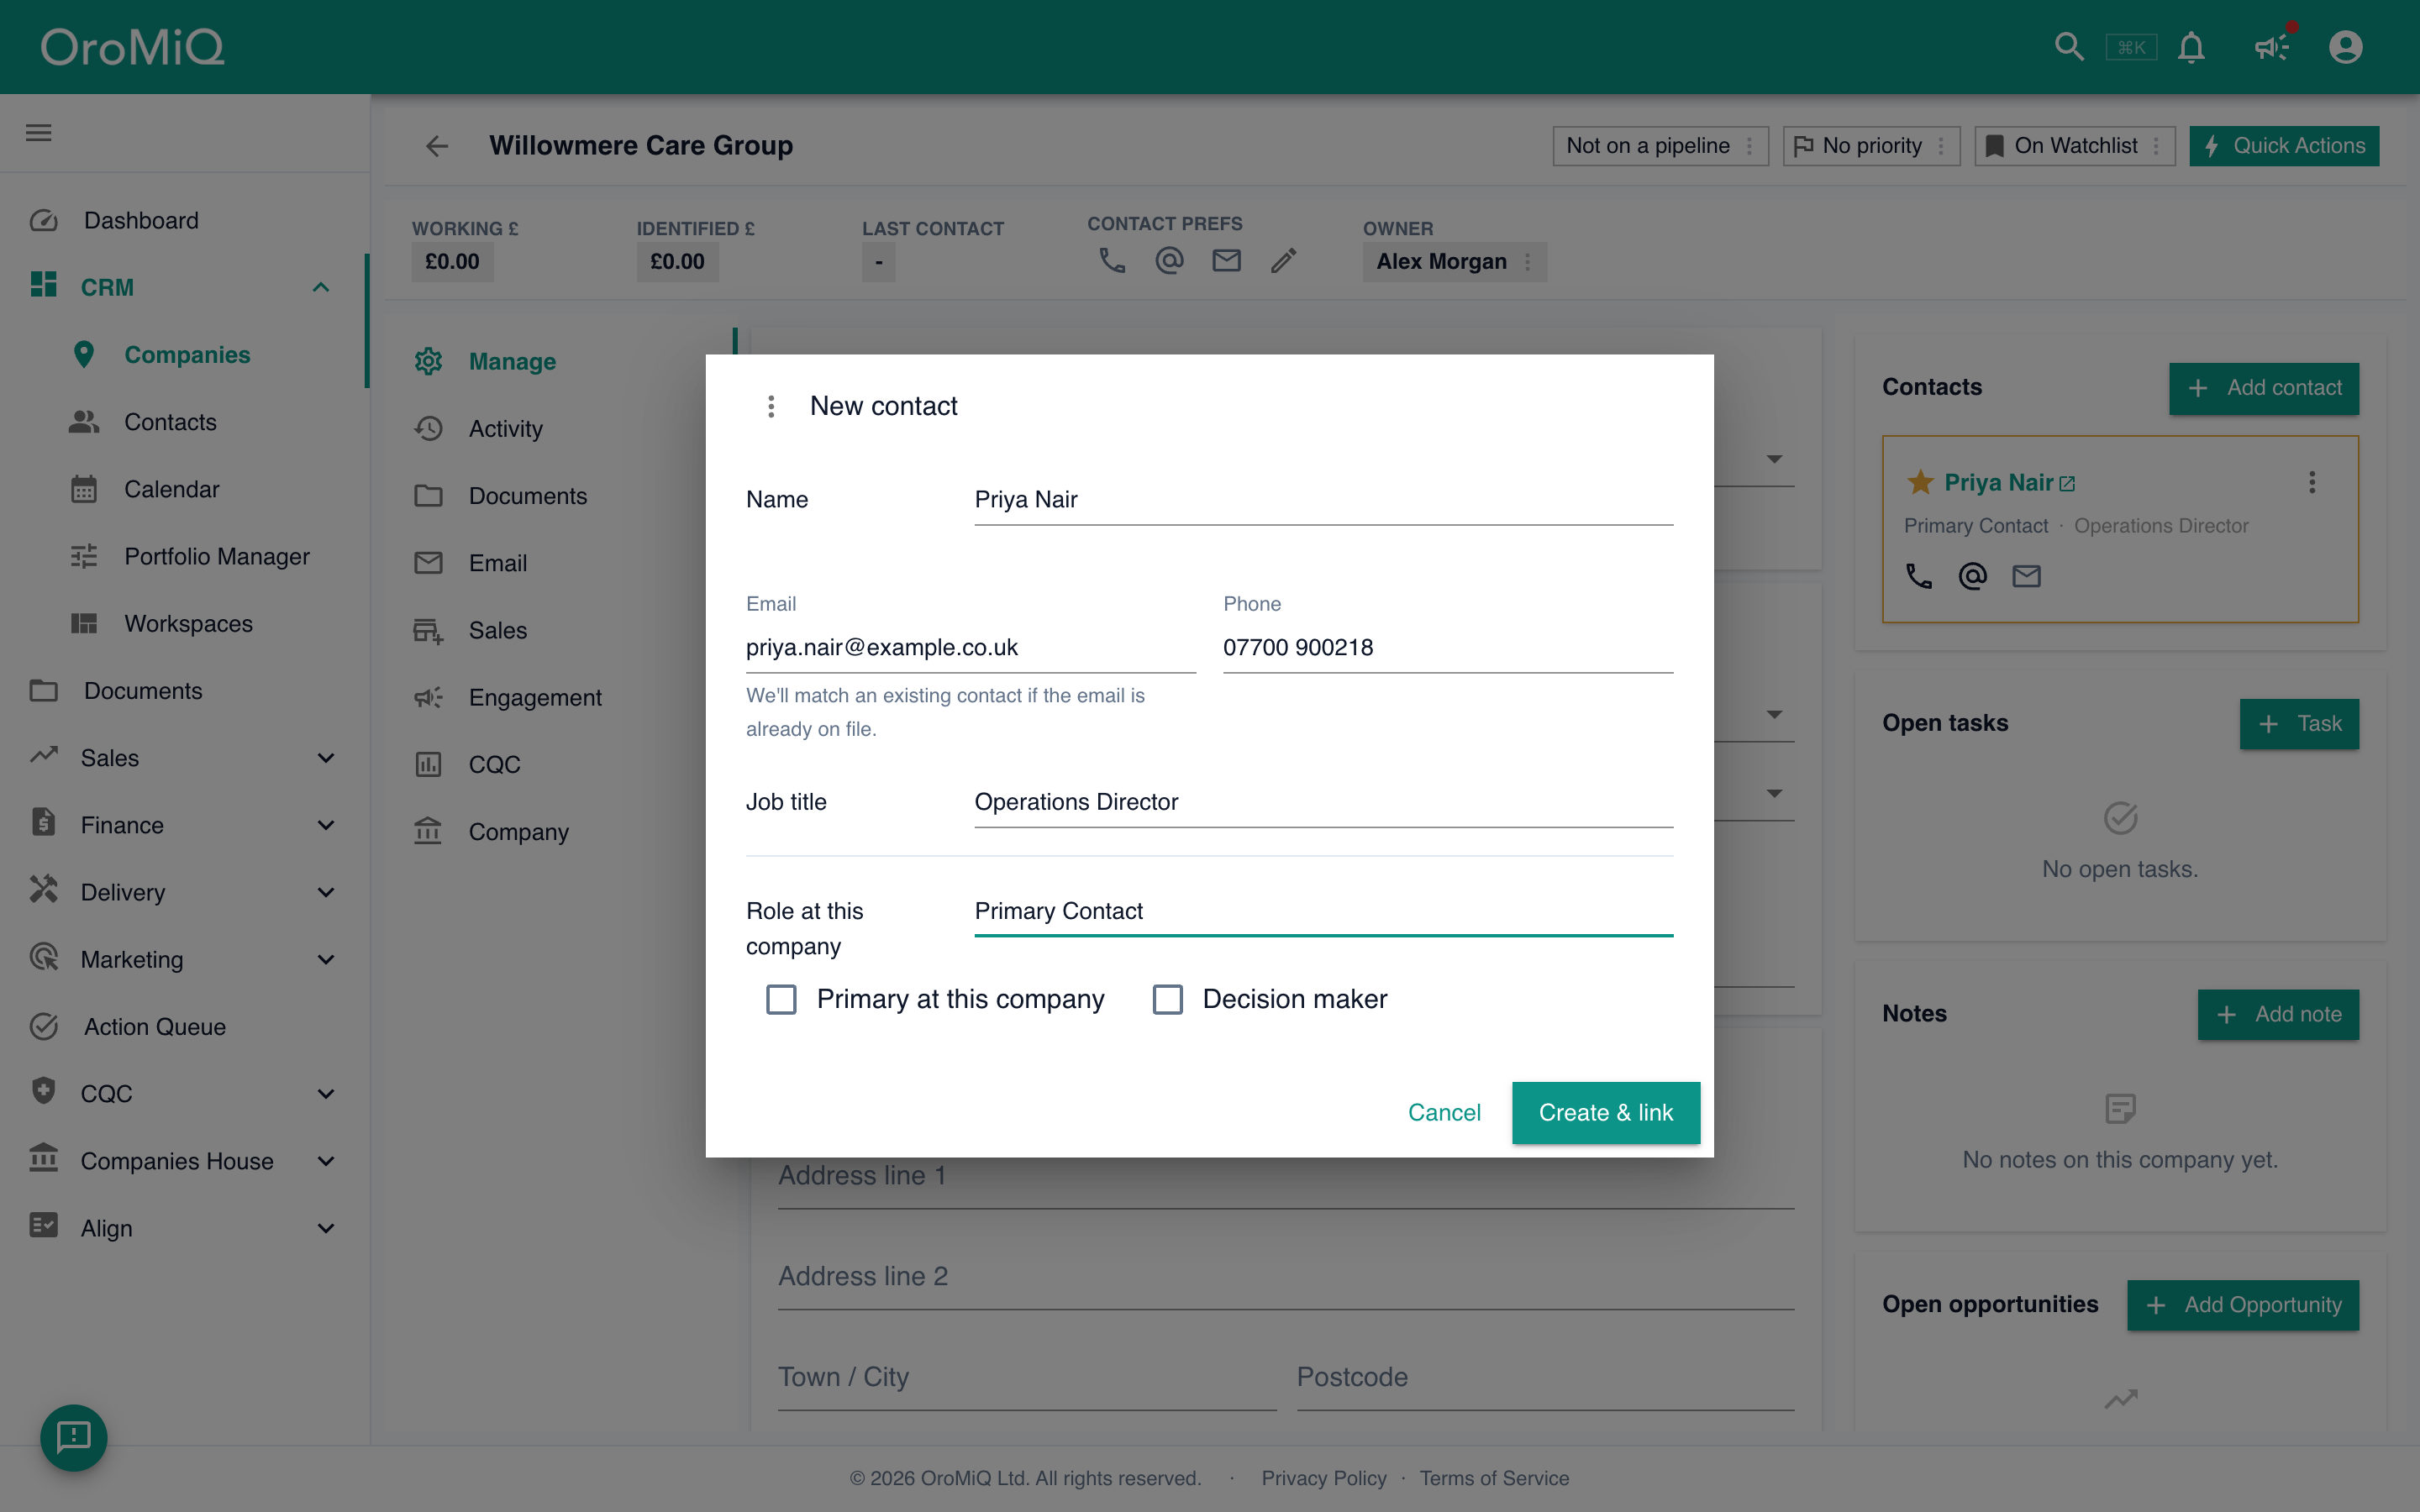
Enter the person’s Name, Email, Phone and Job title, and add an Initial note if you have one. Under Relationship with the company’s name, pick their Role there, and tick Primary contact or Decision maker if that fits. Click Create & link.

If the email matches someone already in OroMiQ, that existing contact is linked instead of creating a duplicate.

Tip
Choose Link existing contact instead when the person already works at another company you track. One contact can be linked to several companies.
The New contact dialog with Name, Email, Phone and Job title filled in, an empty Initial note, a Relationship with section naming the company with its Role filled in and Decision maker ticked, and Cancel and Create & link buttons.

See the contact linked

The contact now appears in the company’s Contacts panel. Click a person to open their record. Add as many people as you need, and drag them to change the order.

Once a company has two or more contacts, use the toggle in the panel to switch between List and Stakeholder map.
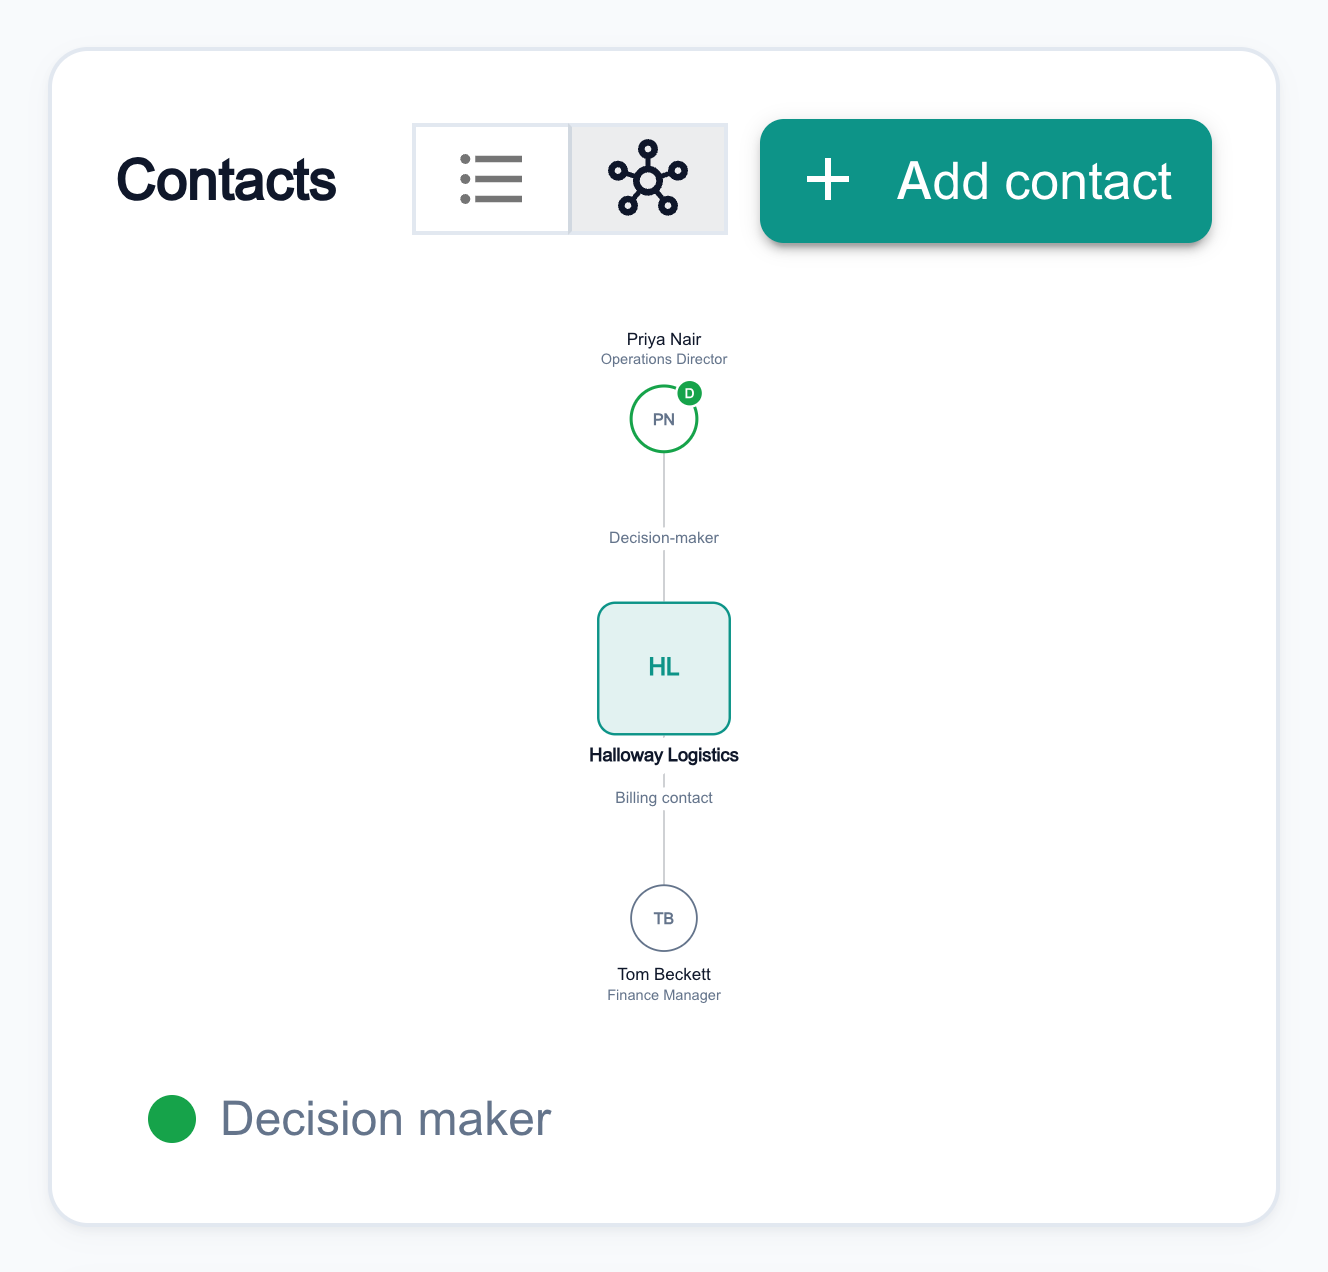
A company's Contacts panel switched to the Stakeholder map, showing the company in the centre linked to its two contacts, each link labelled with the person's role at the company, a Decision maker key, and the List and Stakeholder map toggle beside Add contact.

Find everyone under Contacts

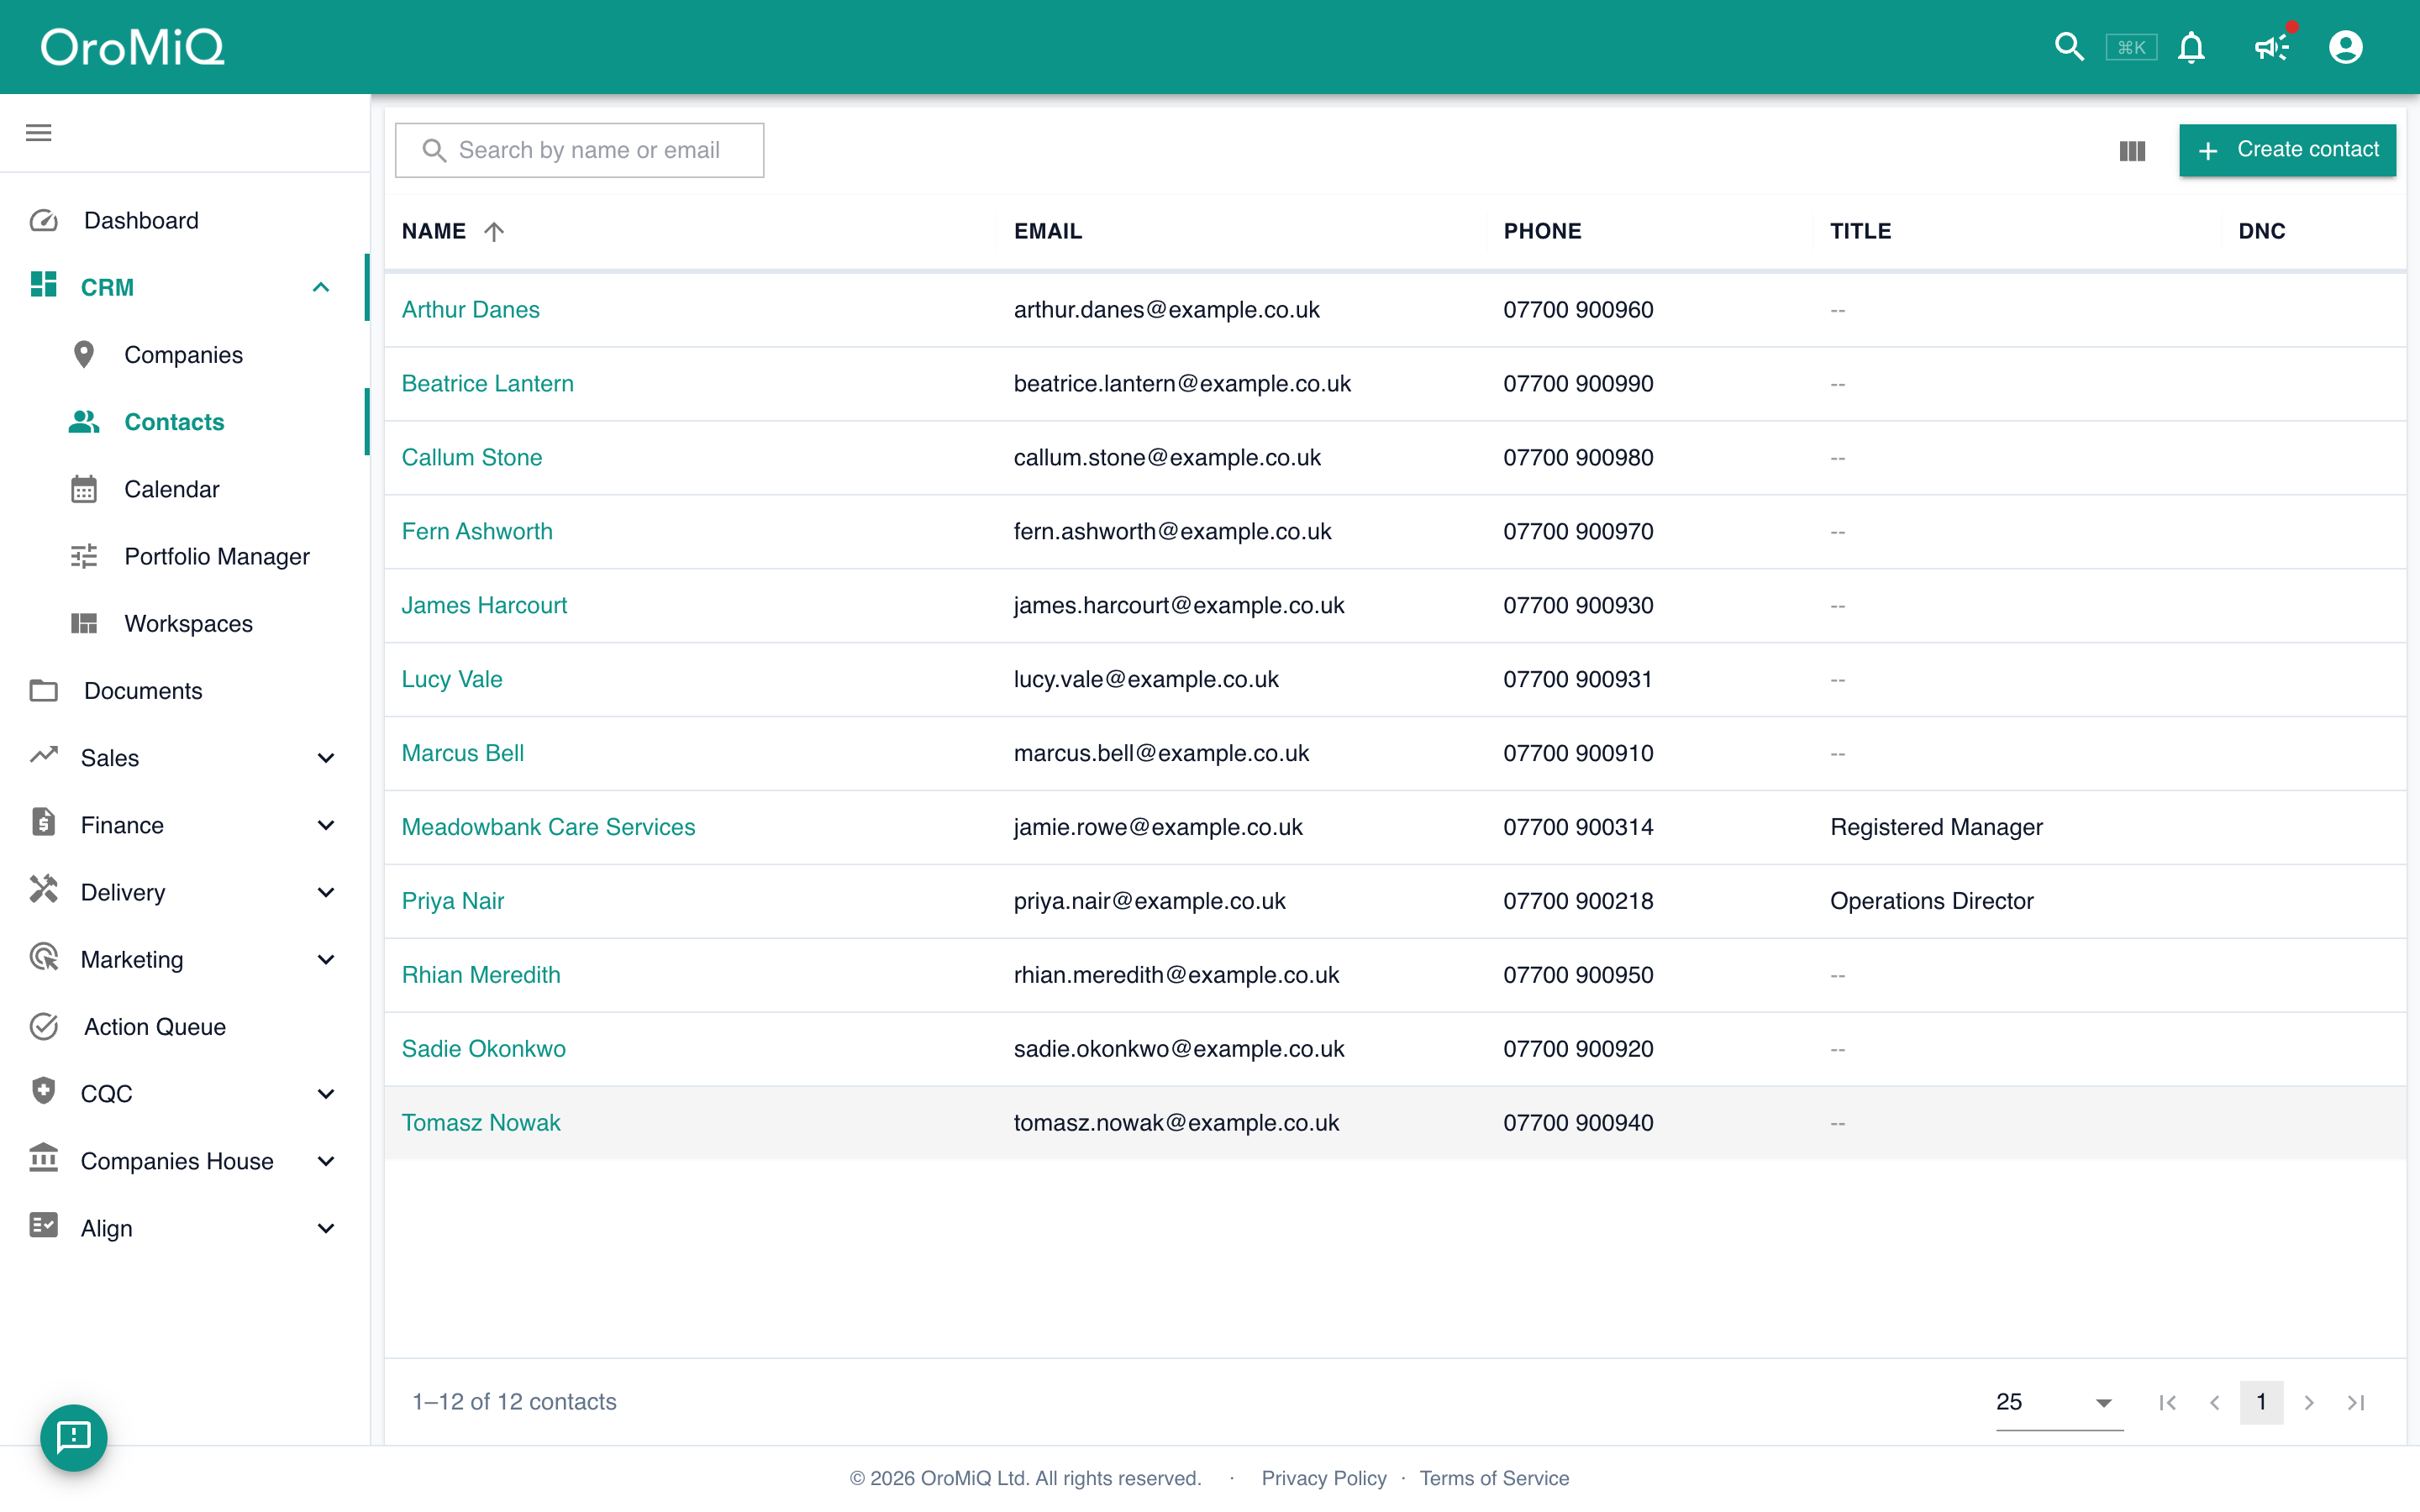
Every person you add lives in one place: open CRM then Contacts to see all your people, wherever they work. Click Create contact to add someone directly.

Tip
On a person’s record you can link them to other people under Related people. If you spot the same person twice, open one, click Quick Actions and choose Merge a duplicate… to combine them.
The Contacts list showing people across all your companies with their email, phone and title, a Search by name or email box and a Create contact button.

Pick up an unrouted enquiry (optional)

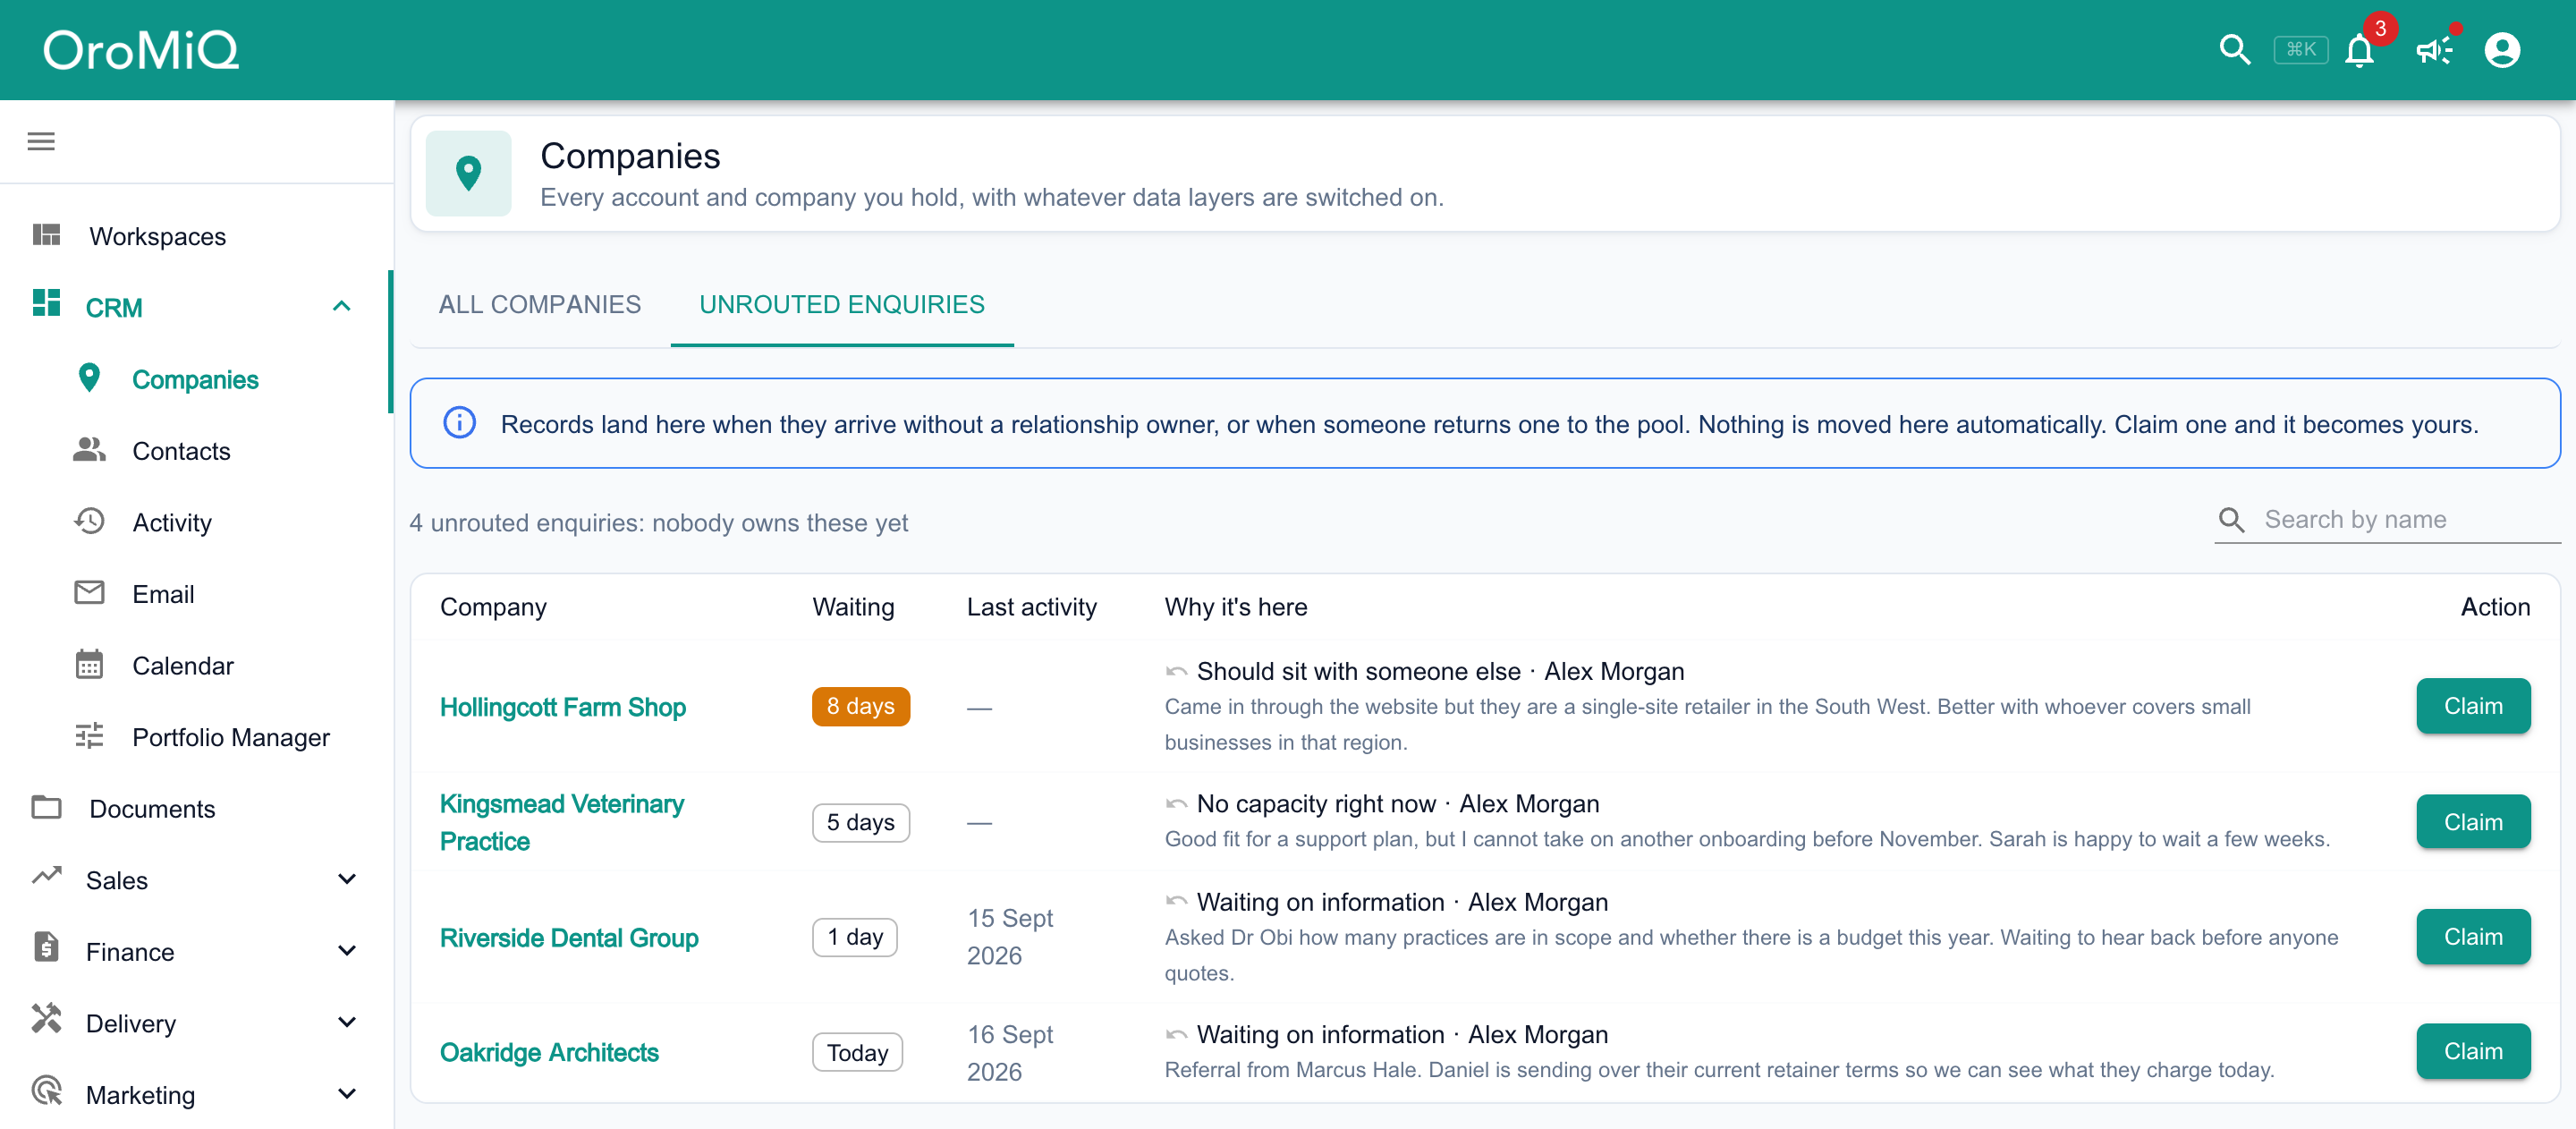
A company lands on the Unrouted enquiries tab when it arrives without a relationship owner, or when a colleague hands it back. Nothing is moved there automatically.

Each row shows how long it has been Waiting, its Last activity, and Why it’s here: the reason, who returned it and their note. Click Claim to make it yours. It leaves the list and you become its owner.

Tip
To hand back a company you own, open its record, open the Owner menu and choose Return to pool. Pick a Reason and add a note, so whoever claims it next knows where things stand.
The Unrouted enquiries tab of Companies listing four companies nobody owns yet, each with how many days it has been waiting, its last activity, why it is here with the reason, who returned it and their note, and a Claim button.