Getting started
Managed onboarding
Before you start
The invitation email from OroMiQ. It goes to the email address you gave your OroMiQ contact.
A way to confirm it is you each time you sign in: a passkey (your computer’s fingerprint, face or screen lock, your phone or a security key), or an authenticator app on your phone such as Google Authenticator, Microsoft Authenticator or Authy.
Somewhere safe to keep ten recovery codes, such as a password manager.
Open your invitation email
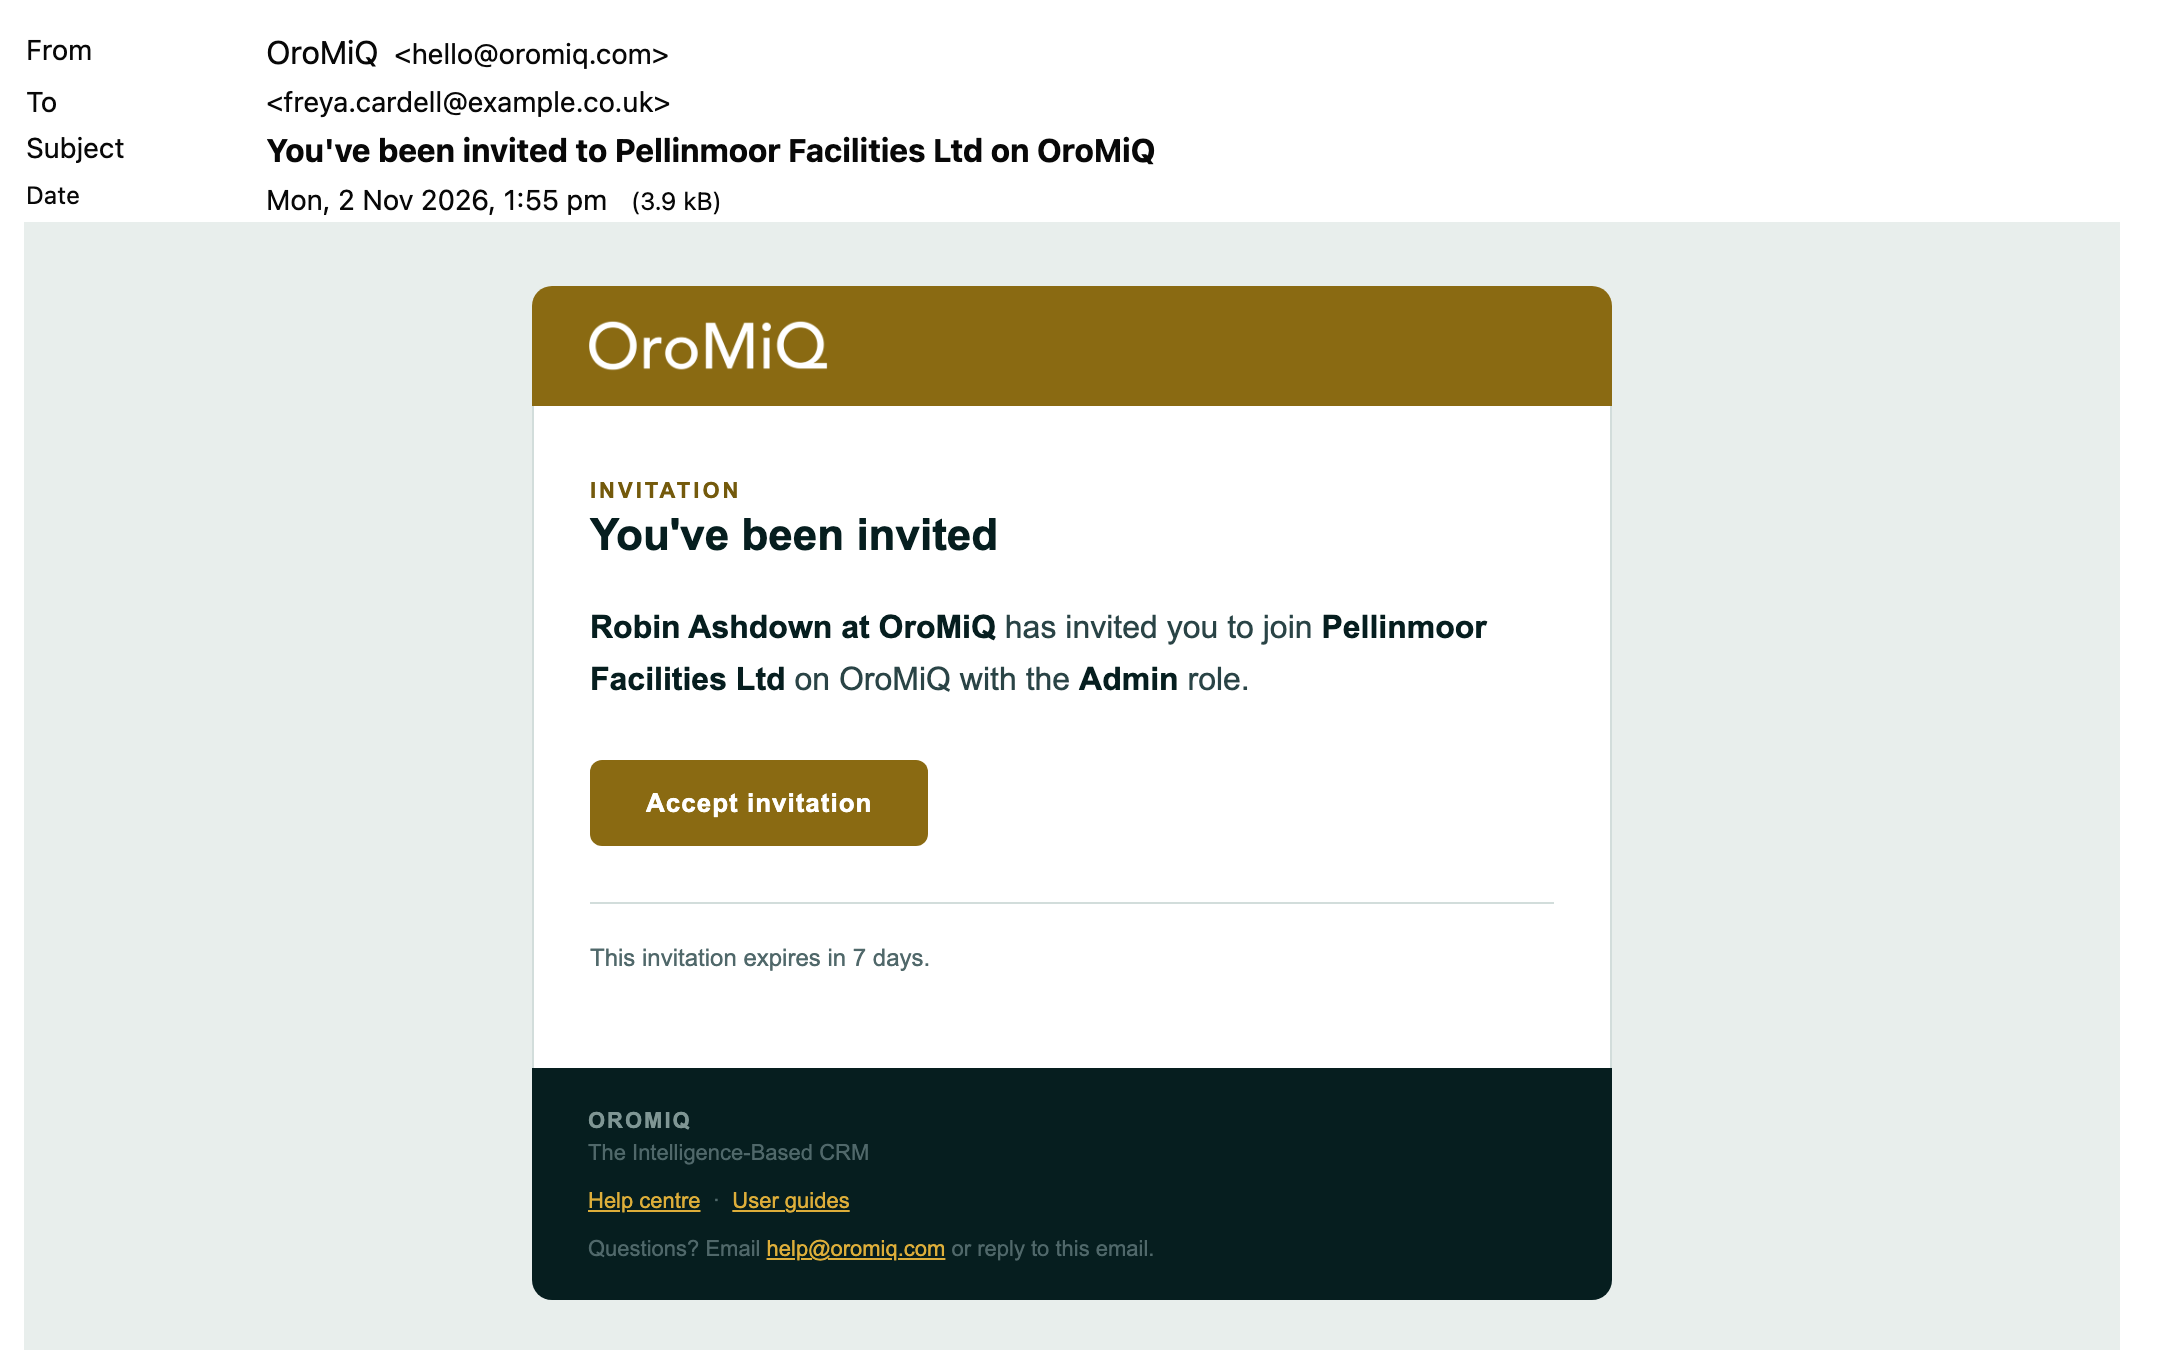
Look for an email from OroMiQ (hello@oromiq.com) with the subject You’ve been invited to followed by your workspace’s name. It comes from the person at OroMiQ who set up your workspace, and invites you to join it with the Admin role. Click Accept invitation.
Note
Create your account
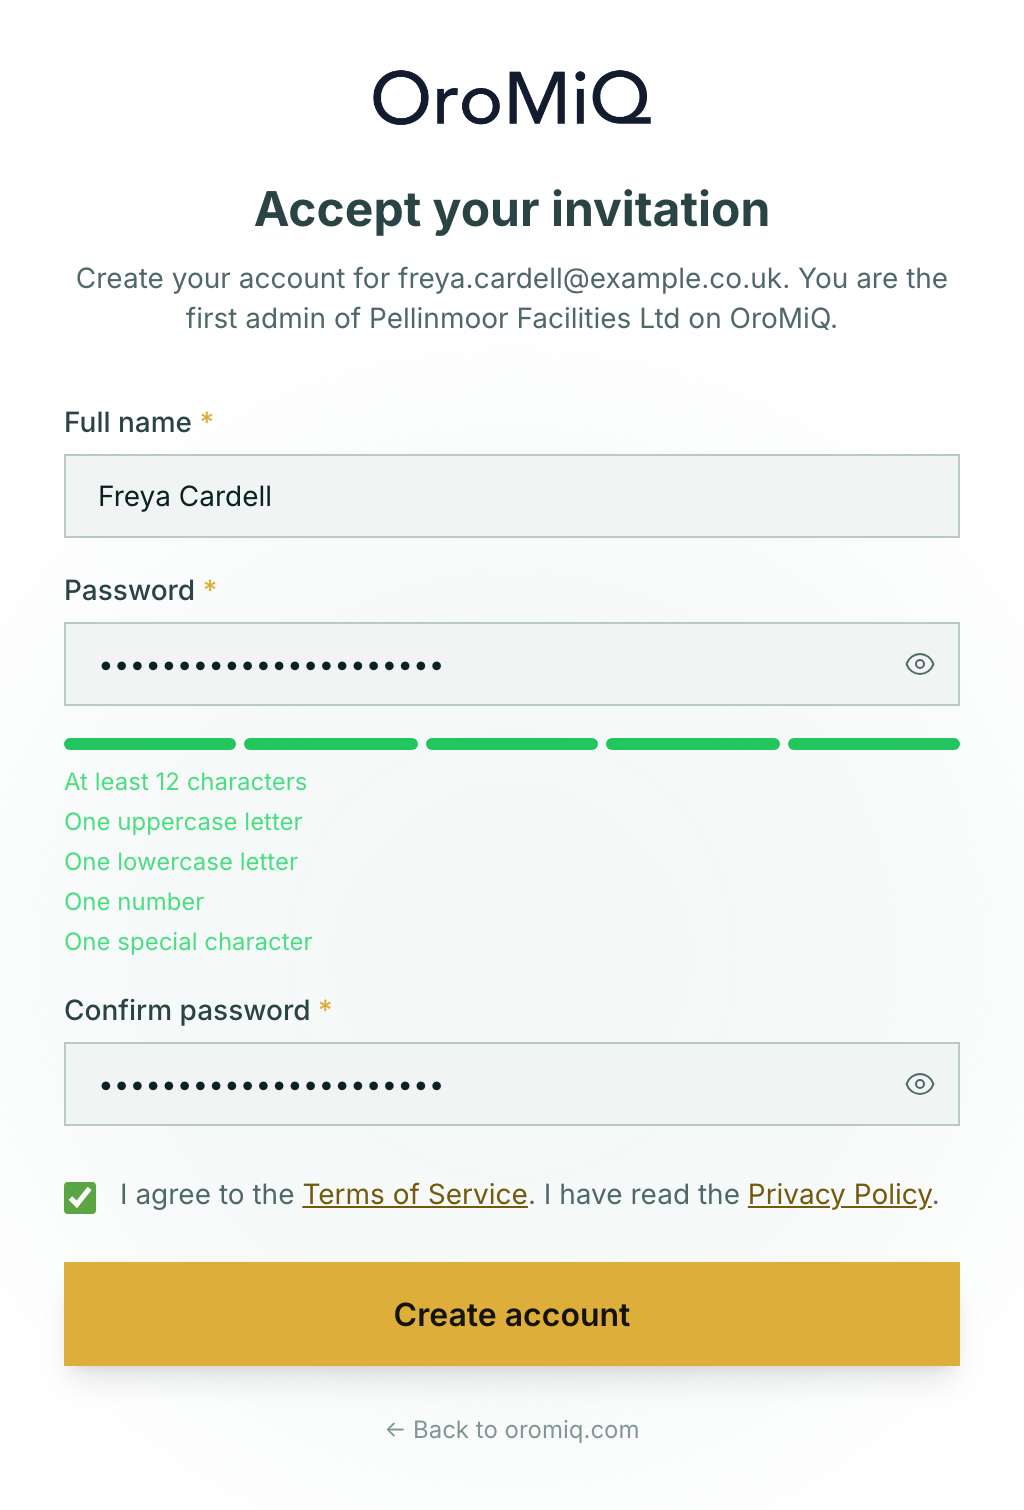
The link opens Accept your invitation on oromiq.com. It shows your email address and tells you that you are the first admin of your workspace. Enter your Full name, choose a Password and type it again in Confirm password.
Your password needs at least 12 characters, with an uppercase letter, a lowercase letter, a number and a special character. Each rule turns green once you meet it.
Tick I agree to the Terms of Service. I have read the Privacy Policy. and click Create account.
Go to sign in
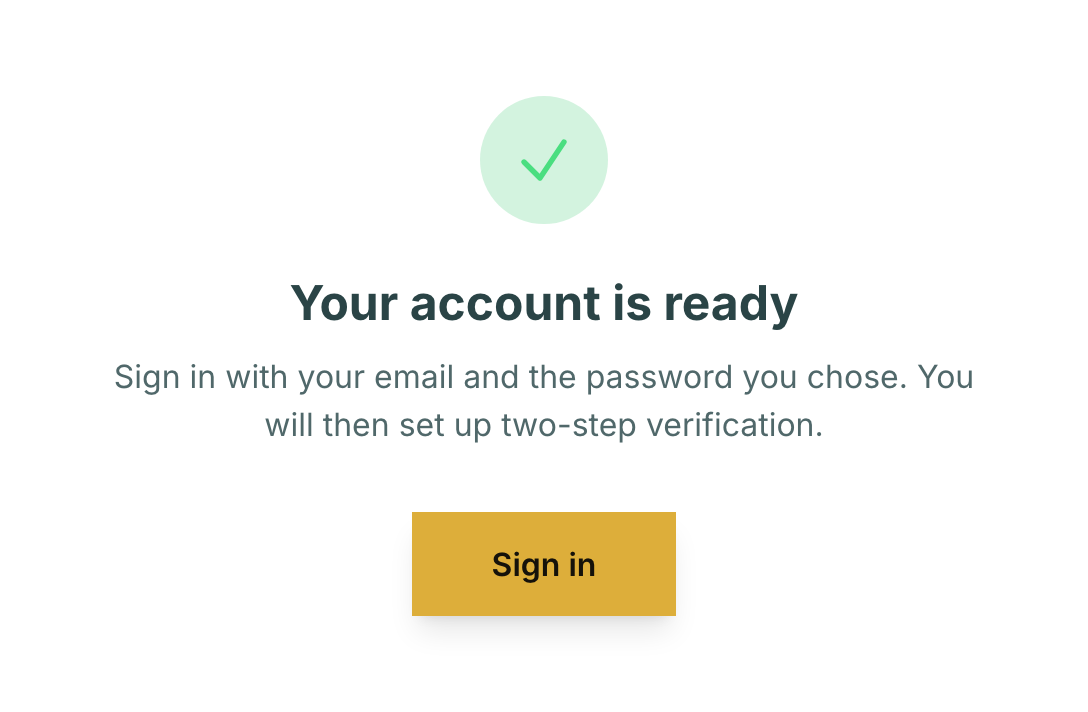
Your account is ready appears. Click Sign in.
Sign in with your new password
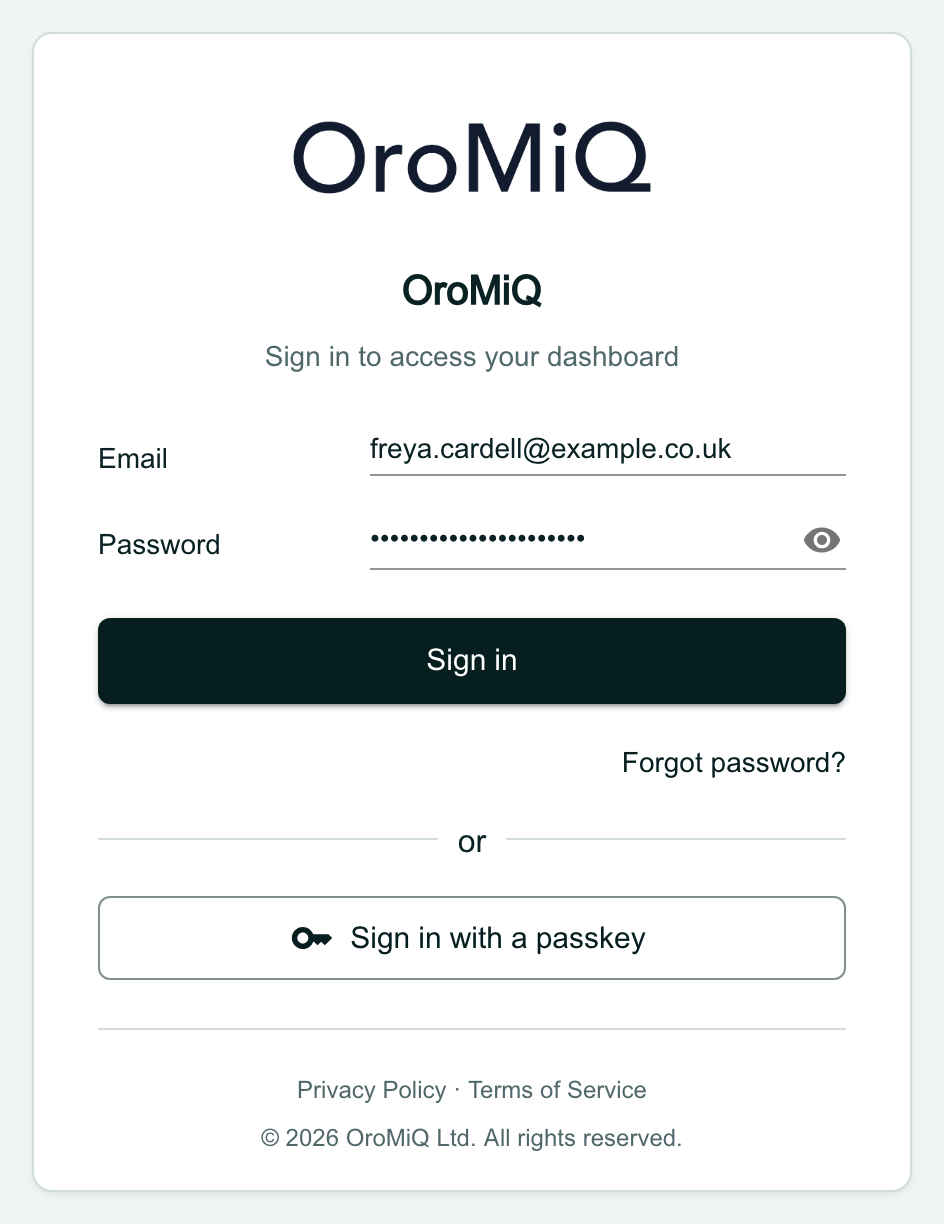
On the OroMiQ sign-in page, enter your Email and the password you have just chosen, then click Sign in.
Tip
Choose how to confirm it is you
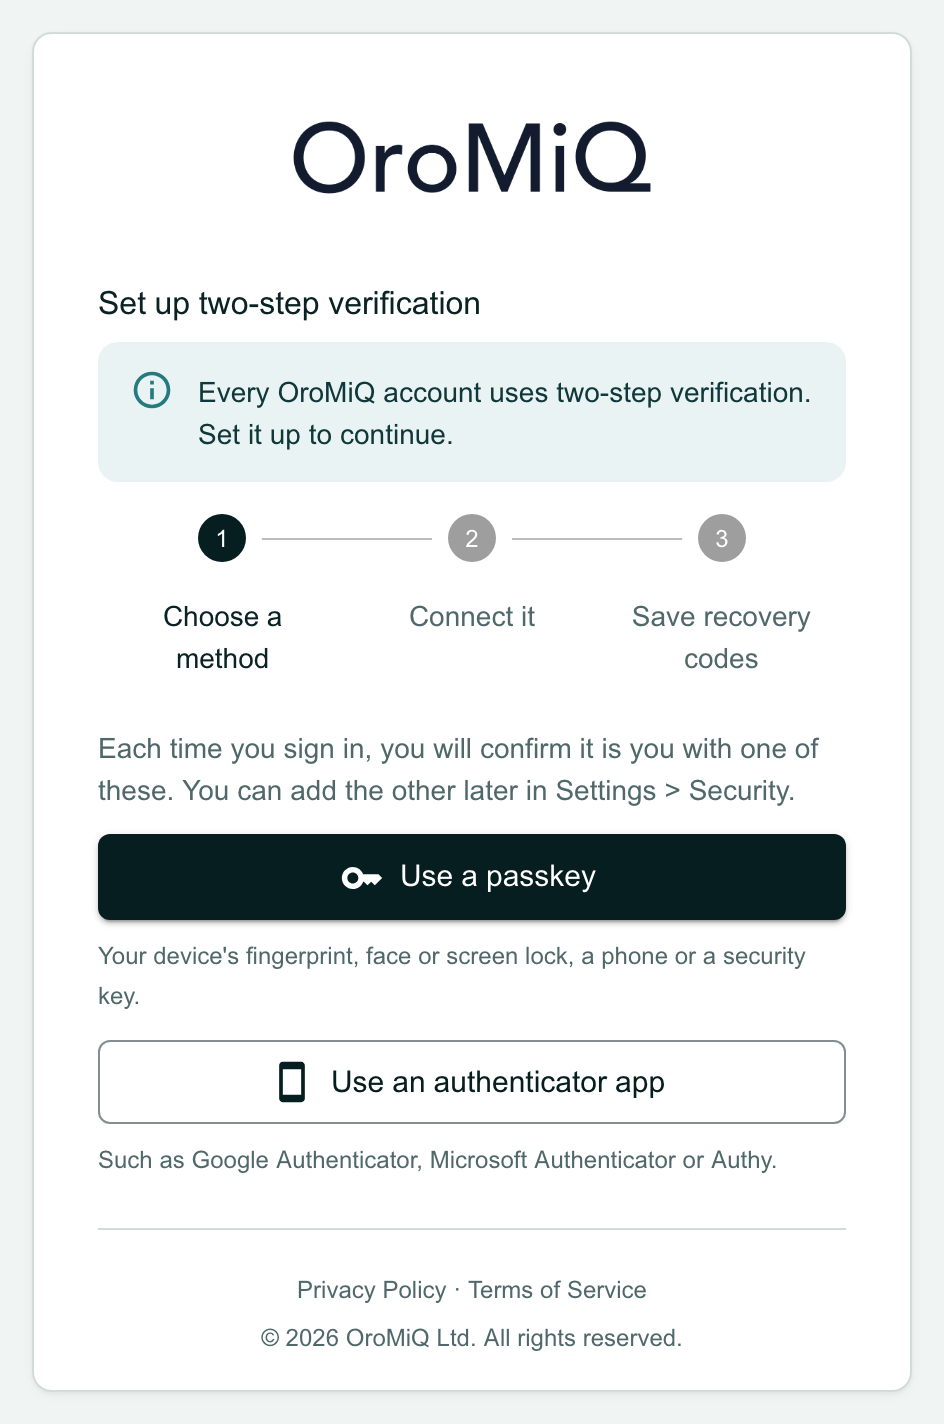
The first time you sign in, OroMiQ asks you to set up two-step verification, so that a password alone can never open your account. Each time you sign in after this, you confirm it is you with one of two methods:
- Use a passkey: your device’s fingerprint, face or screen lock, a phone or a security key. Click it and follow your browser’s prompts. This button appears when your browser supports passkeys.
- Use an authenticator app: a 6-digit code from an app on your phone, such as Google Authenticator, Microsoft Authenticator or Authy.
Choose one now. You can add the other later in Settings > Security. The next step shows the authenticator app; with a passkey you go straight on to your recovery codes in step 7.
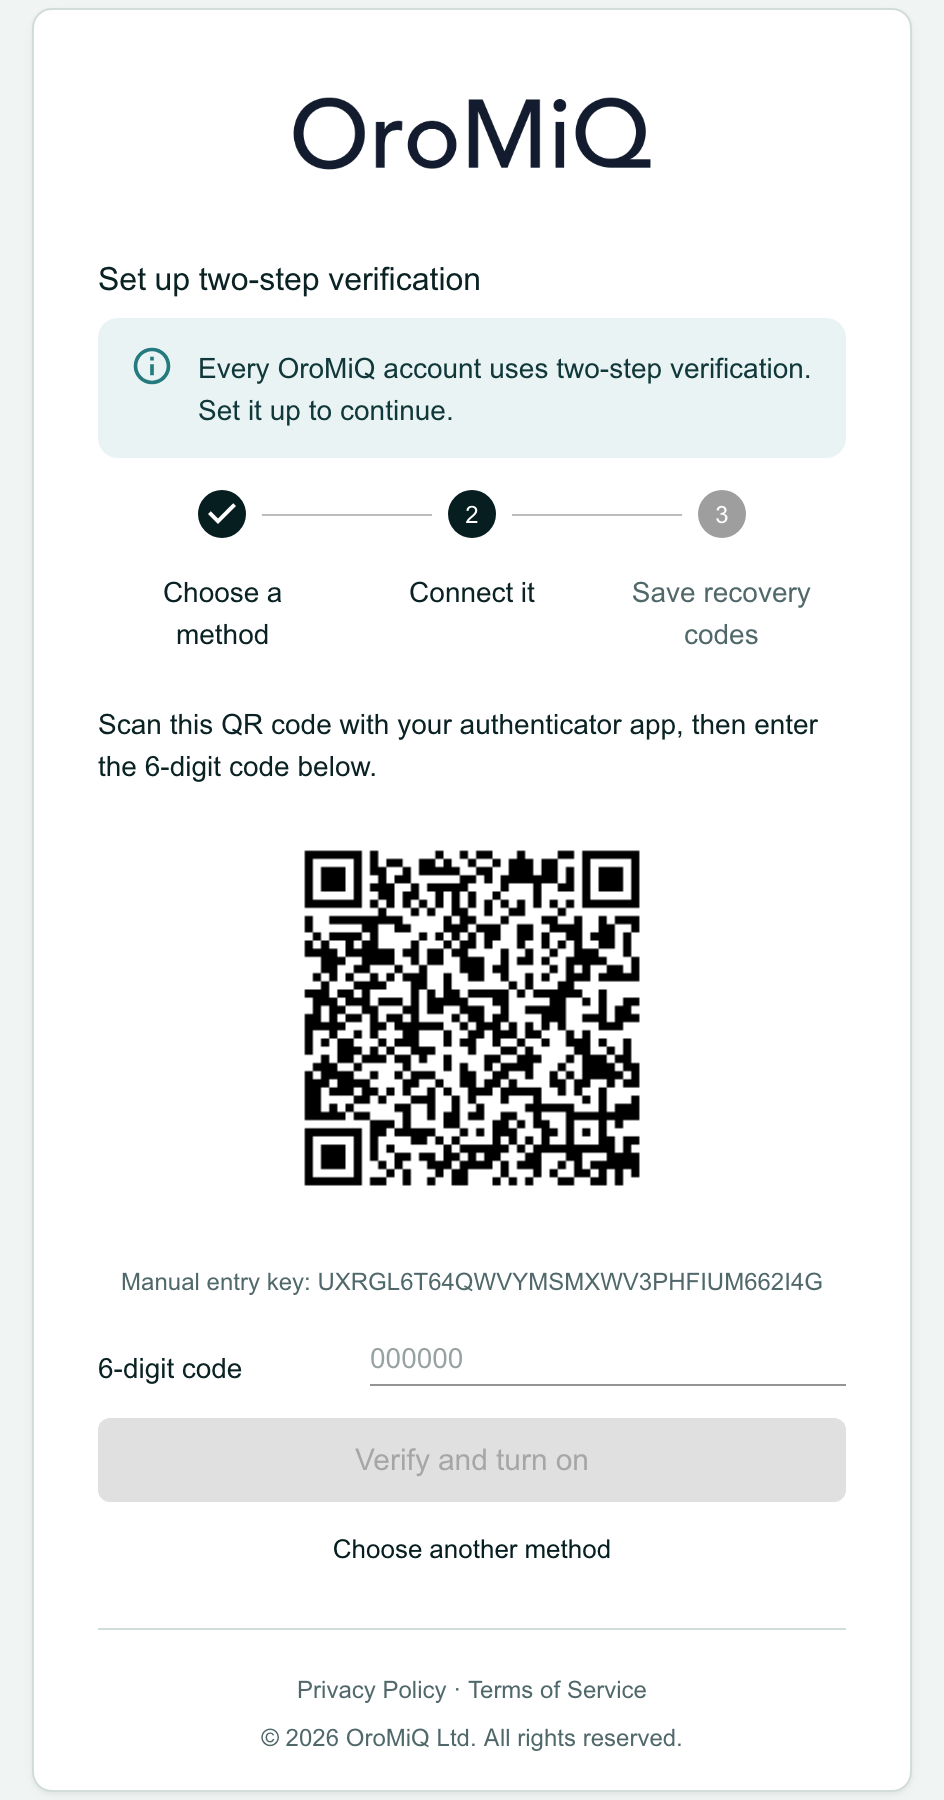
Scan the QR code and enter the code
In your authenticator app, add a new account and scan the QR code on screen. If you cannot scan it, type the Manual entry key into the app instead.
The app shows a 6-digit code. Type it into 6-digit code and click Verify and turn on. To go back and use a passkey instead, click Choose another method.
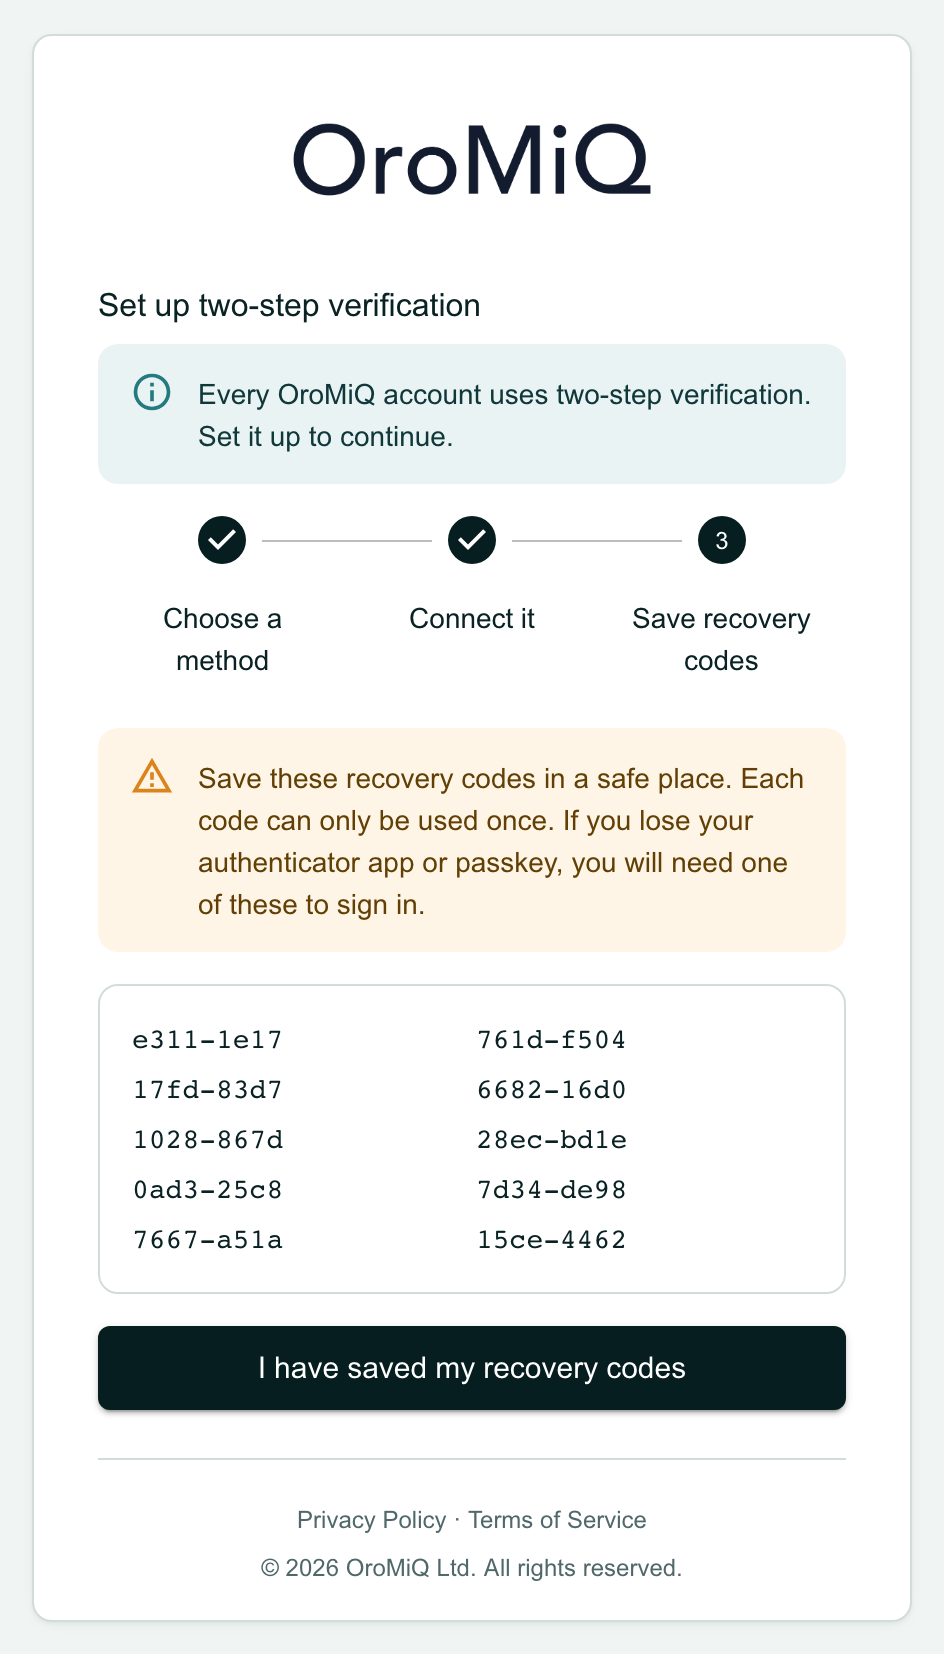
Save your recovery codes
OroMiQ shows ten recovery codes. Each one works once, and you need one to sign in if you ever lose your authenticator app or passkey. Save them in your password manager, or print them and keep them somewhere safe, then click I have saved my recovery codes.
Note
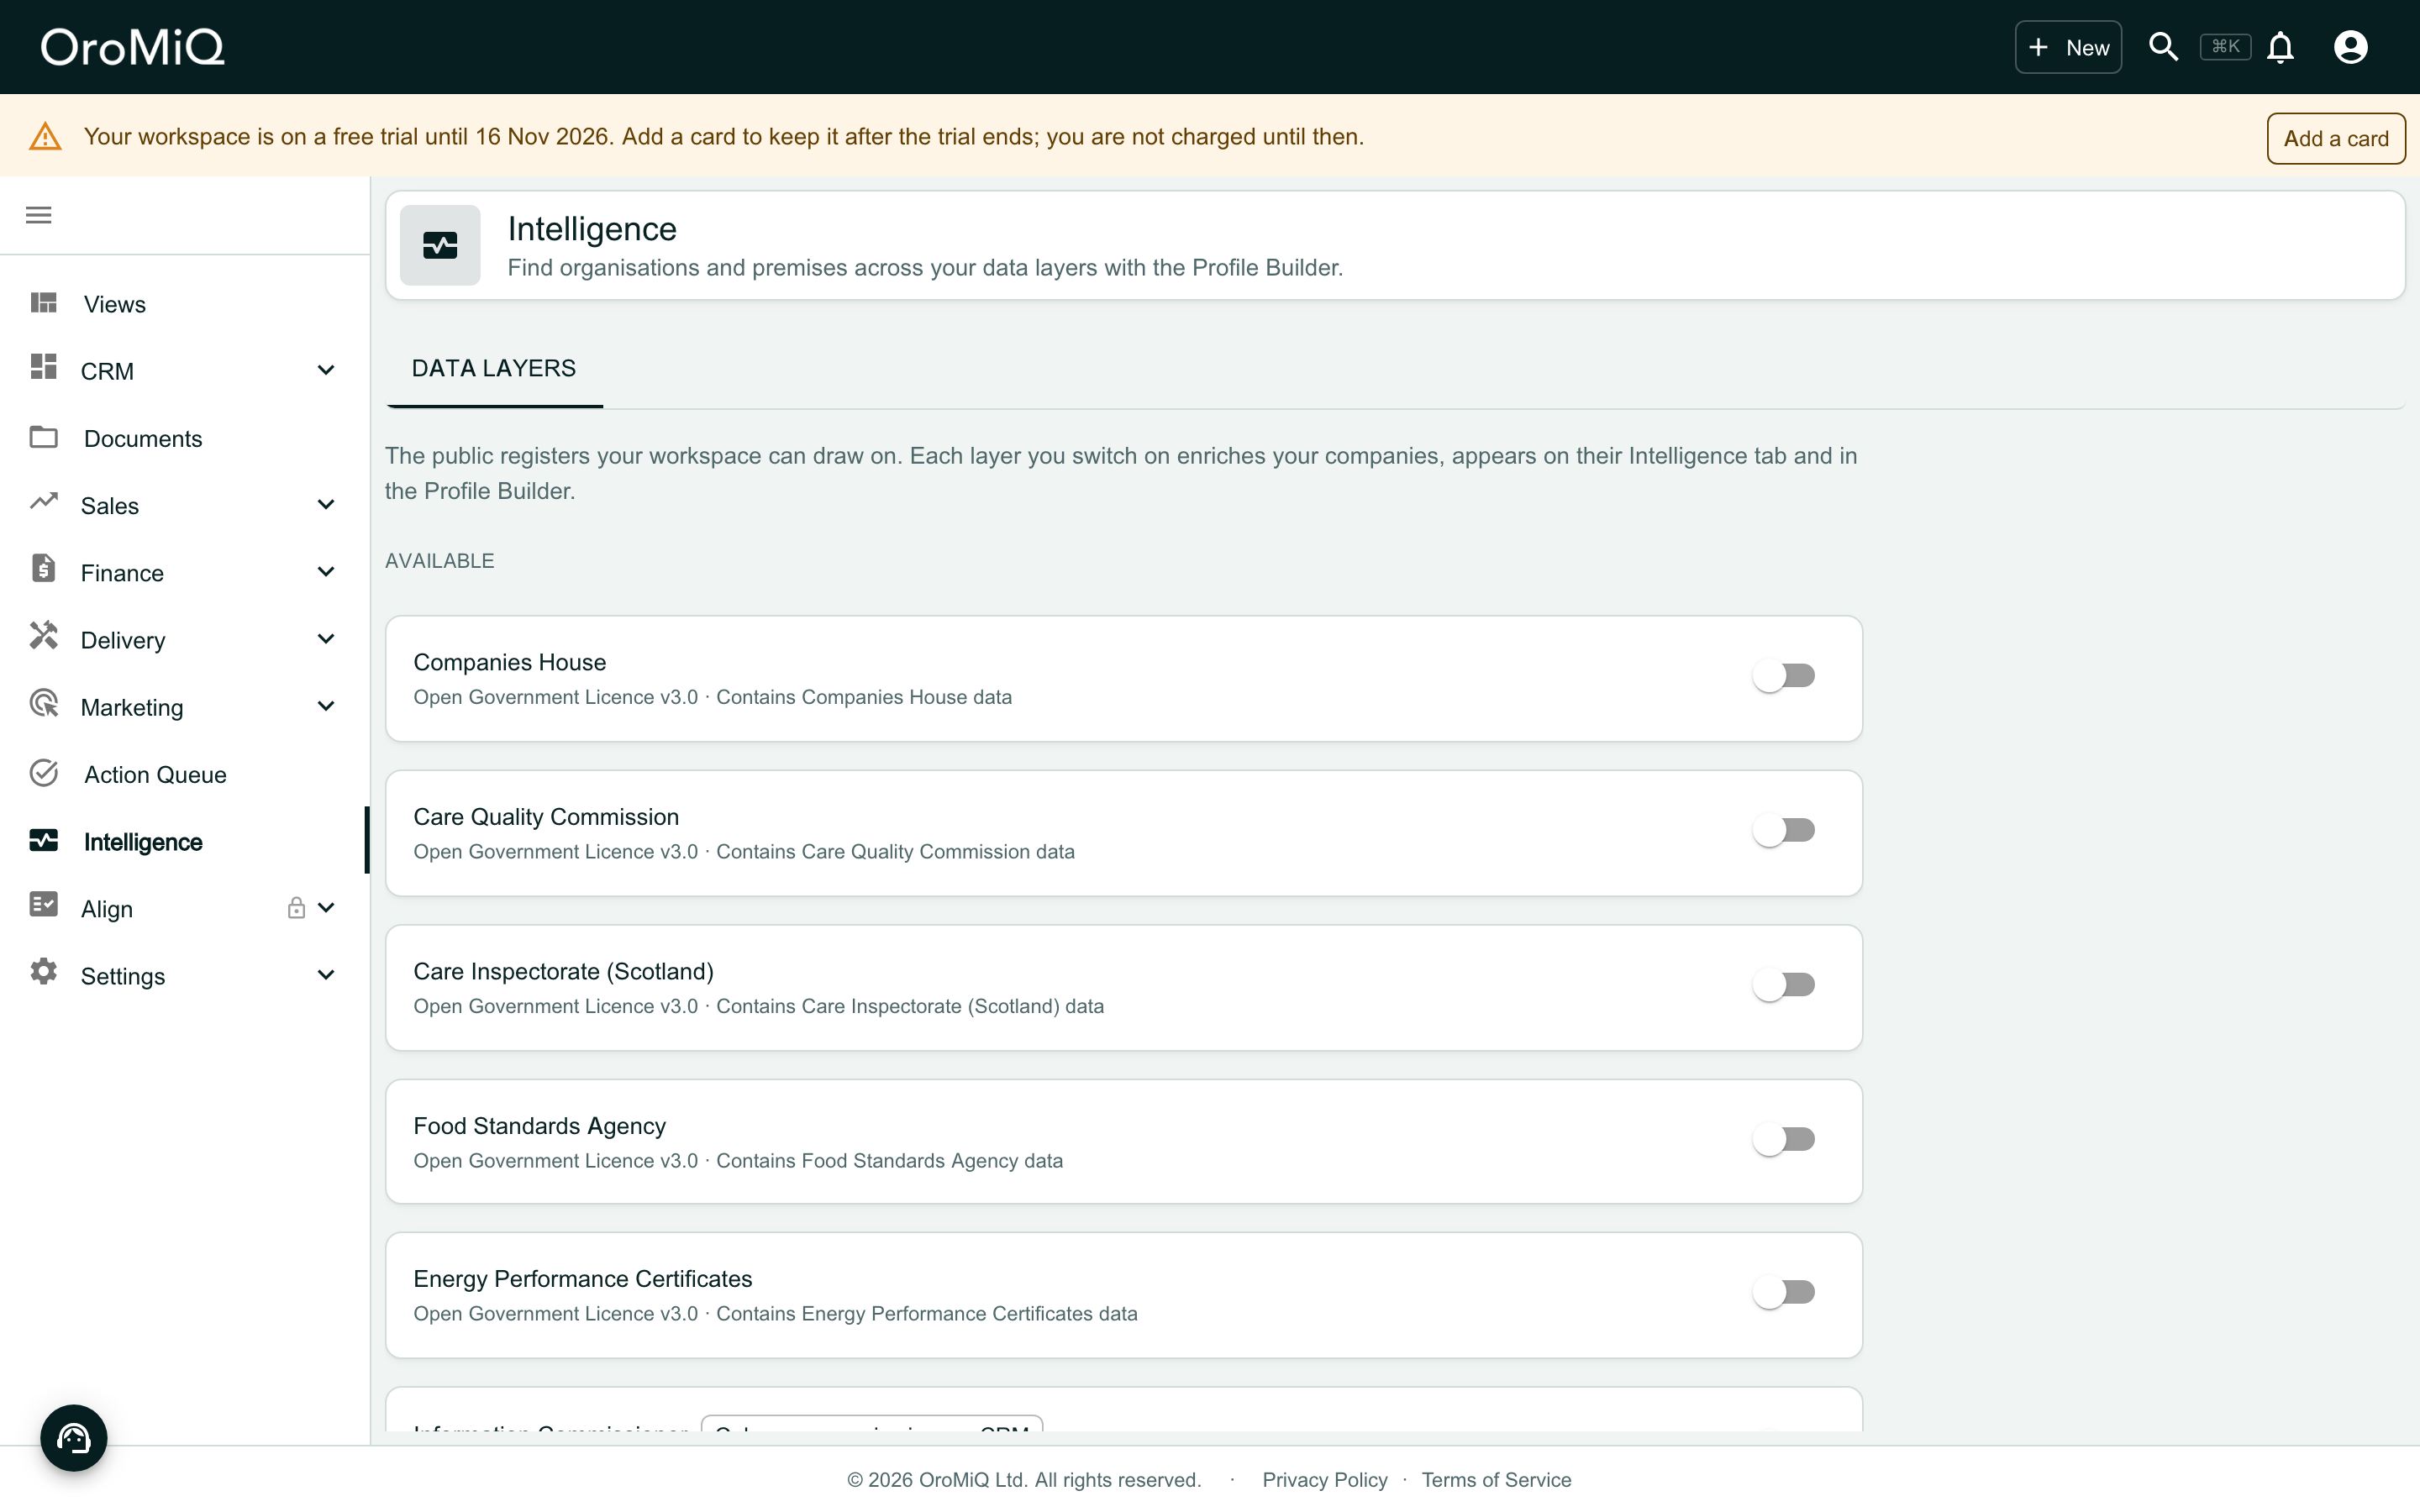
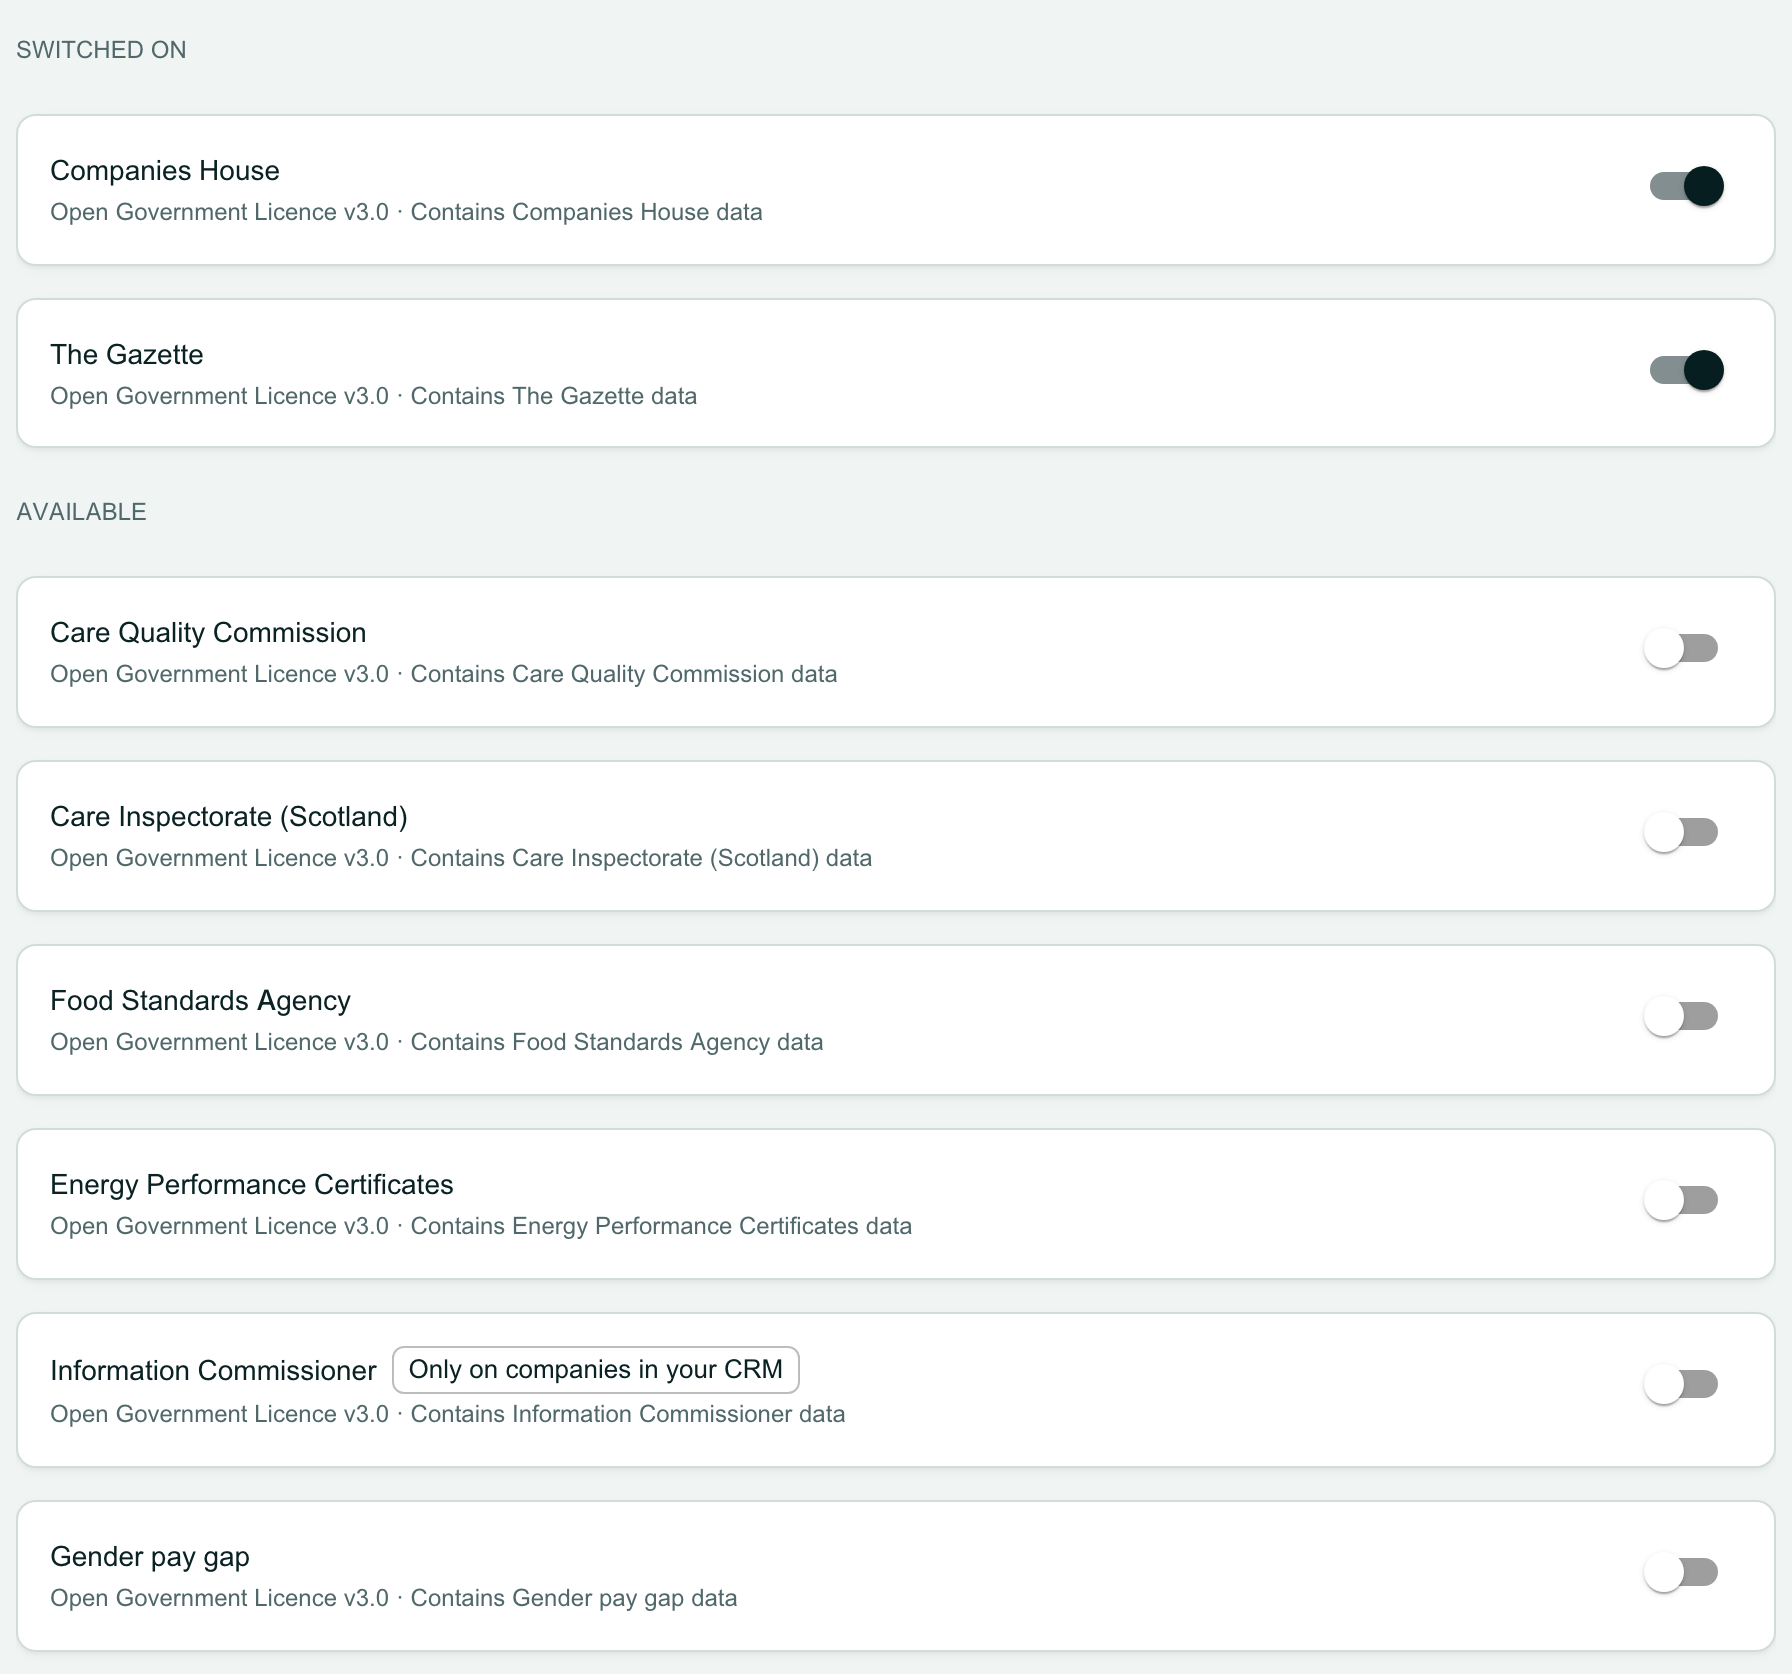
Open Data layers
In the sidebar, click Intelligence, then the Data layers tab. It lists the public registers your workspace can draw on, such as Companies House and The Gazette.
Each layer you switch on enriches your companies with that register’s public data, shown on each company’s Intelligence tab, so you can decide who to contact, when and why with better information.
Switch on the layers you need
Turn on the switch beside each layer you want. Choose the ones your OroMiQ contact suggested, or the ones that matter in your market: for example, Companies House if you sell to UK registered companies. The layer moves under Switched on. You can switch a layer off again at any time.
Note
Choose how long OroMiQ support may come in
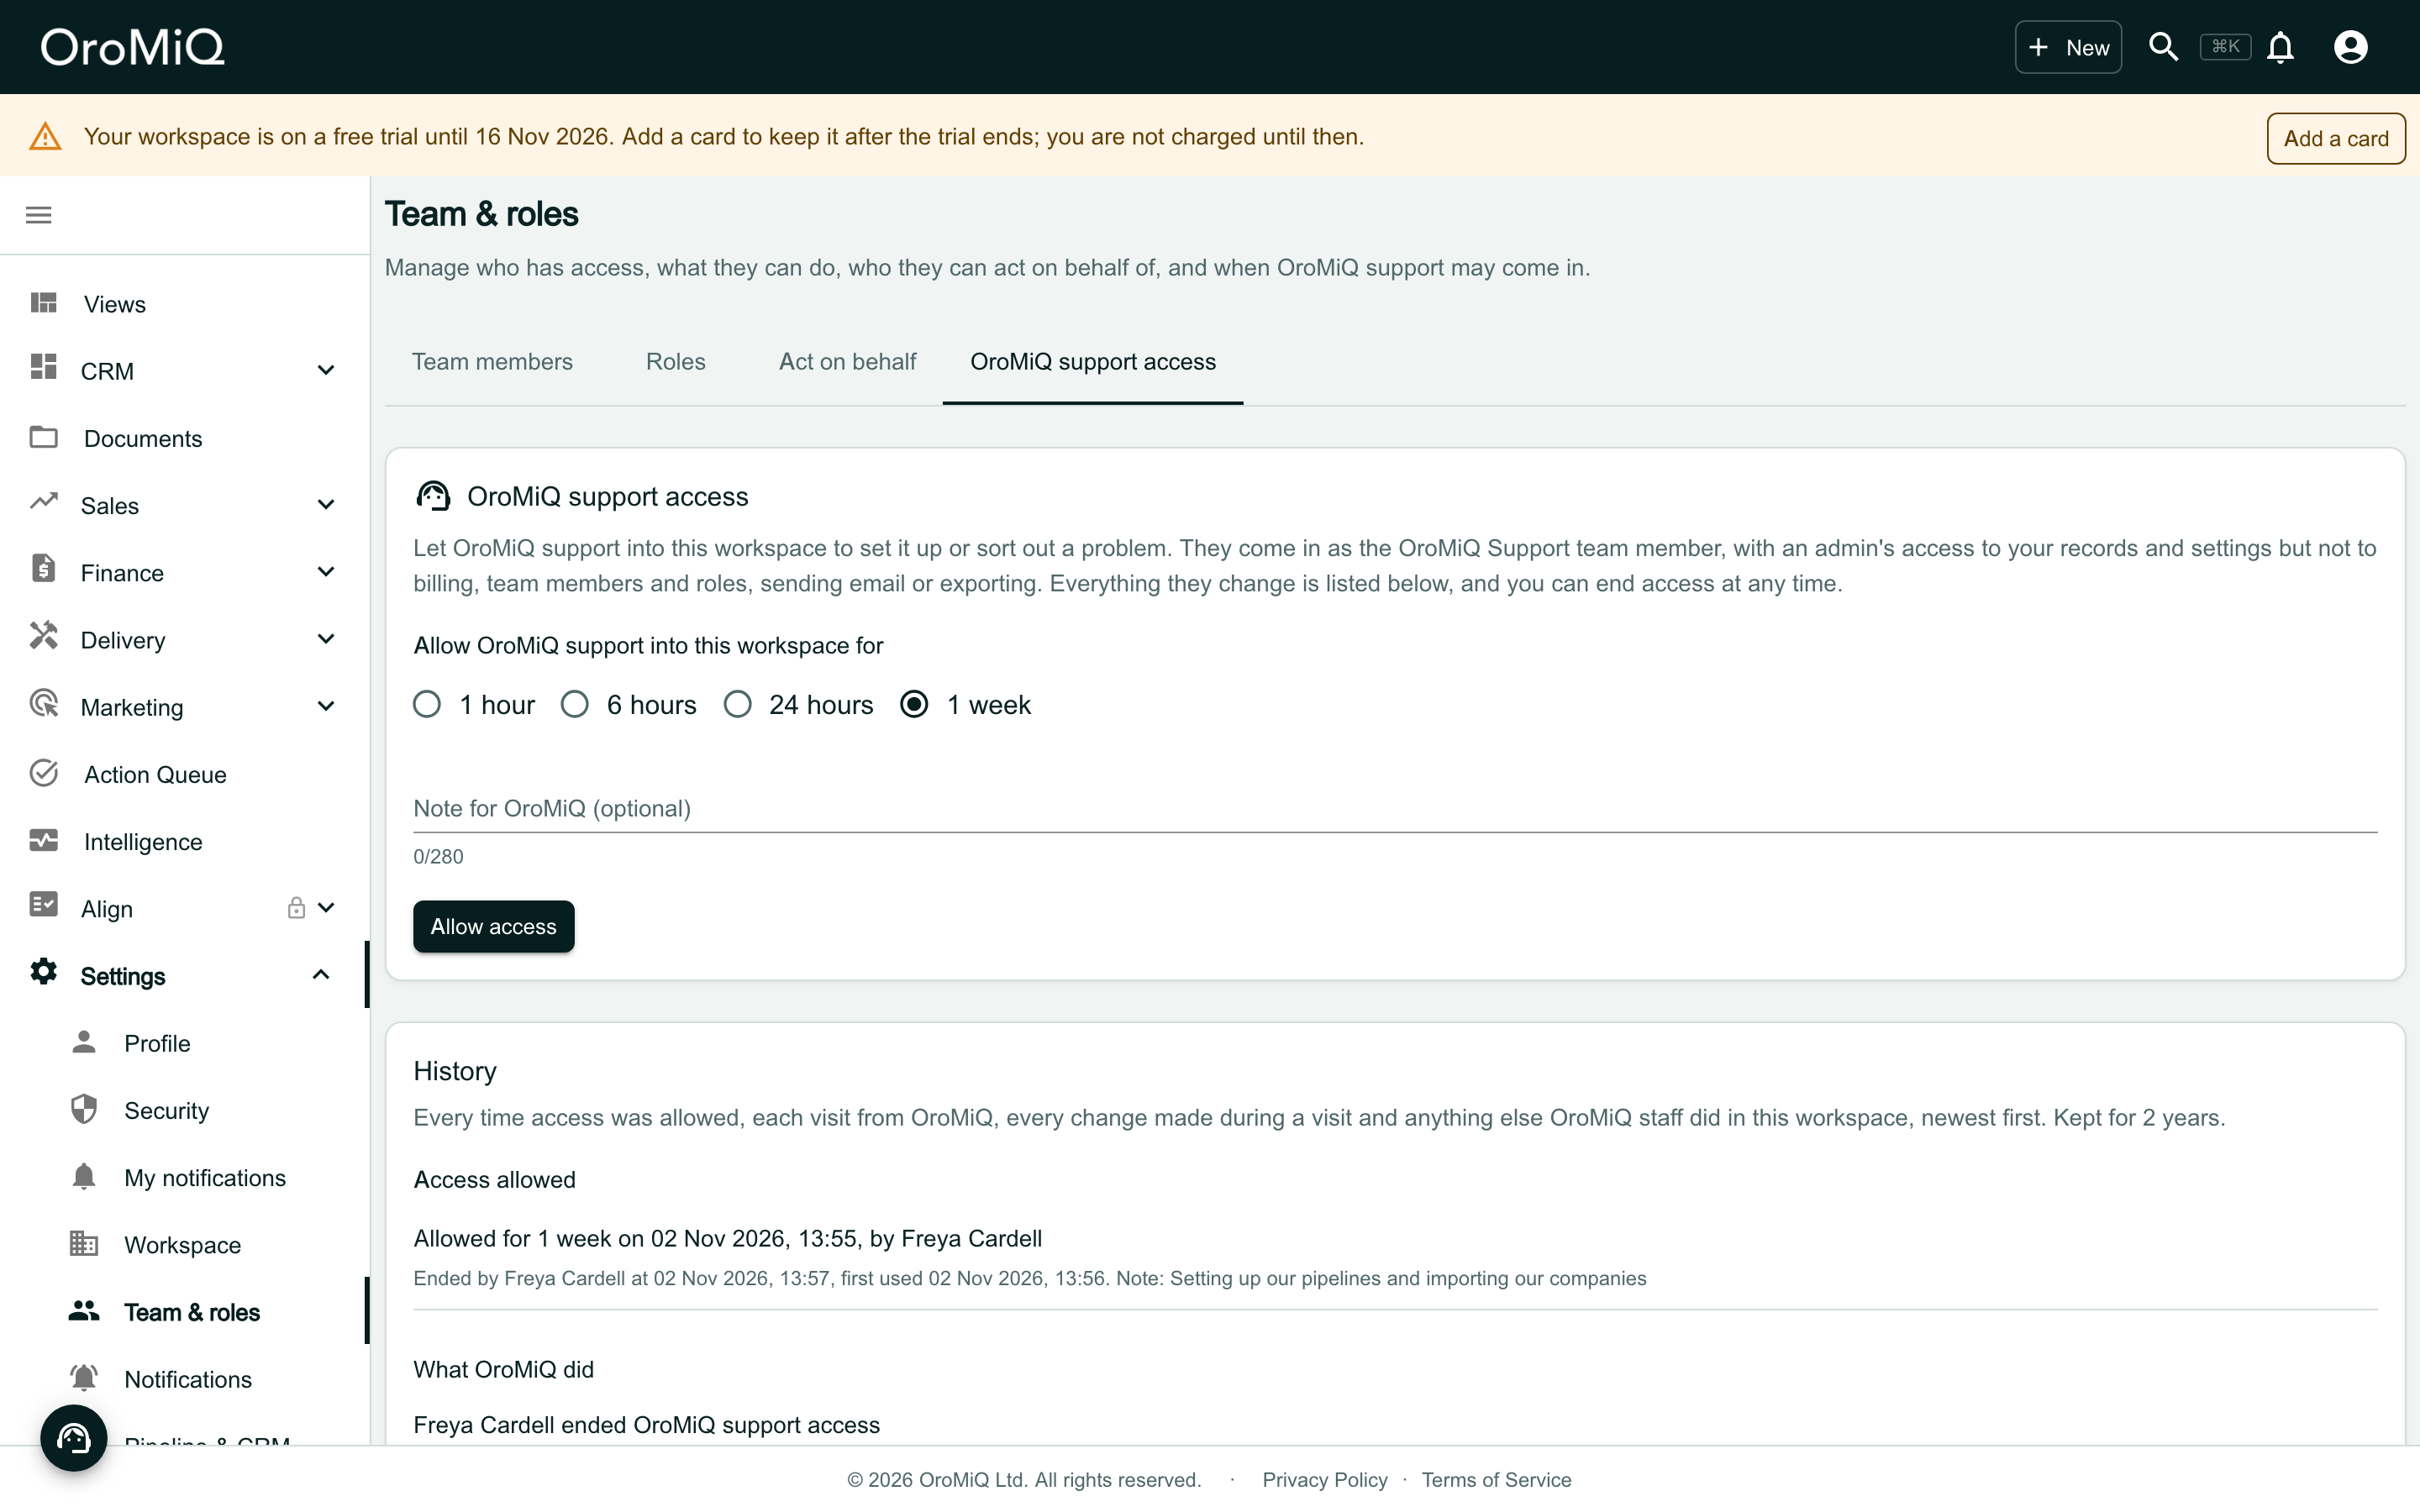
Open Settings, then Team & roles, and choose the OroMiQ support access tab. Only workspace Admins see this tab.
Under Allow OroMiQ support into this workspace for, choose 1 hour, 6 hours, 24 hours or 1 week. For your initial setup we suggest 1 week. In Note for OroMiQ (optional), say what you would like done.
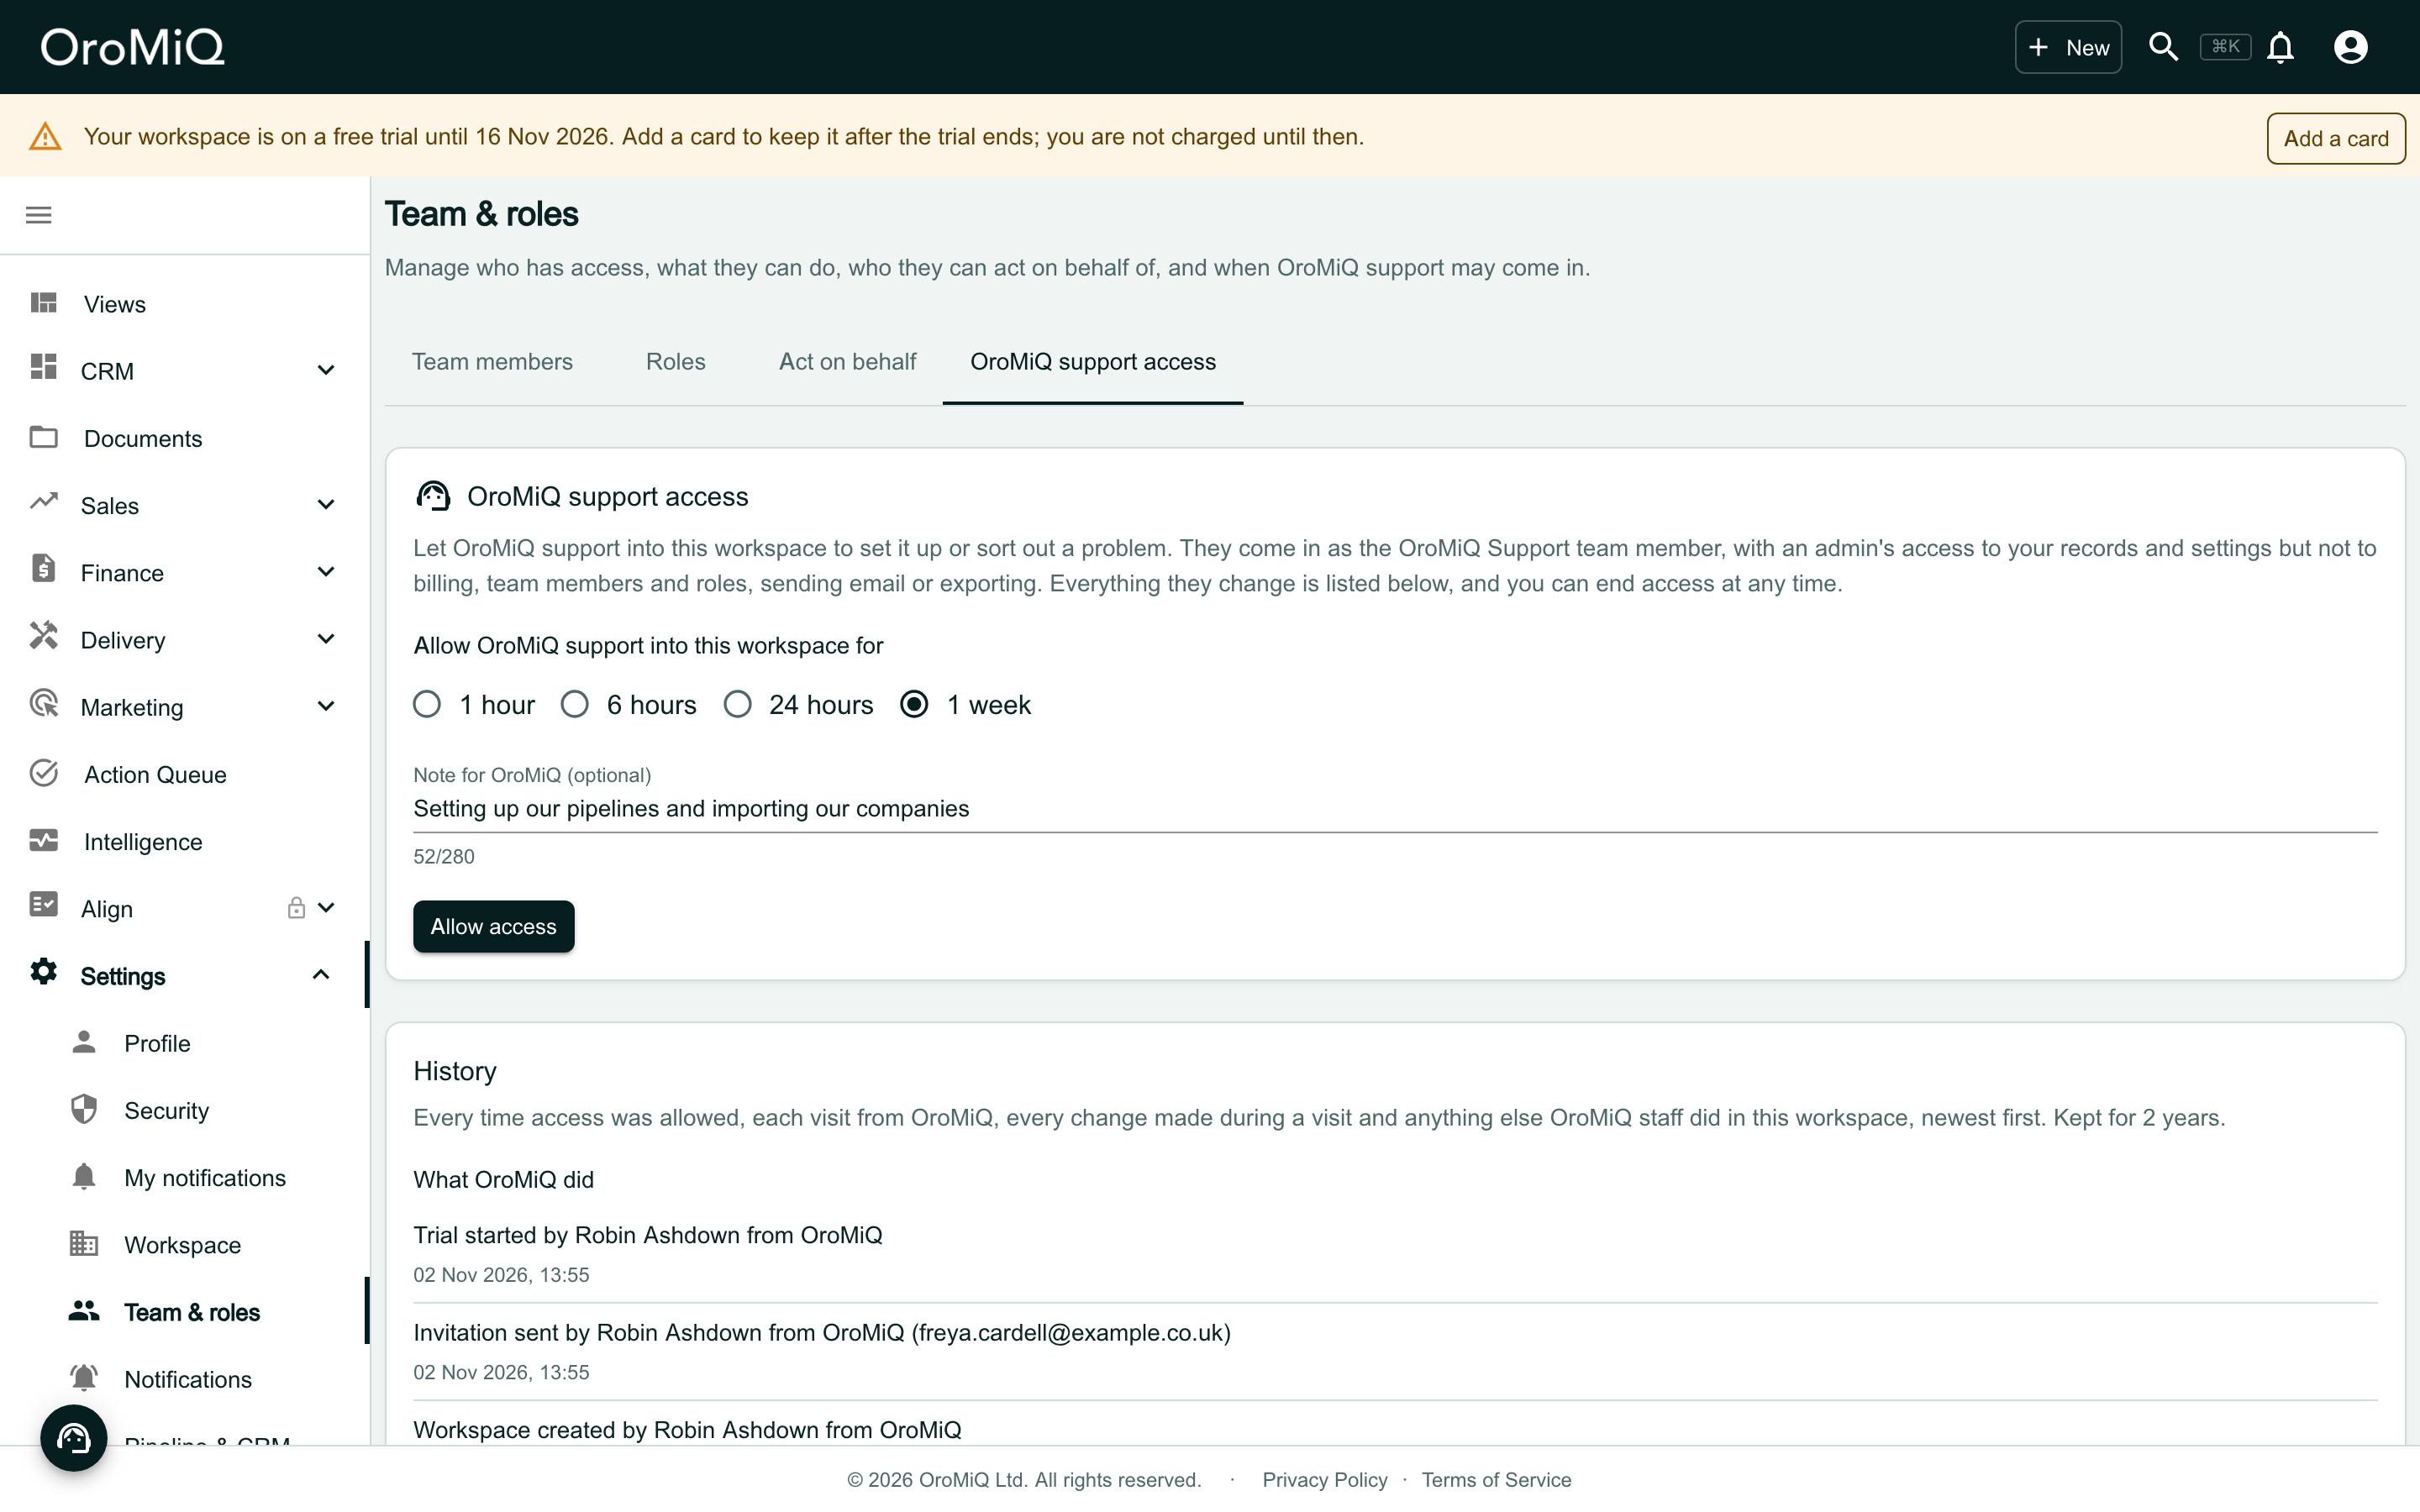
Allow access
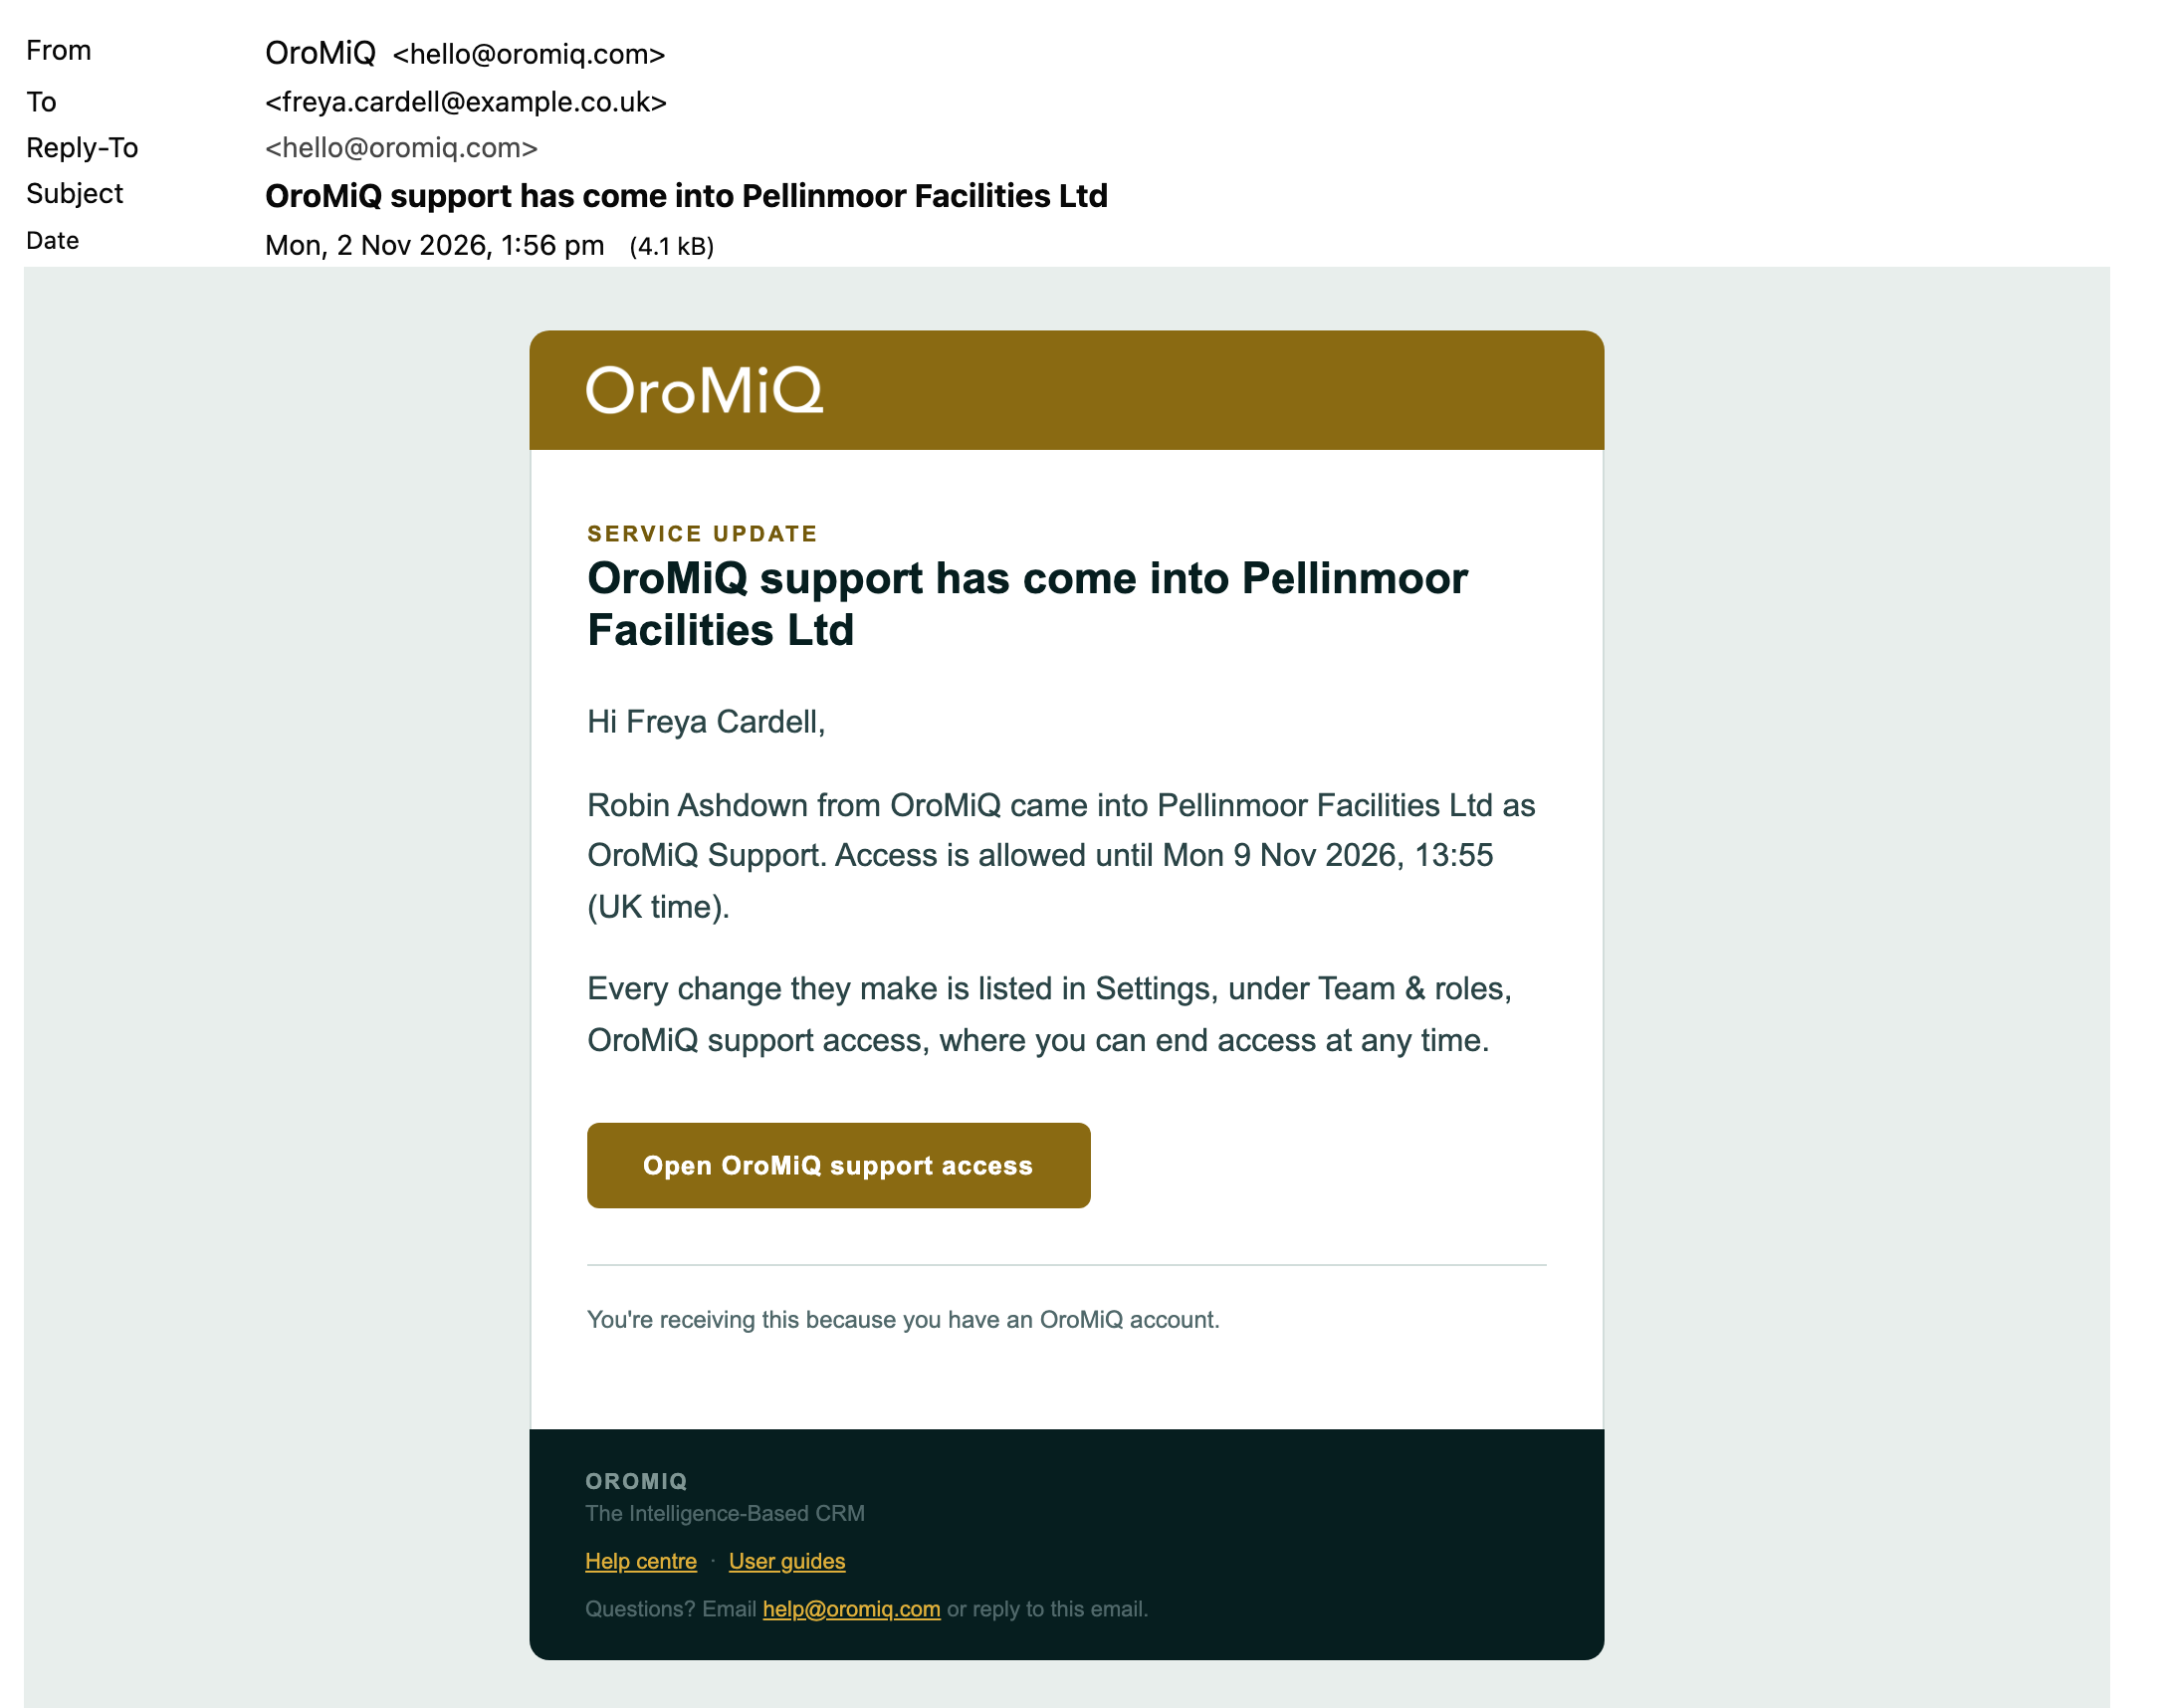
Click Allow access. The card now shows until when access is allowed, who allowed it, your note and whether OroMiQ support has come in yet. Then tell your OroMiQ contact that access is allowed.
What OroMiQ support can and cannot do
OroMiQ support comes in as the OroMiQ Support team member, with an Admin’s access to your records and settings, so they can set up your workspace for you. They cannot:
- see or change your billing or your subscription
- add, change or remove team members or roles, or invite anyone to your workspace or to a secure room
- allow, extend or change their own access
- send email, sequences or meeting invitations from any mailbox, connect a mailbox, or enrol anyone in a sequence or campaign
- export your data
- delete records in bulk, or delete your workspace
- act on behalf of a team member, or change anyone’s password, two-step verification or sessions
They can only come in while you allow it, and only for the time you choose. Every change they make, and anything they download, is recorded for you to see.
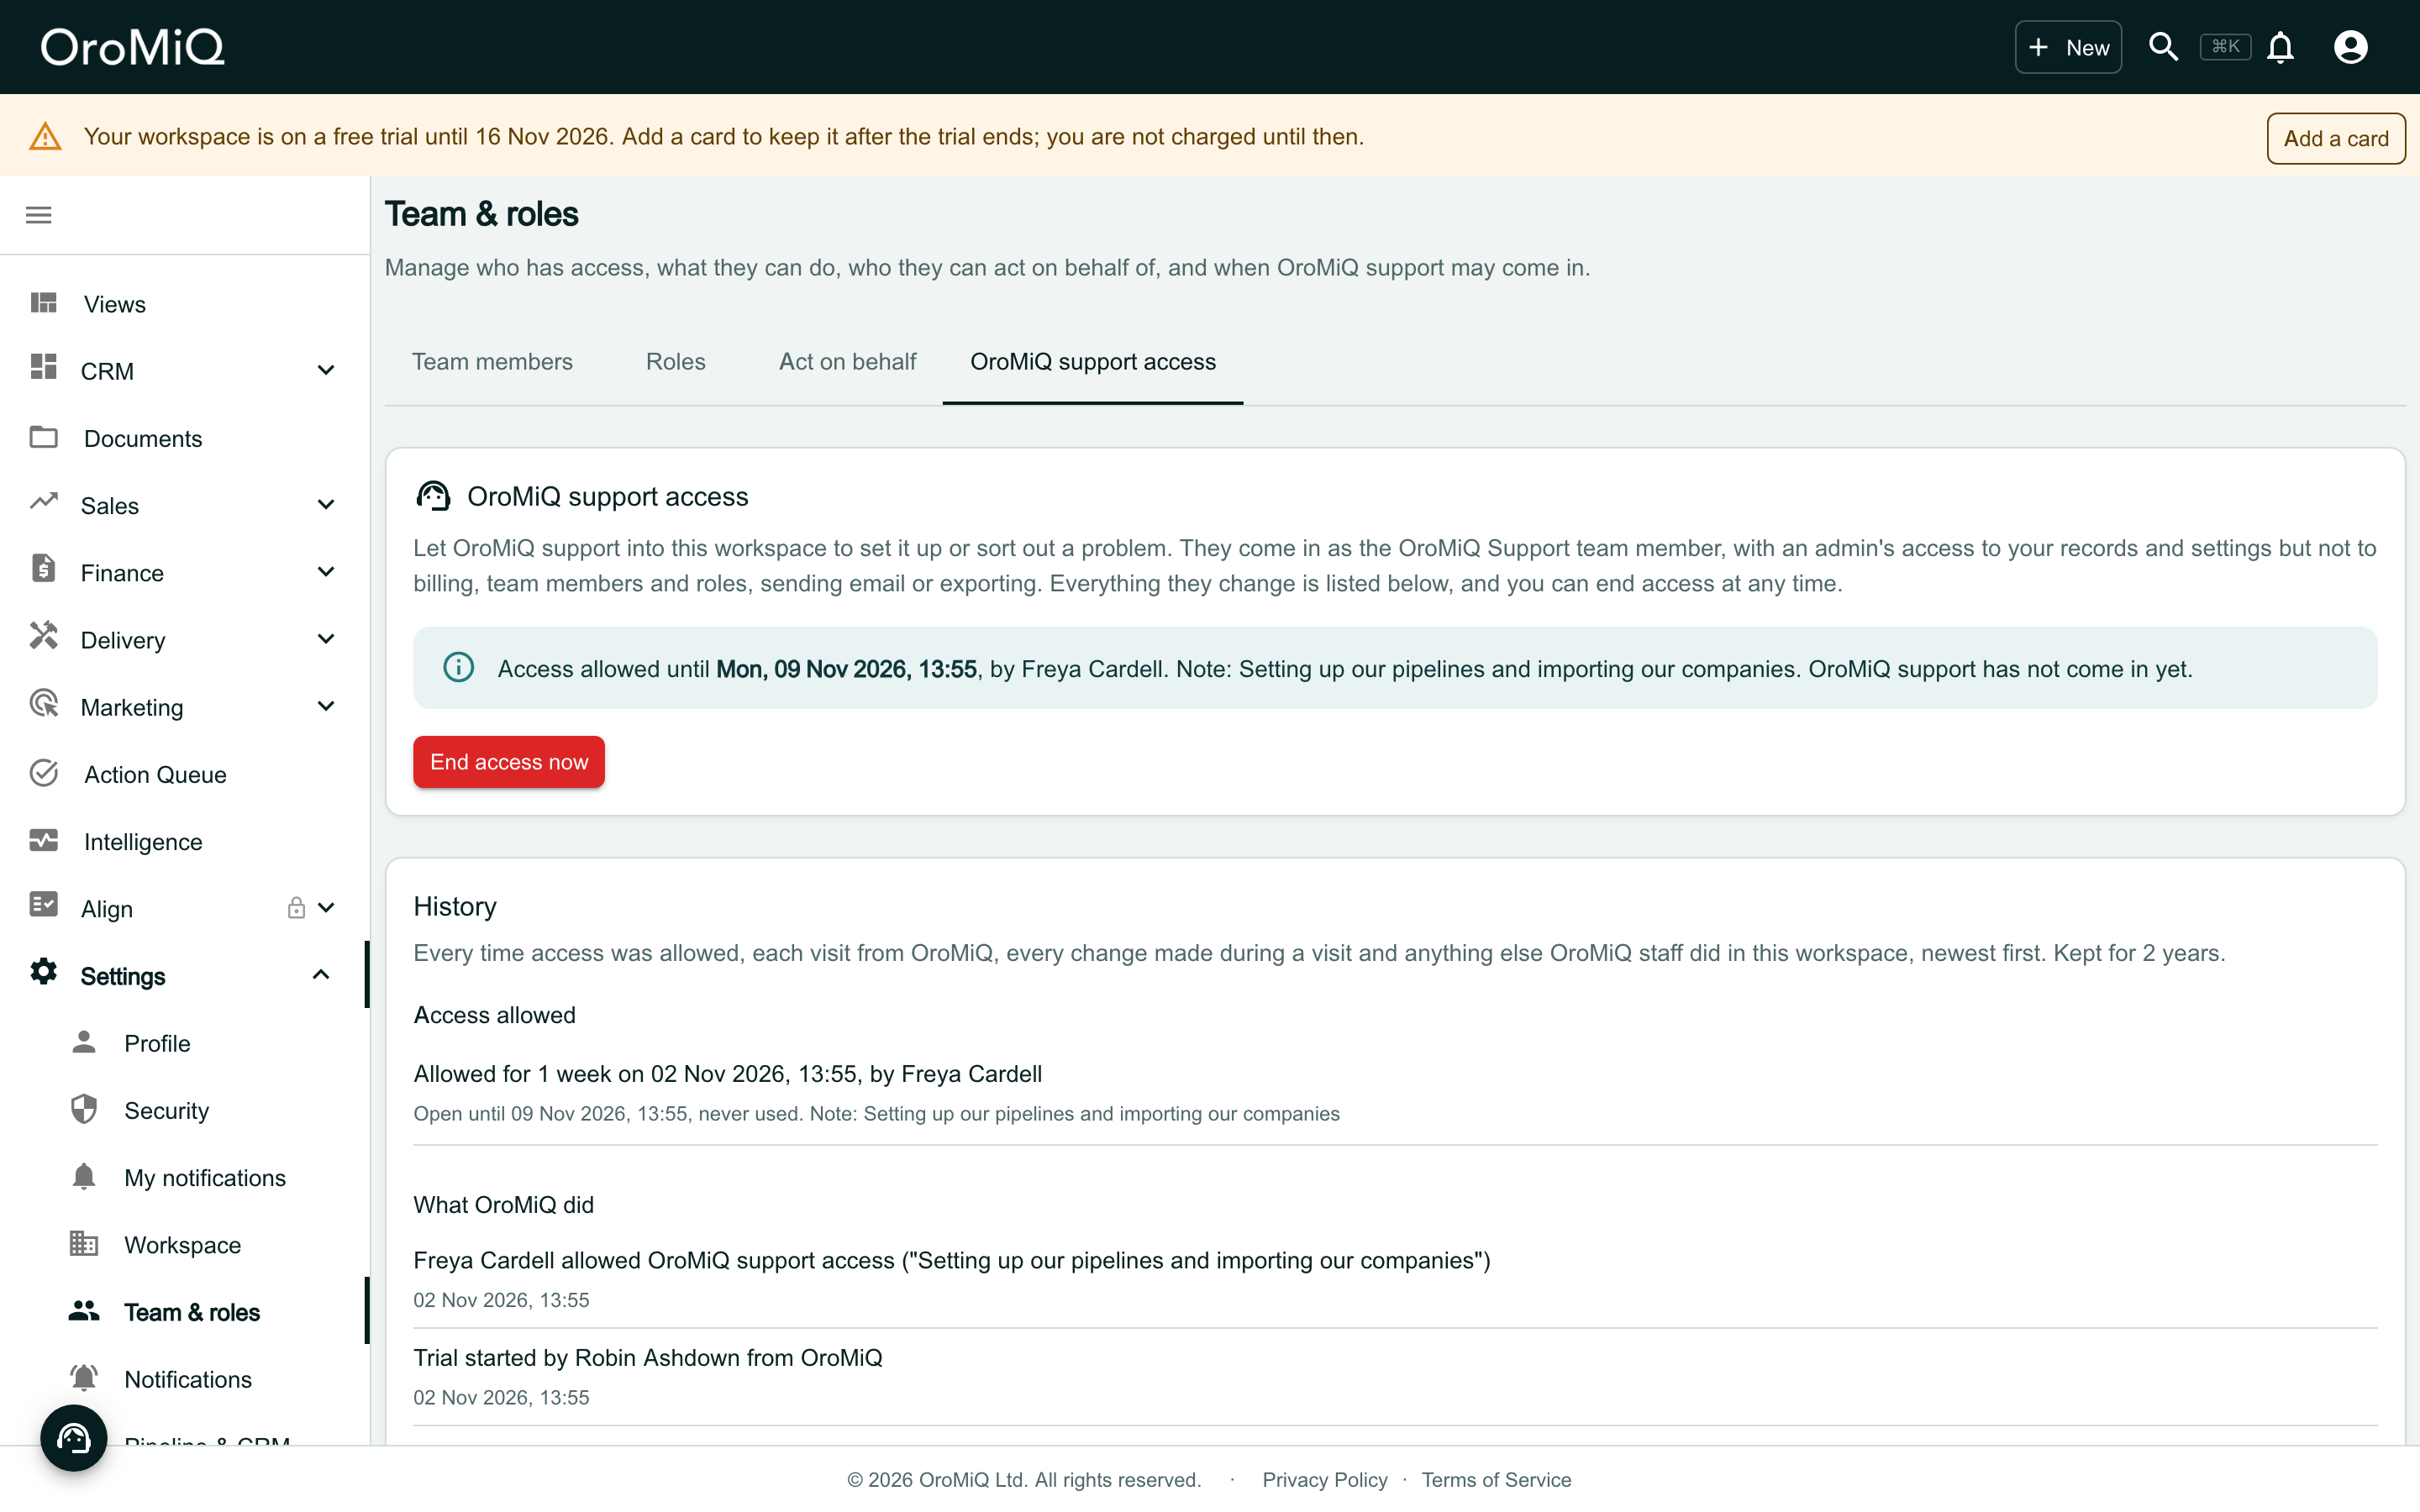
Look out for the emails
OroMiQ emails your workspace’s Admins each time something changes:
- when access is allowed: OroMiQ support access allowed for your workspace
- when OroMiQ support first comes in: OroMiQ support has come into your workspace, with the name of the person who came in
- when access ends, whether you end it or it runs out: OroMiQ support access to your workspace has ended
Each one has an Open OroMiQ support access button that takes you straight to the page.
See everything OroMiQ did
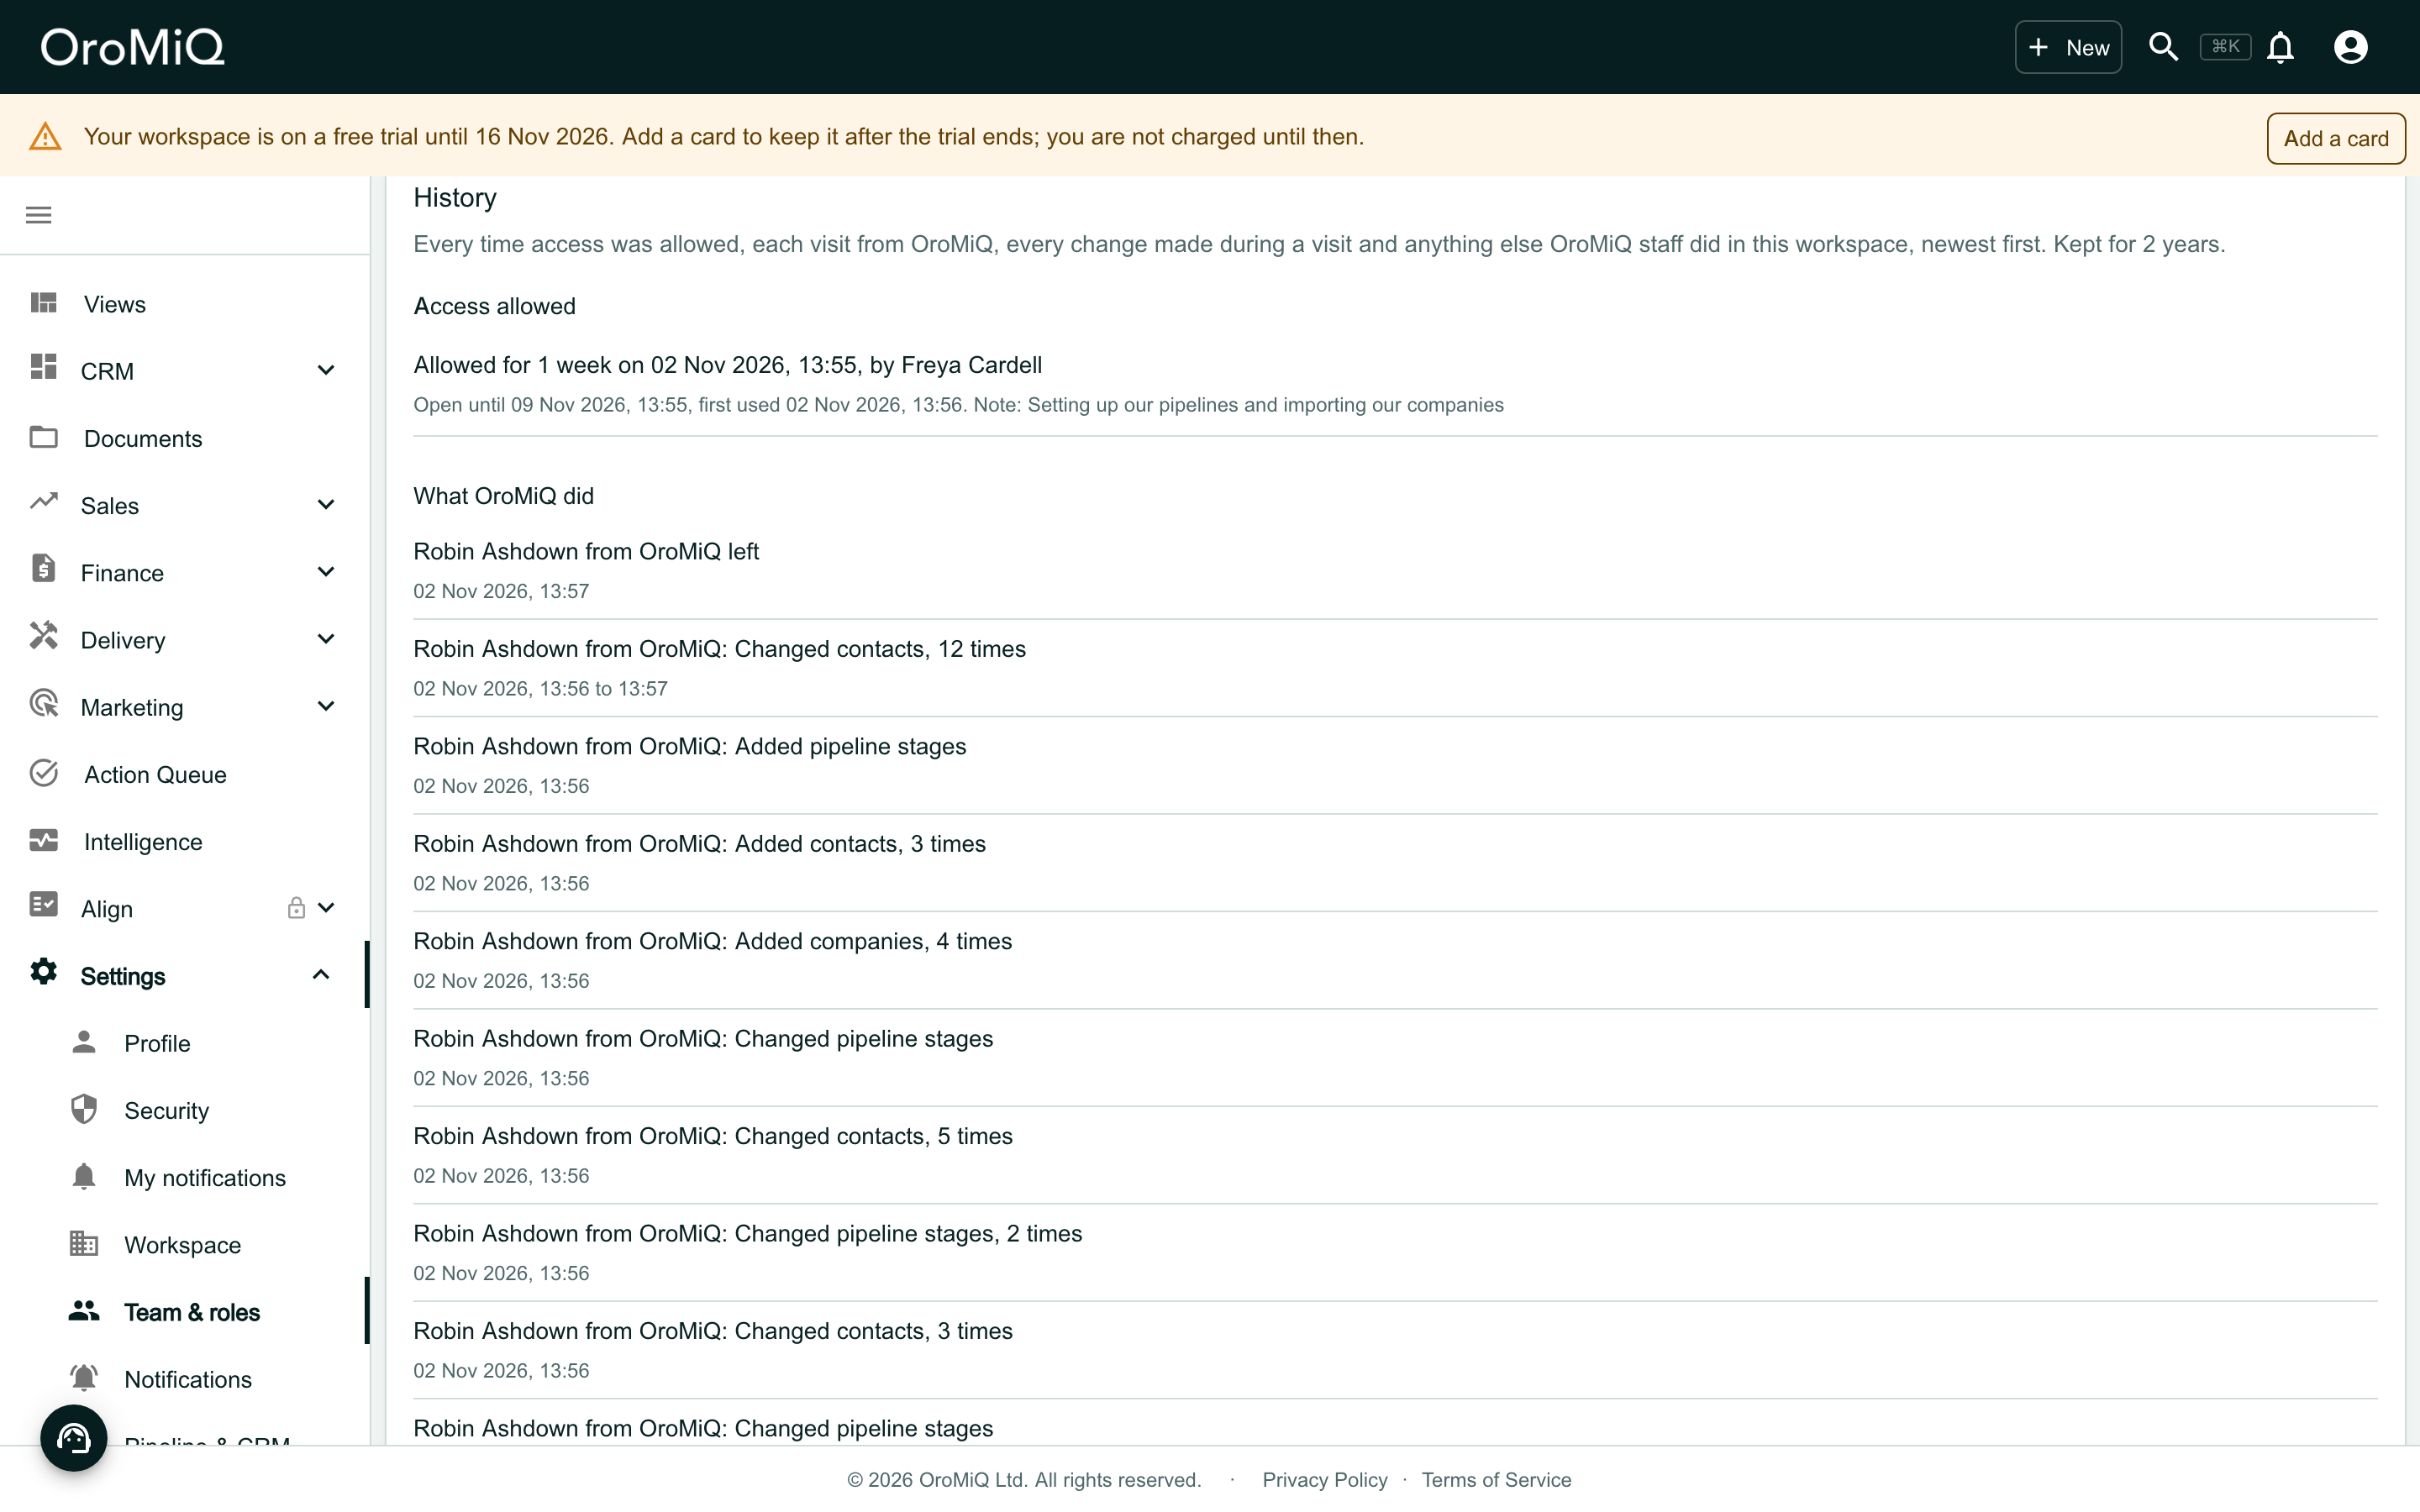
On OroMiQ support access, the History lists every time access was allowed, each visit from OroMiQ and every change made during a visit, newest first. The history is kept for 2 years.
Under Access allowed, each line says how long access was allowed for, when and by whom, and below it whether it is still open, when it ended or ran out, and when OroMiQ support first came in. Under What OroMiQ did, a visit shows who came in and when they left, and each change names what was added or changed, such as pipeline stages or contacts, with its date and time.
Repeats are grouped: the same kind of change made several times in a row is one line, such as Changed contacts, 12 times. Beneath it is the time, or the first and last times if the run took longer than a minute.
Load older entries
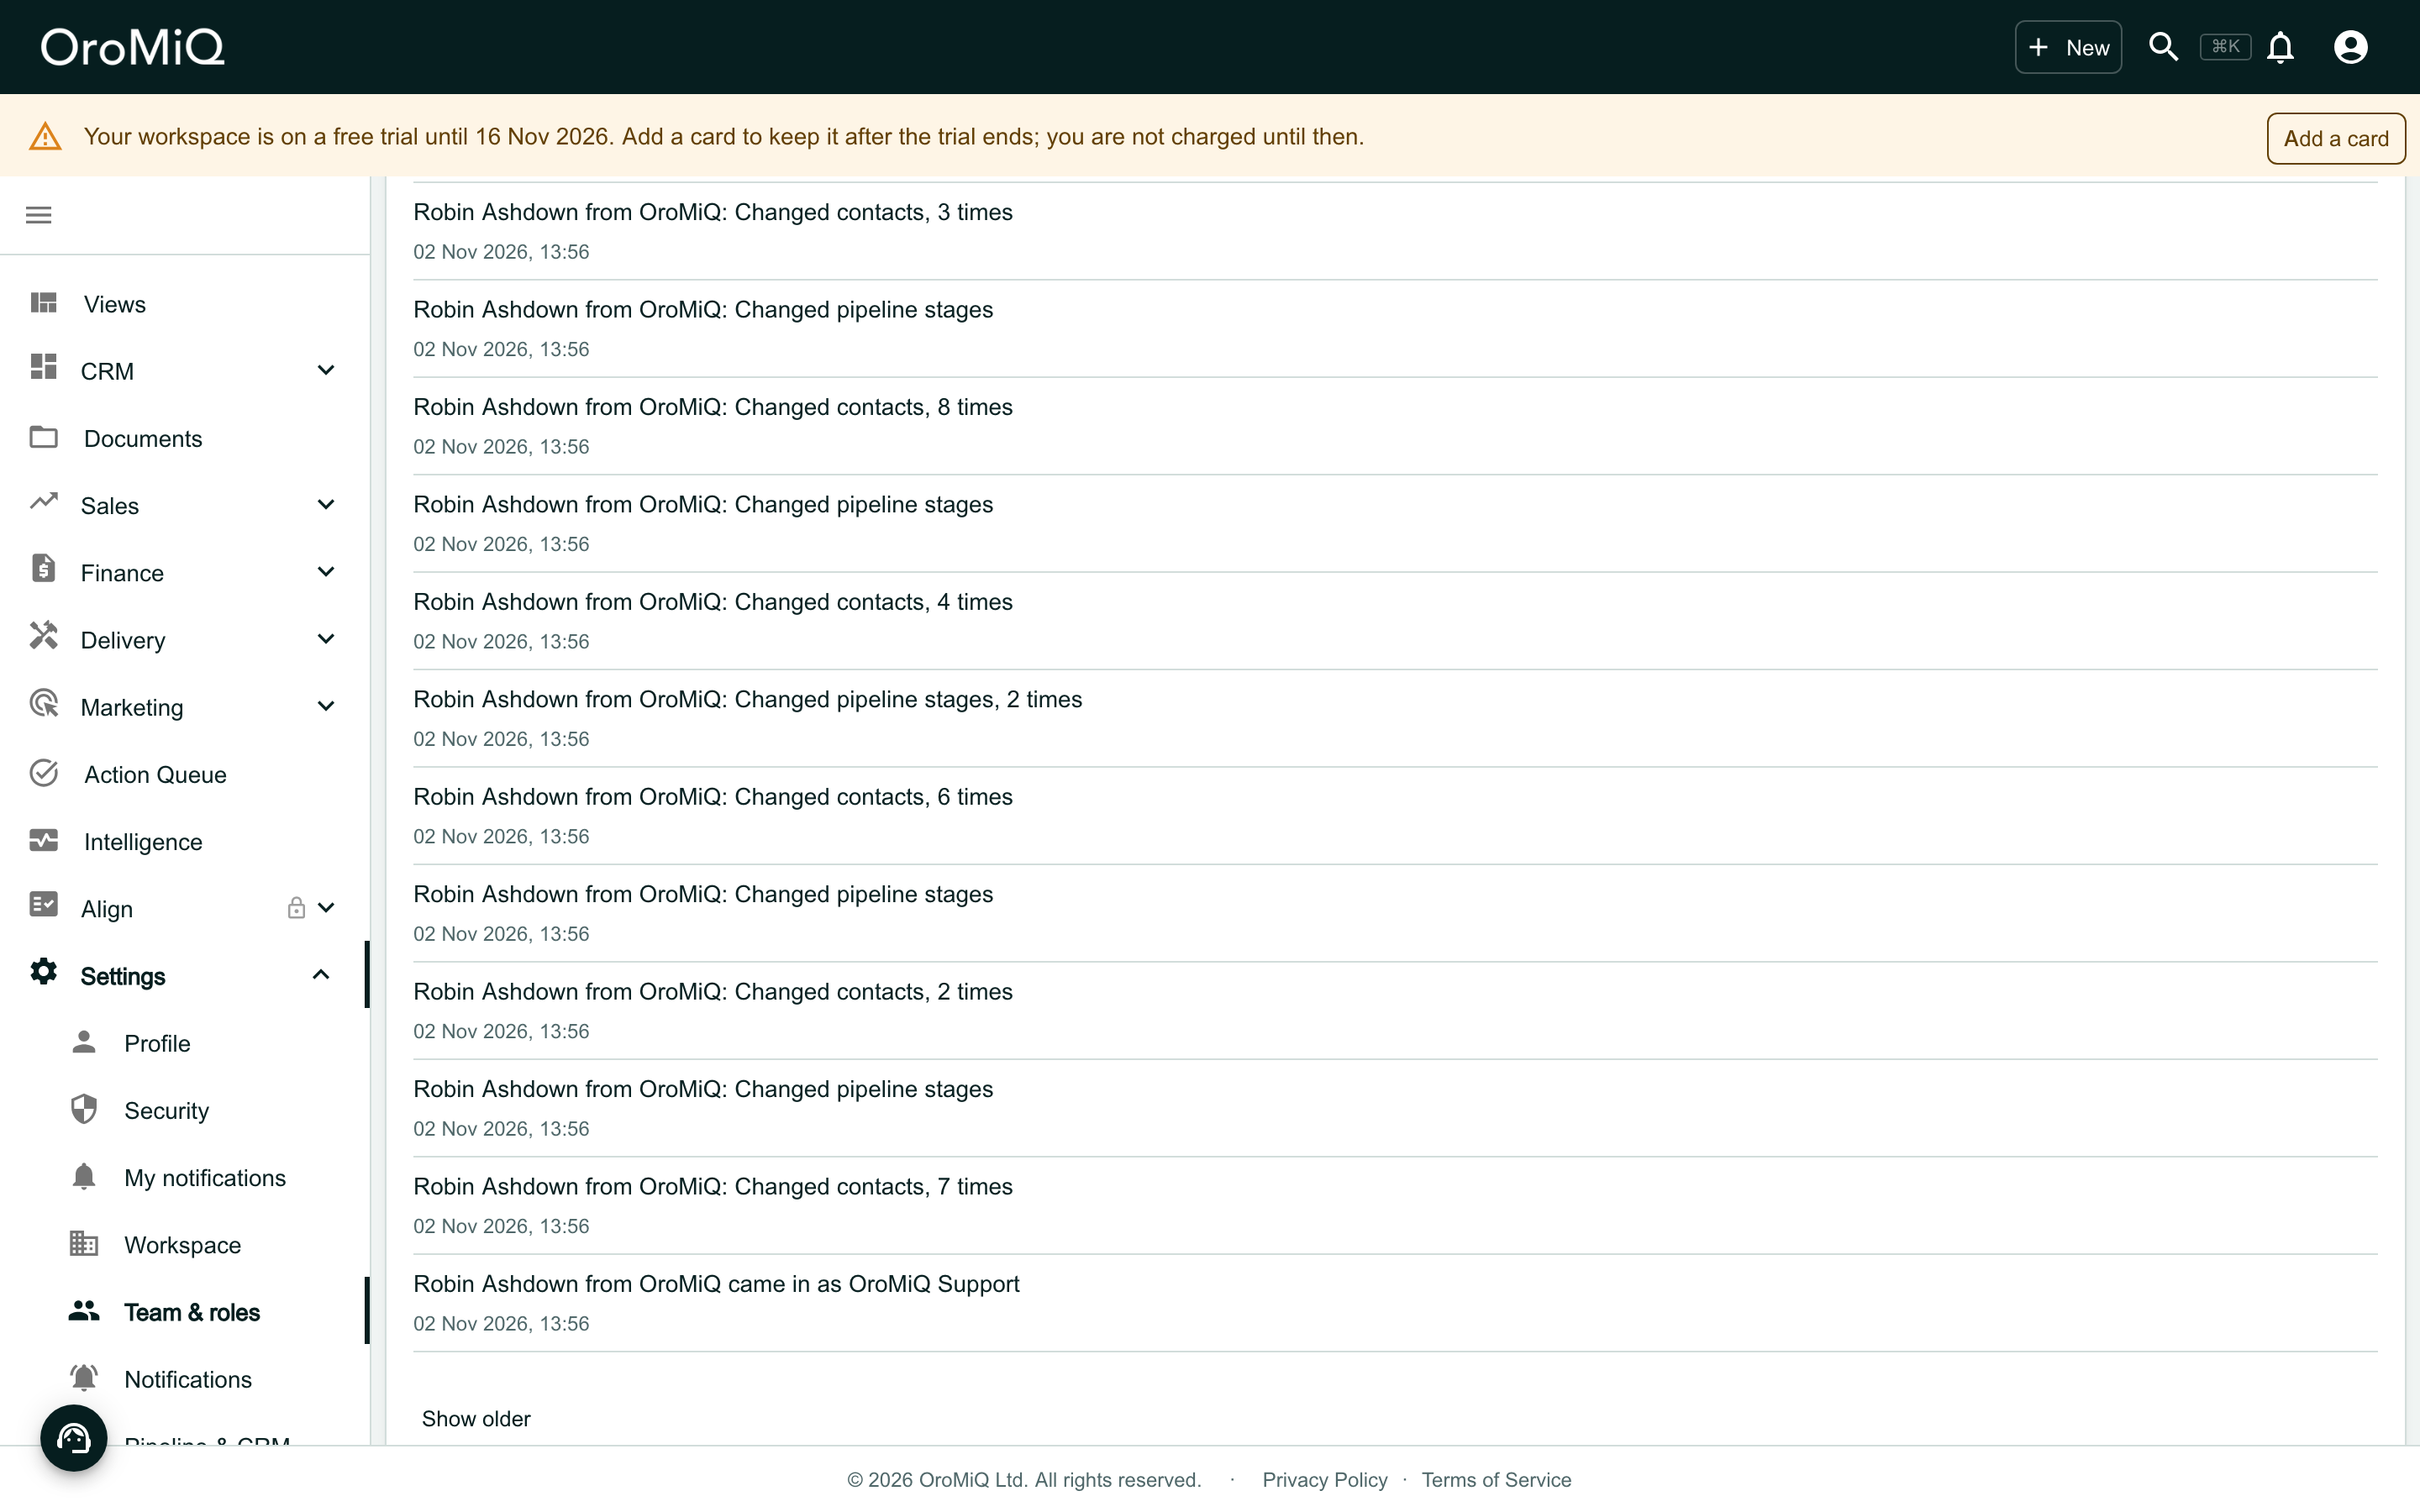
The newest entries load first. Scroll to the bottom of the history and click Show older to load earlier ones.
See how your workspace was set up
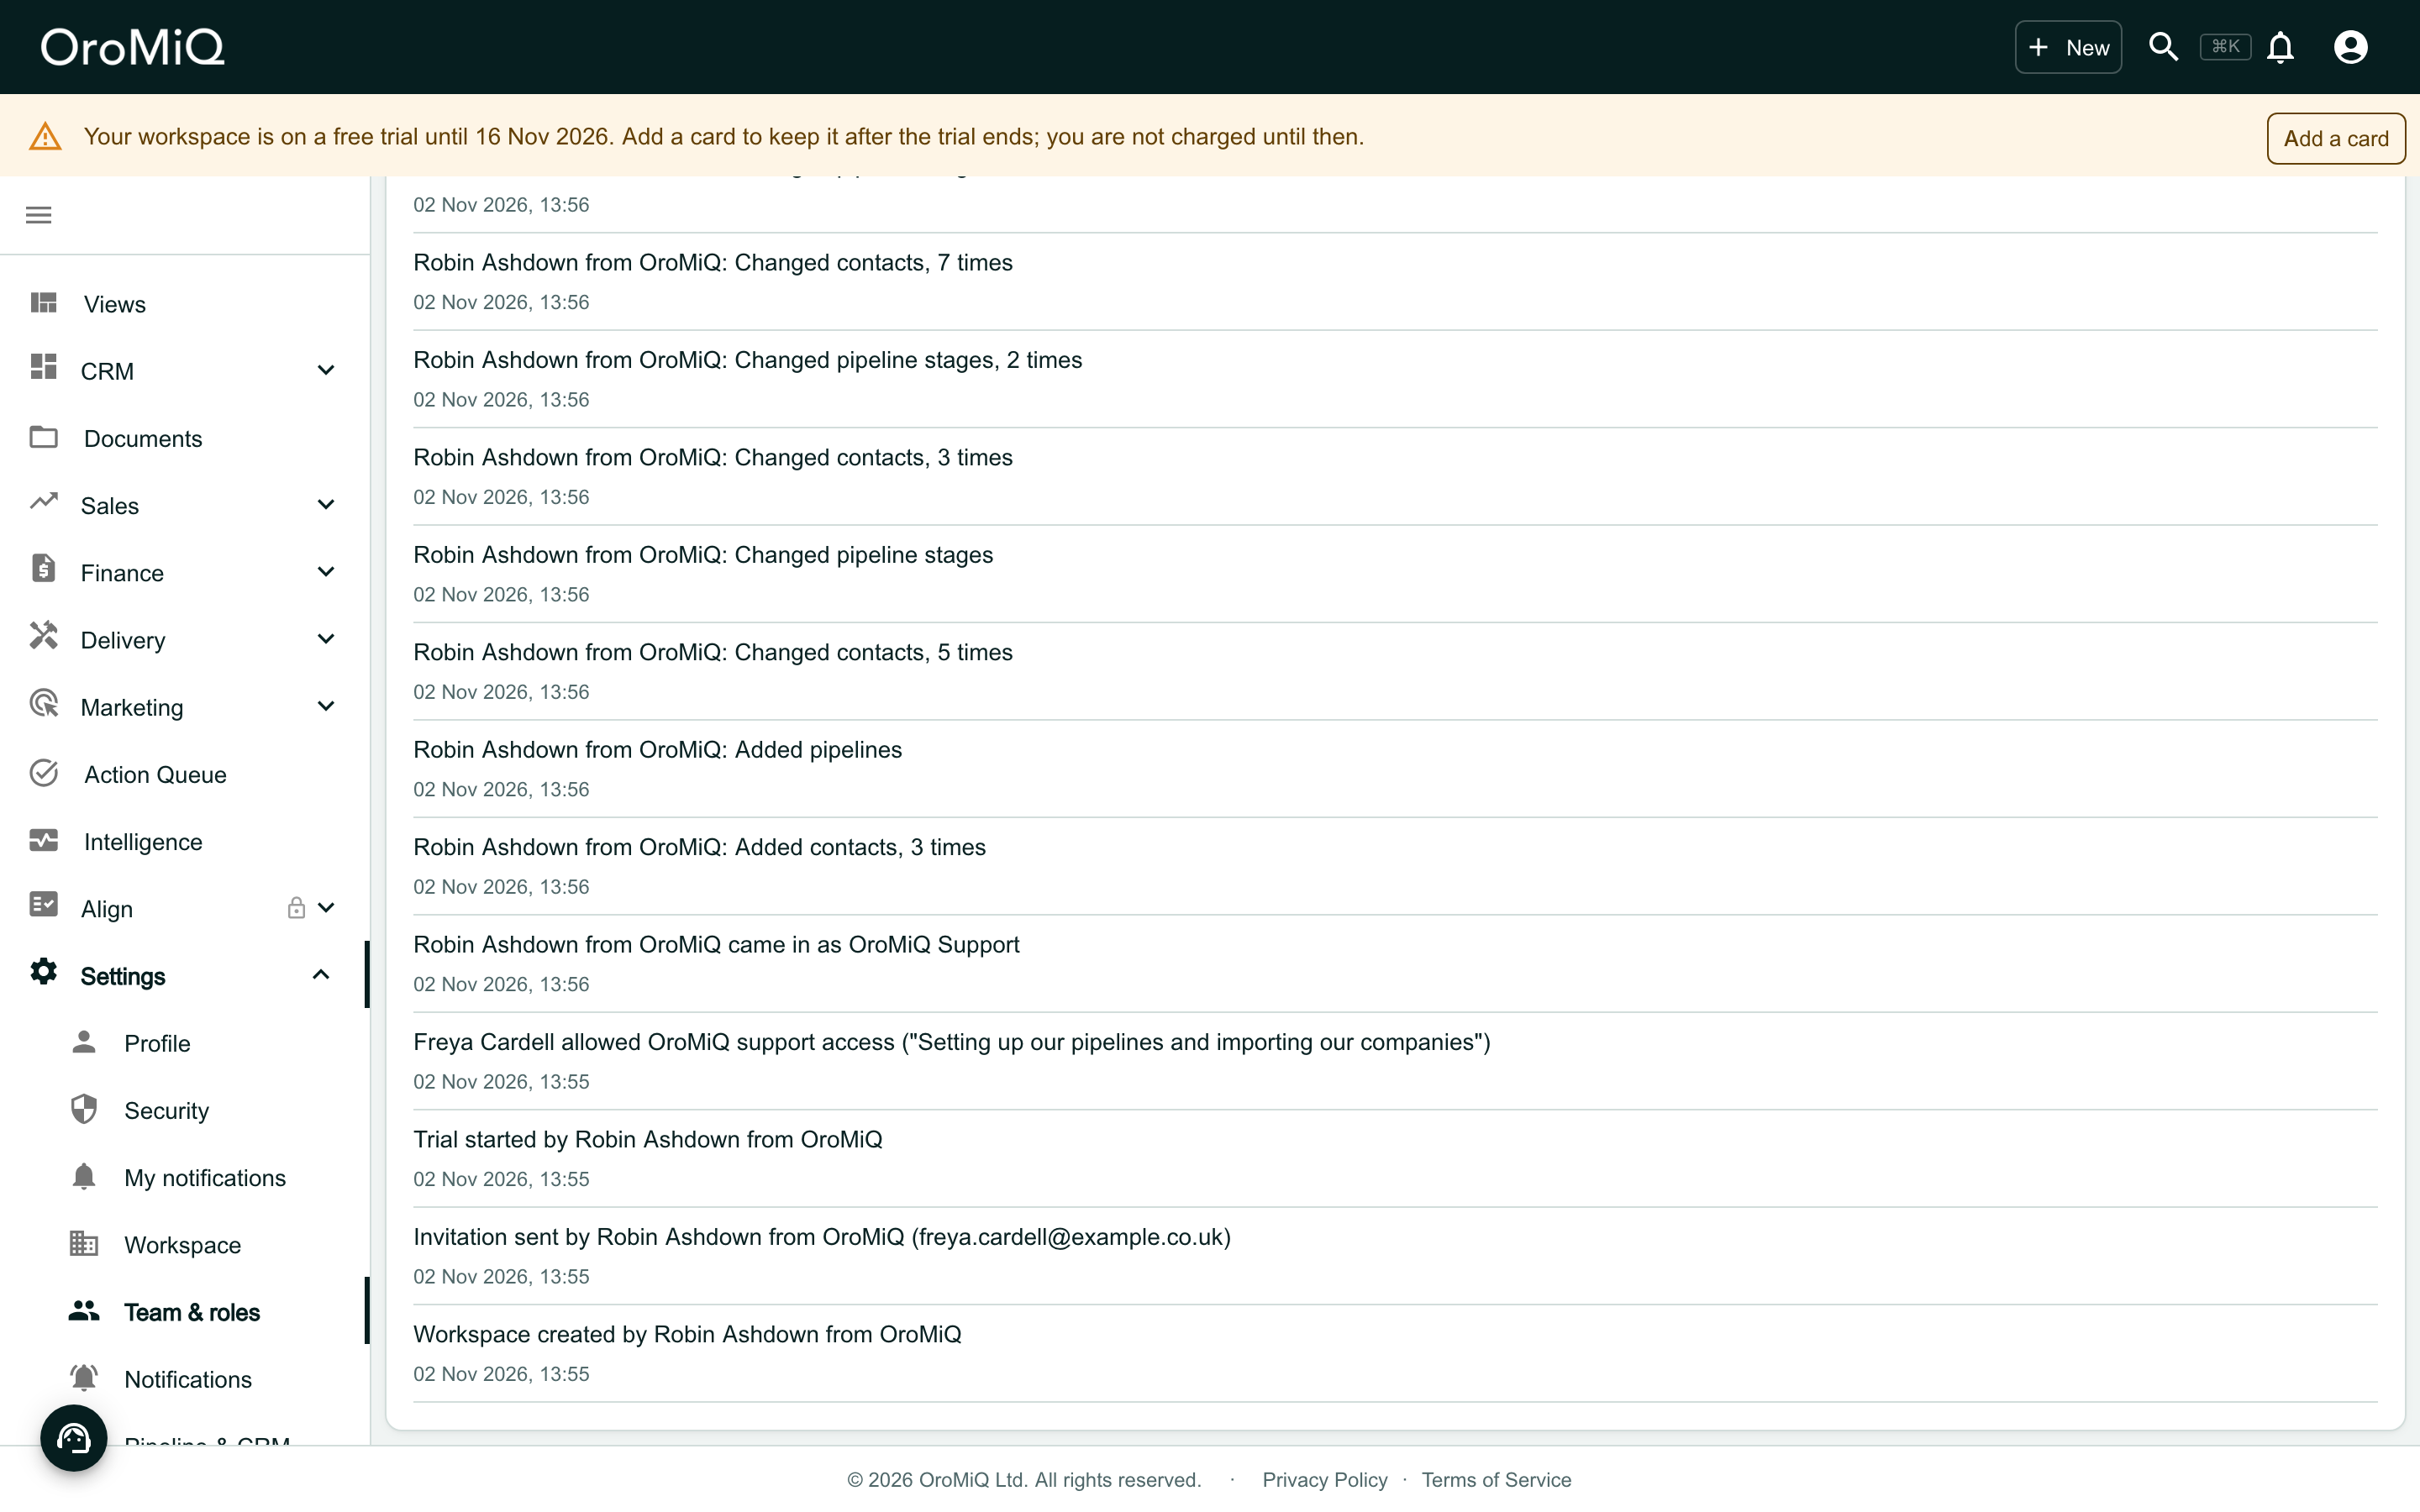
The oldest entries show what OroMiQ did before you joined, such as Workspace created and Invitation sent, each with the name of the person at OroMiQ who did it.
End access early if you need to
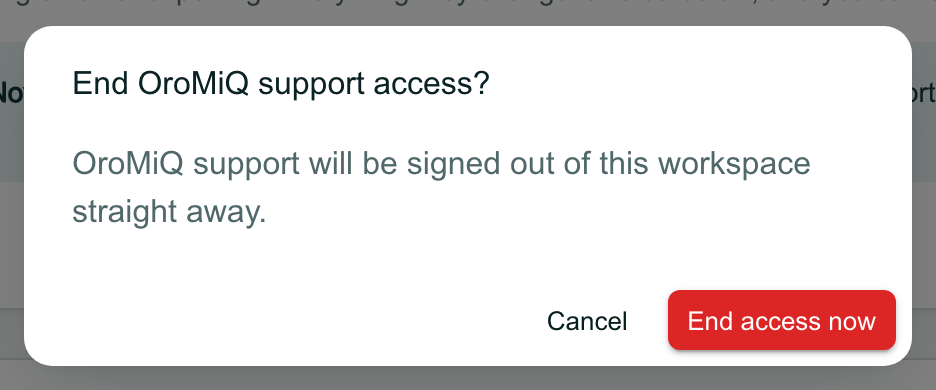
Access ends on its own when the time you chose runs out. To end it sooner, click End access now, then End access now again to confirm. OroMiQ support is signed out of your workspace straight away.
Check that access has ended
The page shows Allow access again, and the history line now reads Ended by you, with the time. Everything OroMiQ did stays listed. Whenever you need help again, allow access in the same way.
Invite your team when you are ready
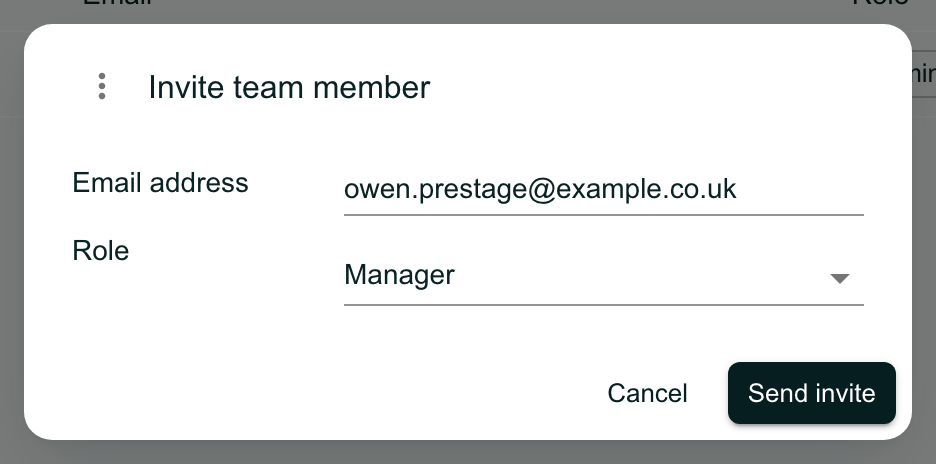
When you want colleagues in your workspace, open Settings, Team & roles, Team members and click Invite team member. Enter their Email address, choose a Role and click Send invite. They get an invitation email, just as you did.
For help choosing roles, see Set up your workspace and invite your team.
What happens next
Once you have allowed access, tell your OroMiQ contact. They come into your workspace as OroMiQ Support and set it up with you: your pipelines, your lists, your data and anything else you have agreed.
You can follow every change in the history, and end access at any time from Settings, Team & roles, OroMiQ support access. If anything is unclear, ask your OroMiQ contact, or raise a support request from inside the app.
What next
Cannot find what you need? Browse the Help Centre or submit a support ticket.