Getting started
Set up your workspace and invite your team
Before you start
You need the Admin or Manager role to edit workspace settings and invite team members. Anyone can manage their own profile and security.
Complete your profile
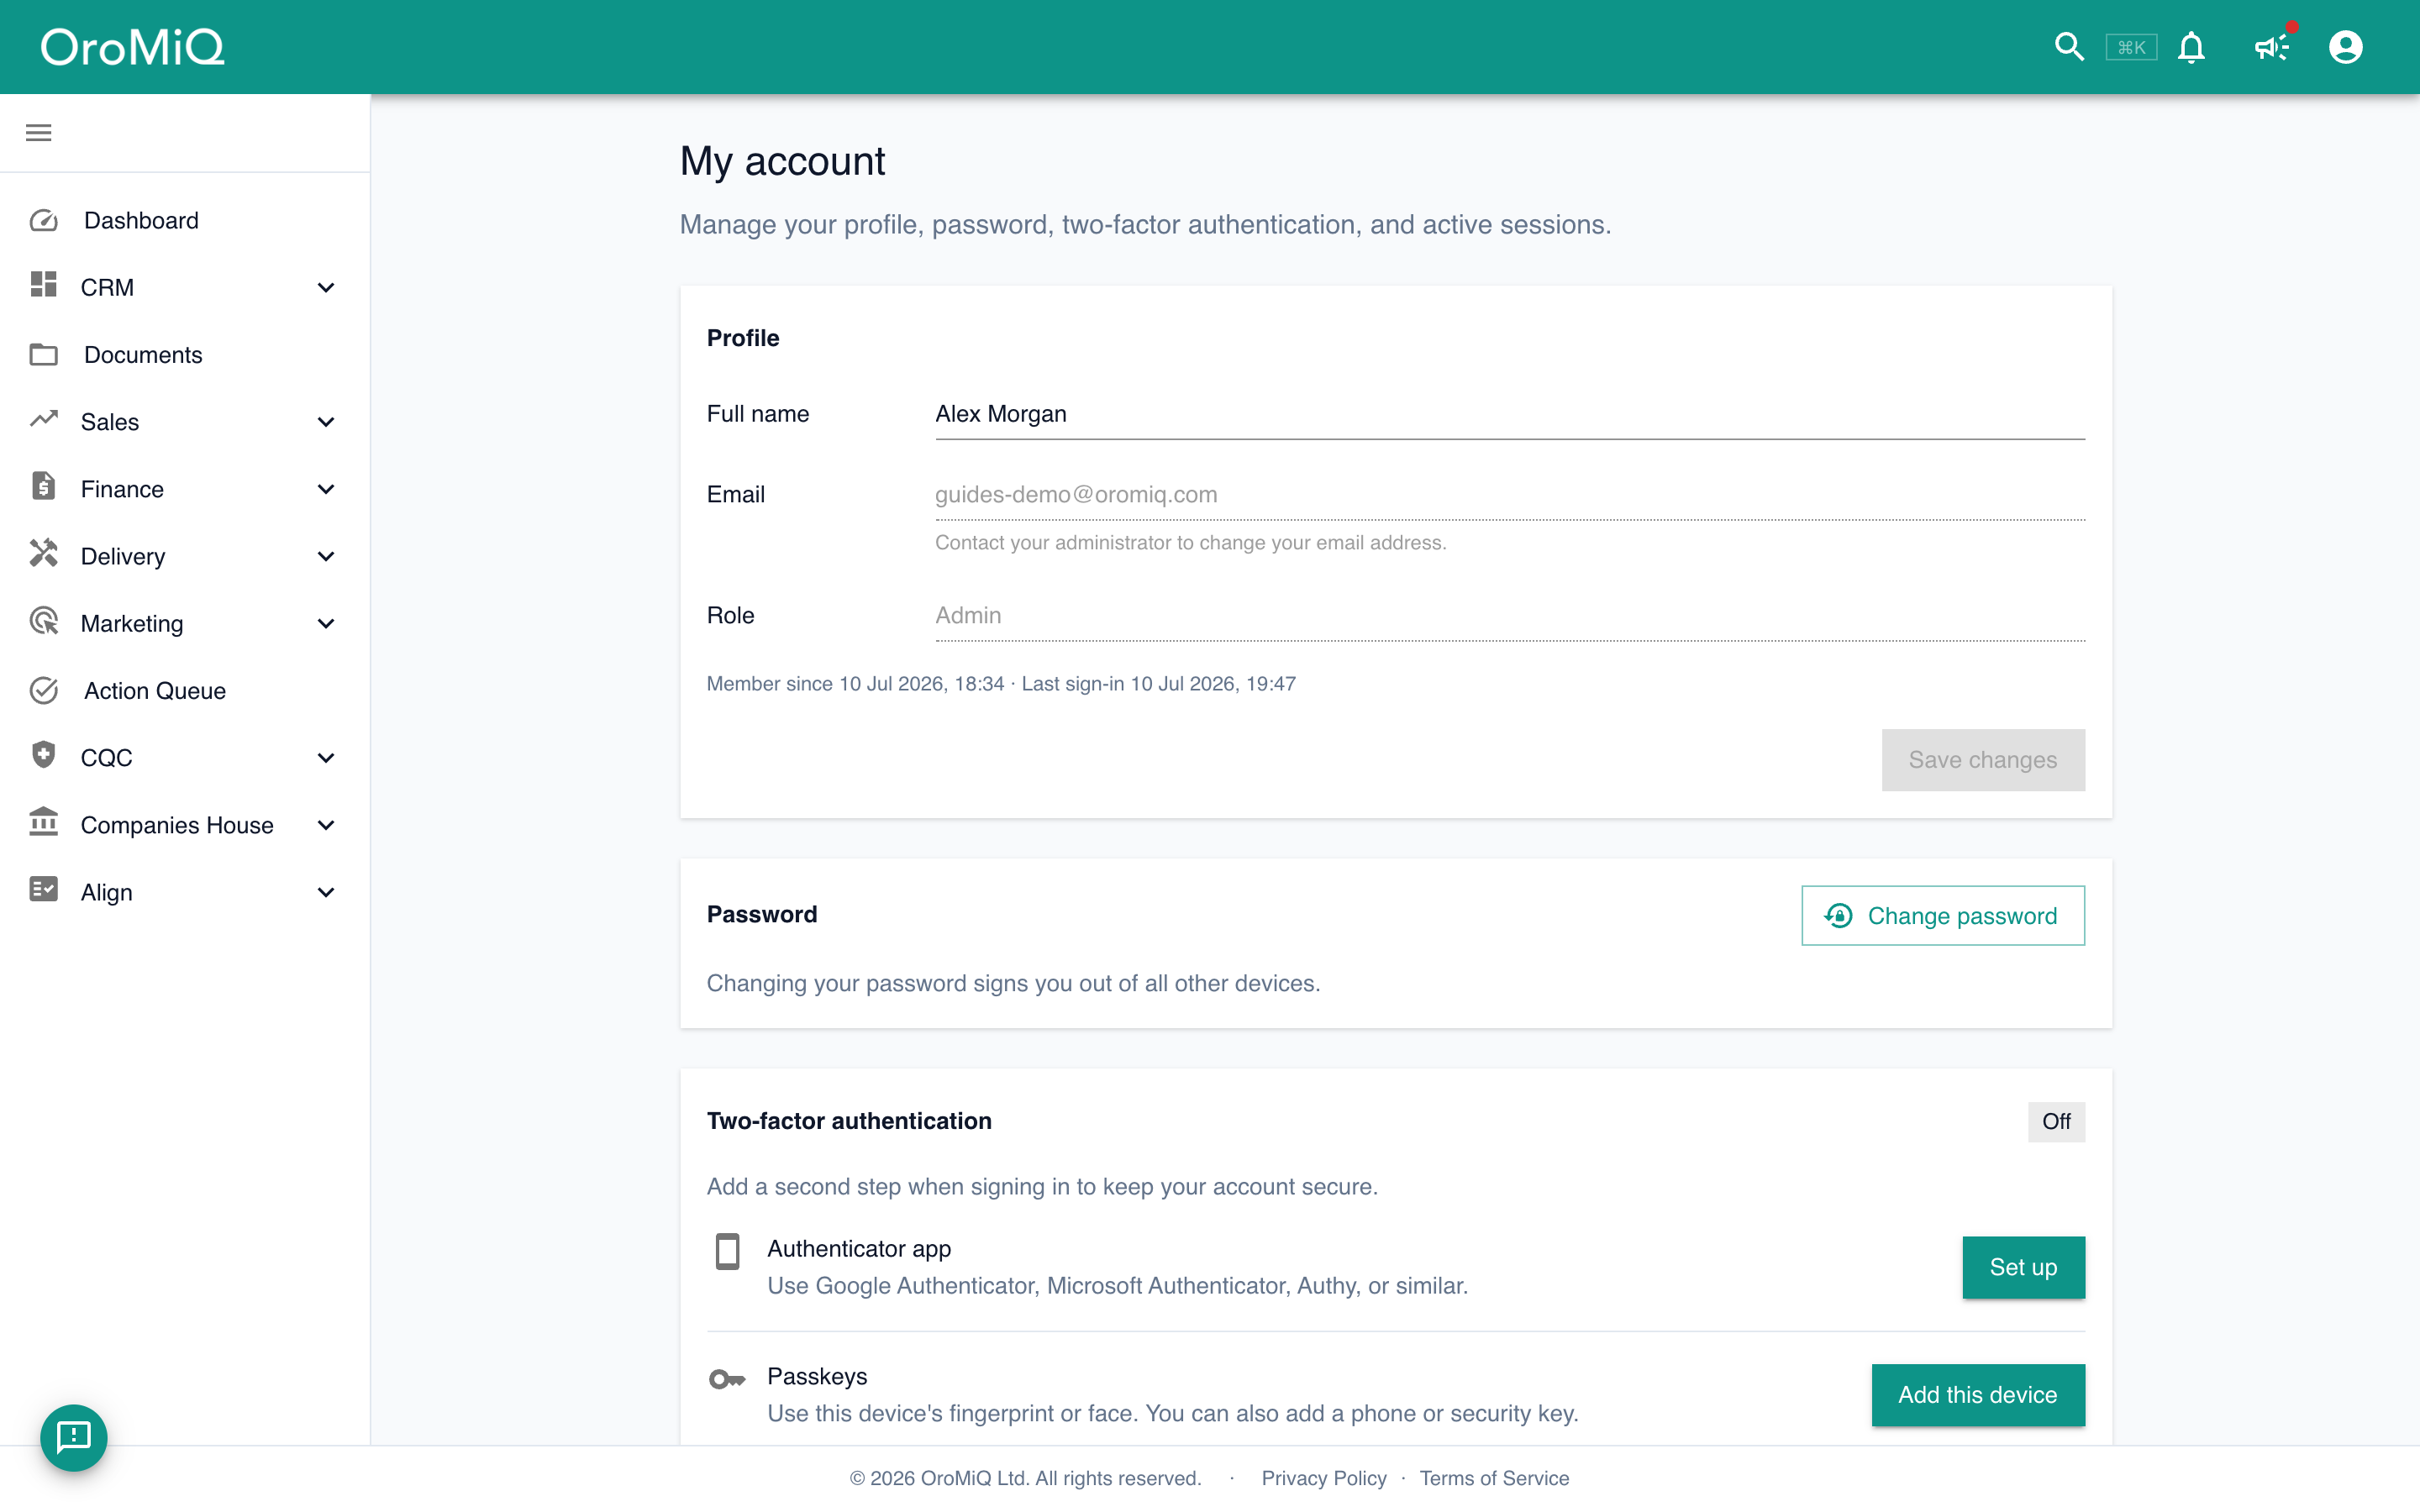
Open your avatar menu (top-right) and choose My account. Set your Full name and Timezone, then click Save changes so colleagues recognise you in activity and assignments. You can add a profile photo here too.
Note
Secure your account
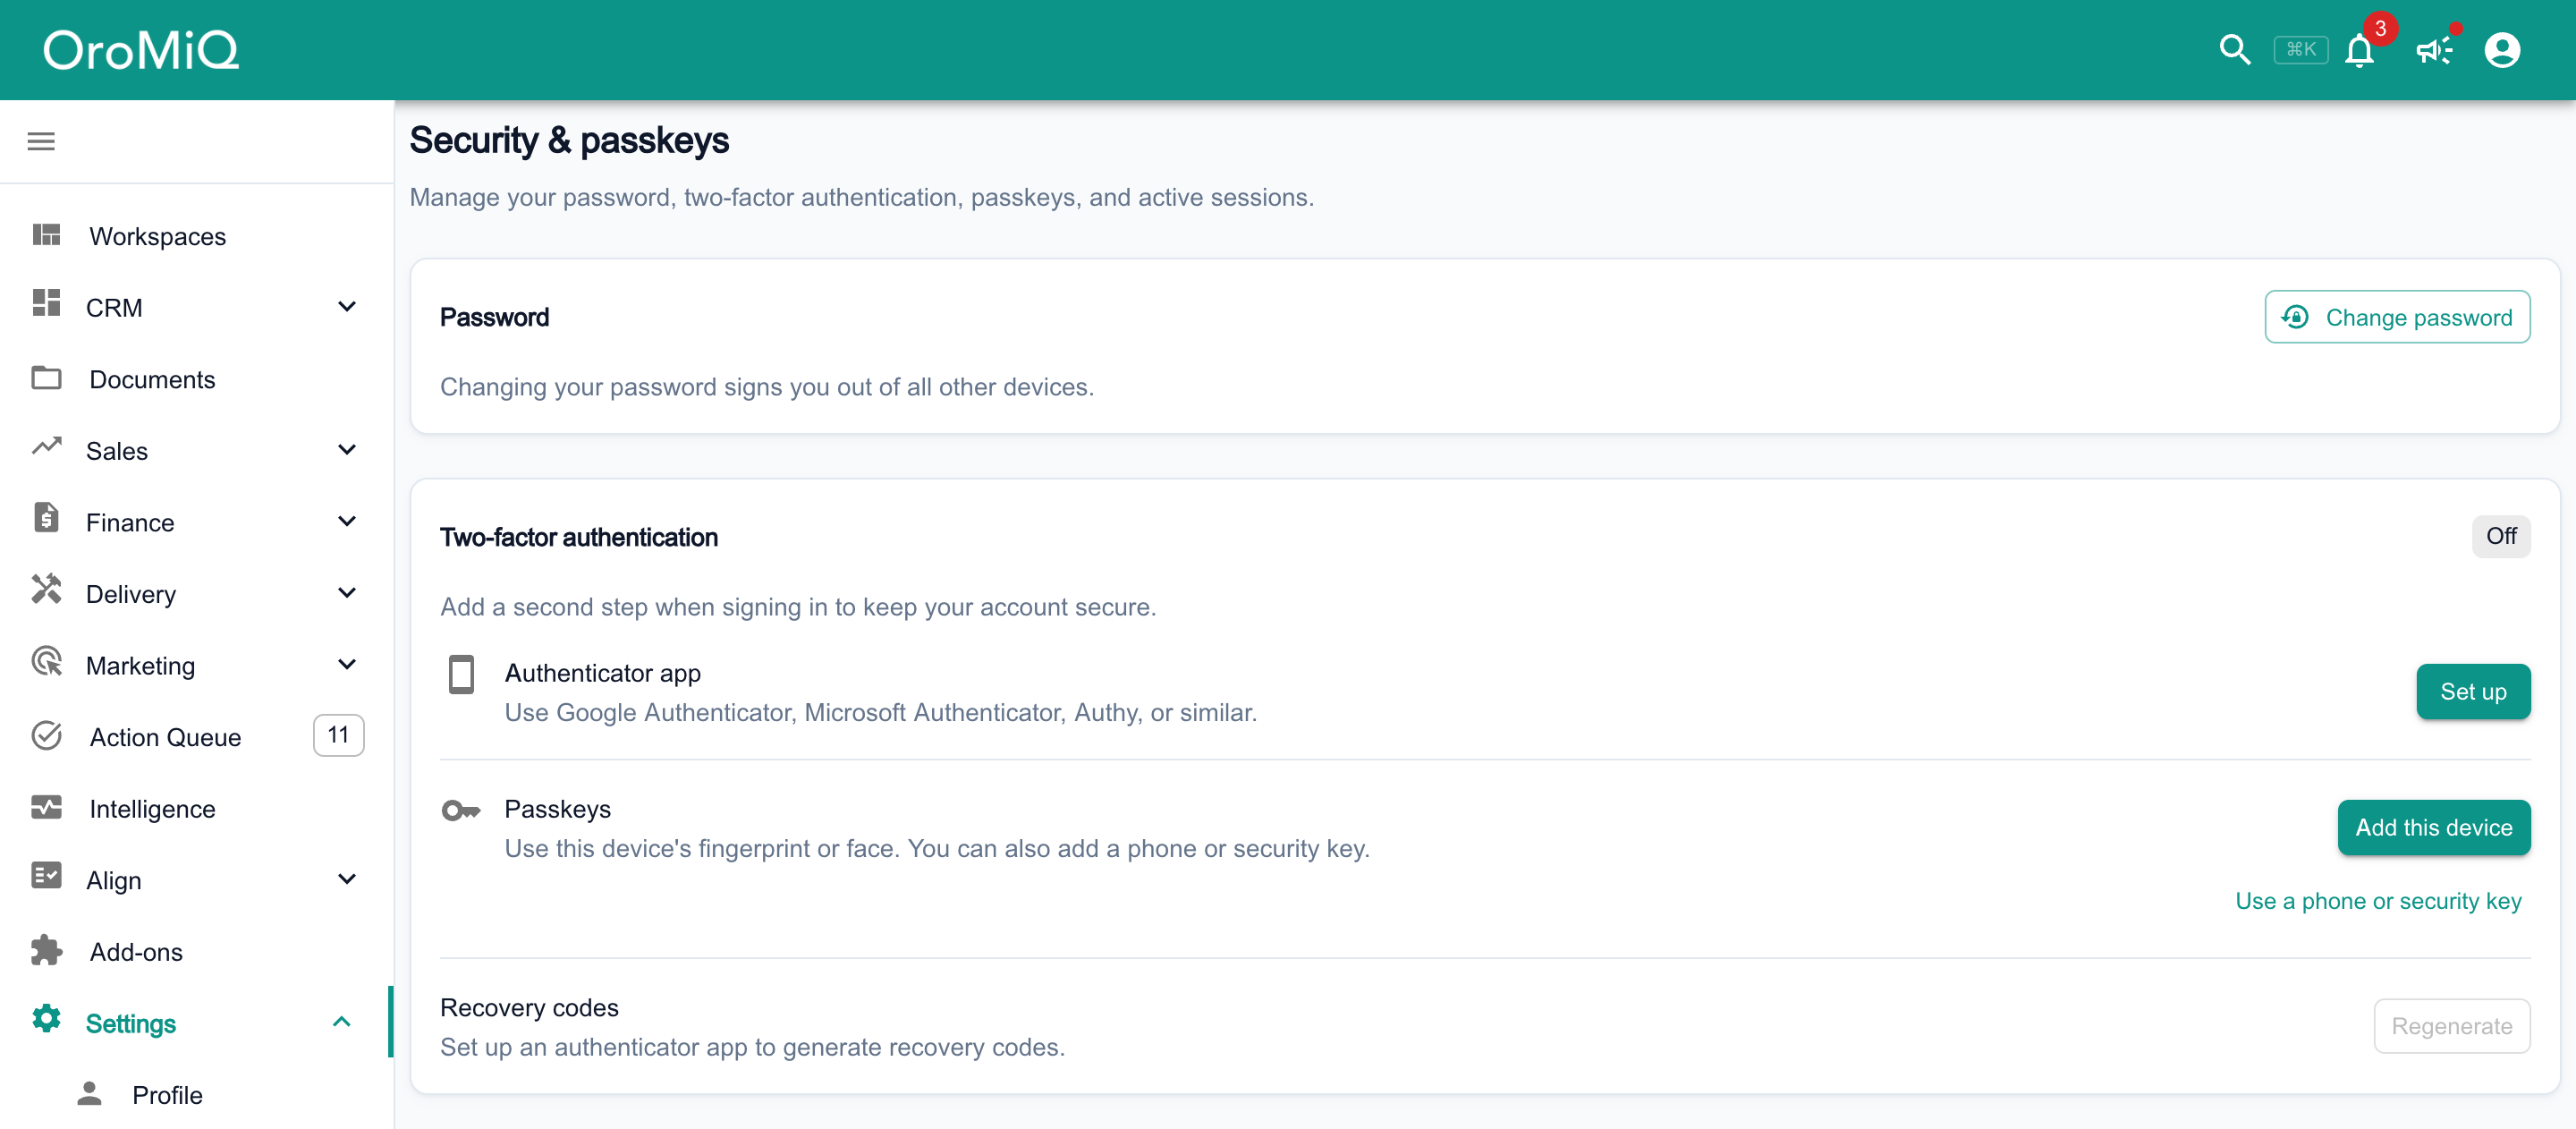
Open Settings → Security. On the Security & passkeys page, set a strong password and turn on two-factor authentication or add a passkey.
Set your workspace details
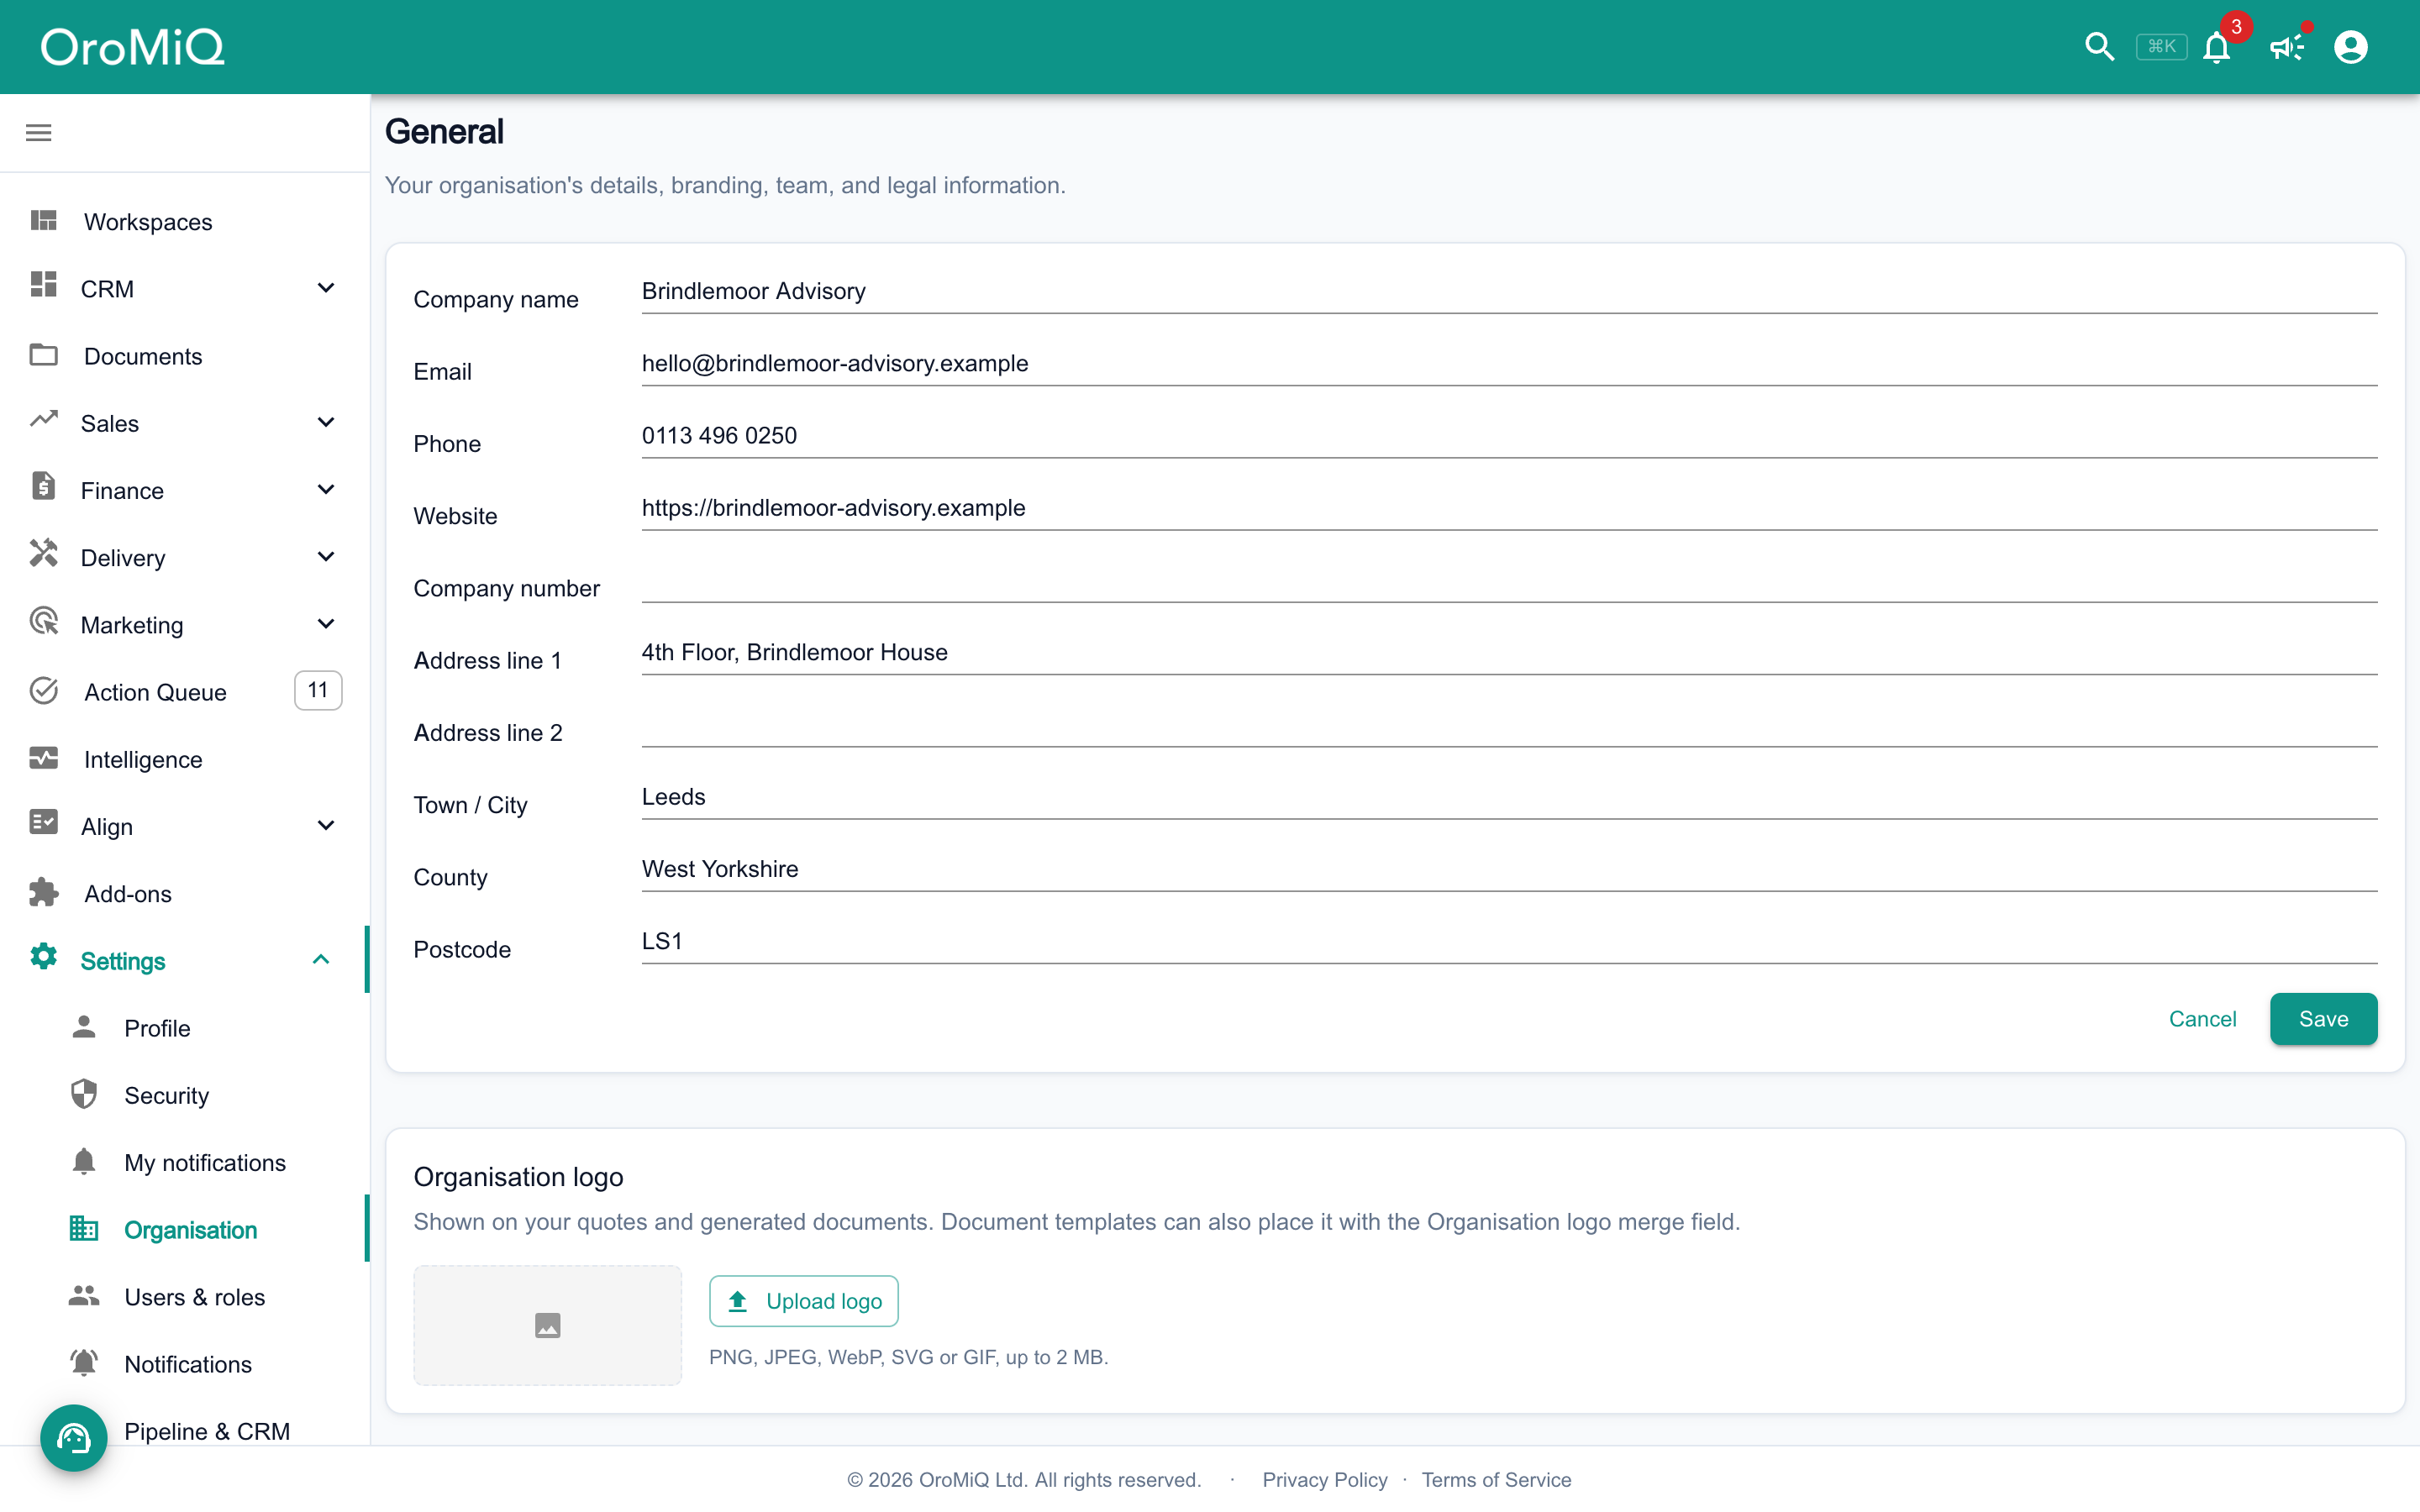
From your avatar menu, choose Settings. This opens your workspace’s General page. Click Edit, fill in your company name, email, phone, website, company number and address, then click Save.
Use Upload logo to add your company logo. It appears on the quotes and documents OroMiQ generates for you.
Open Team & roles
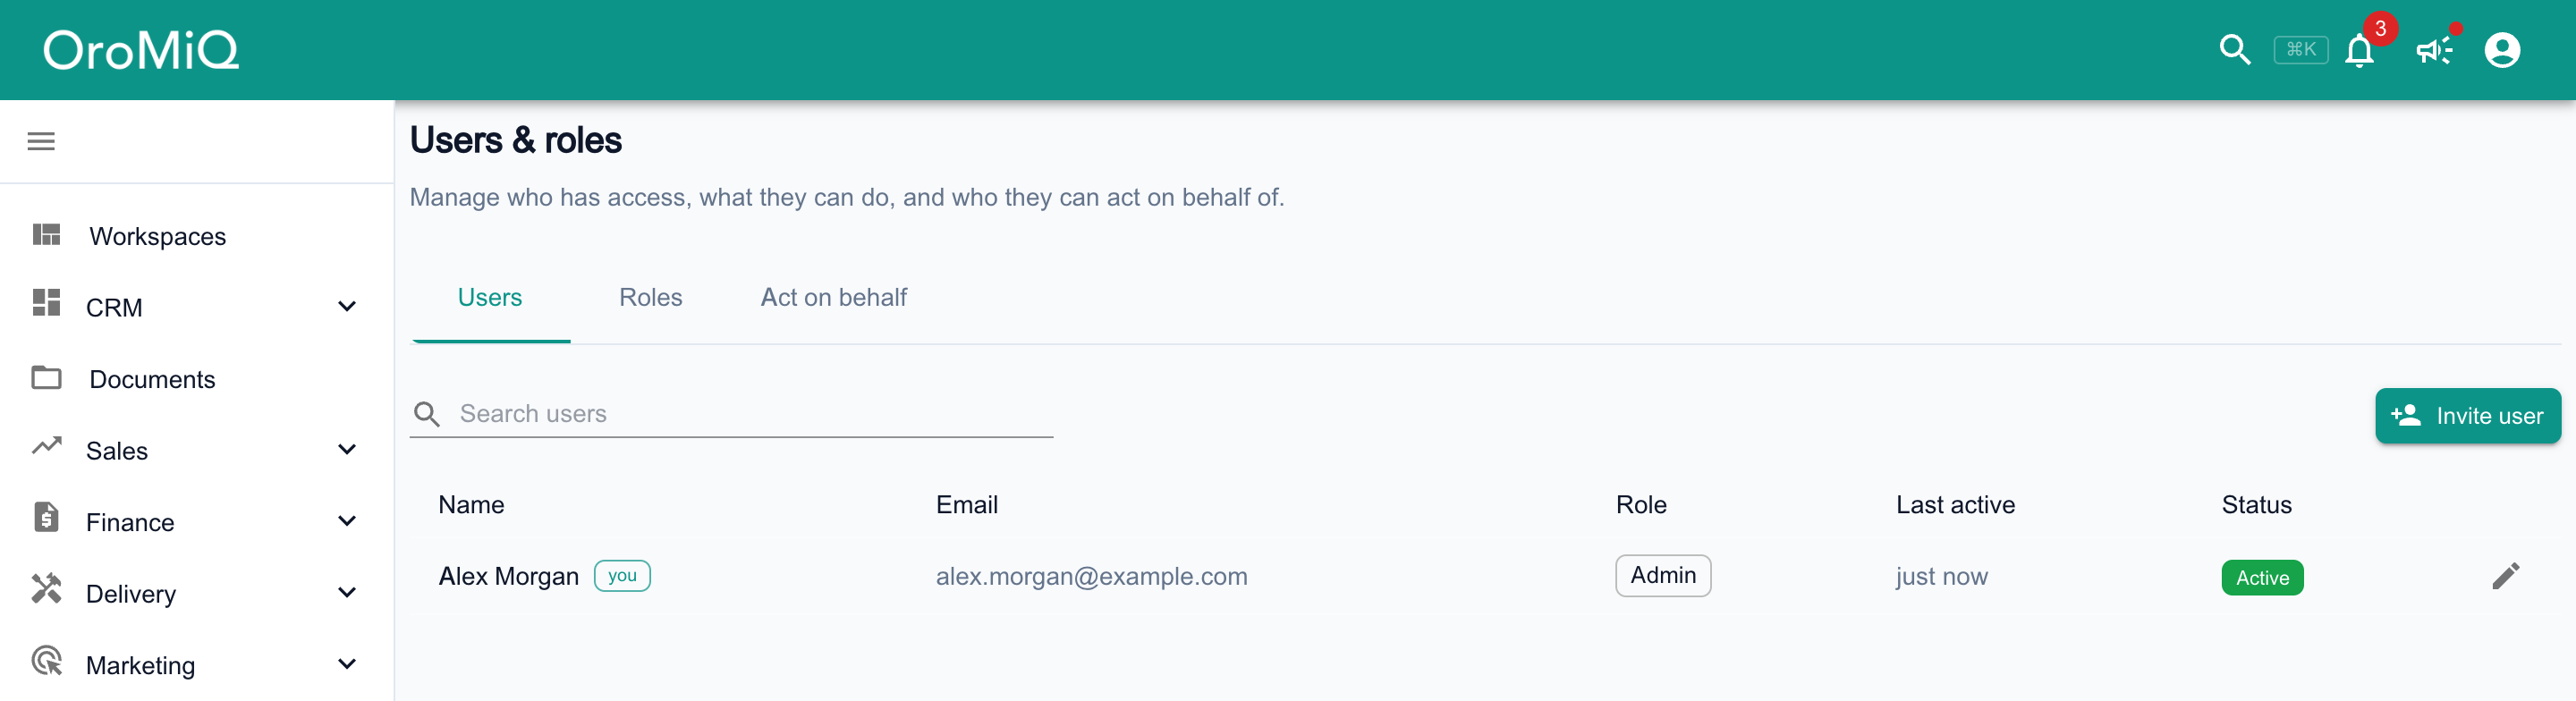
In Settings, open Team & roles. It has three tabs: Team members, Roles and Act on behalf. The Team members tab lists everyone who can sign in, along with their role and status.
Invite a team member
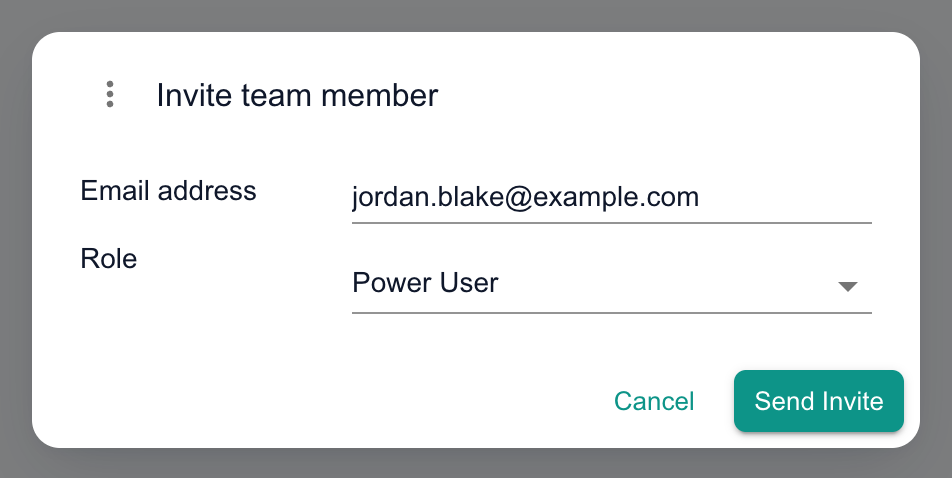
Click Invite team member. Enter the person’s Email address, choose a Role, and click Send Invite.
They receive an email with a link to set their name and password. The link expires after 7 days. Until they accept, the Team members tab shows a count of pending invitations.
Note
Tip
Choose the right role
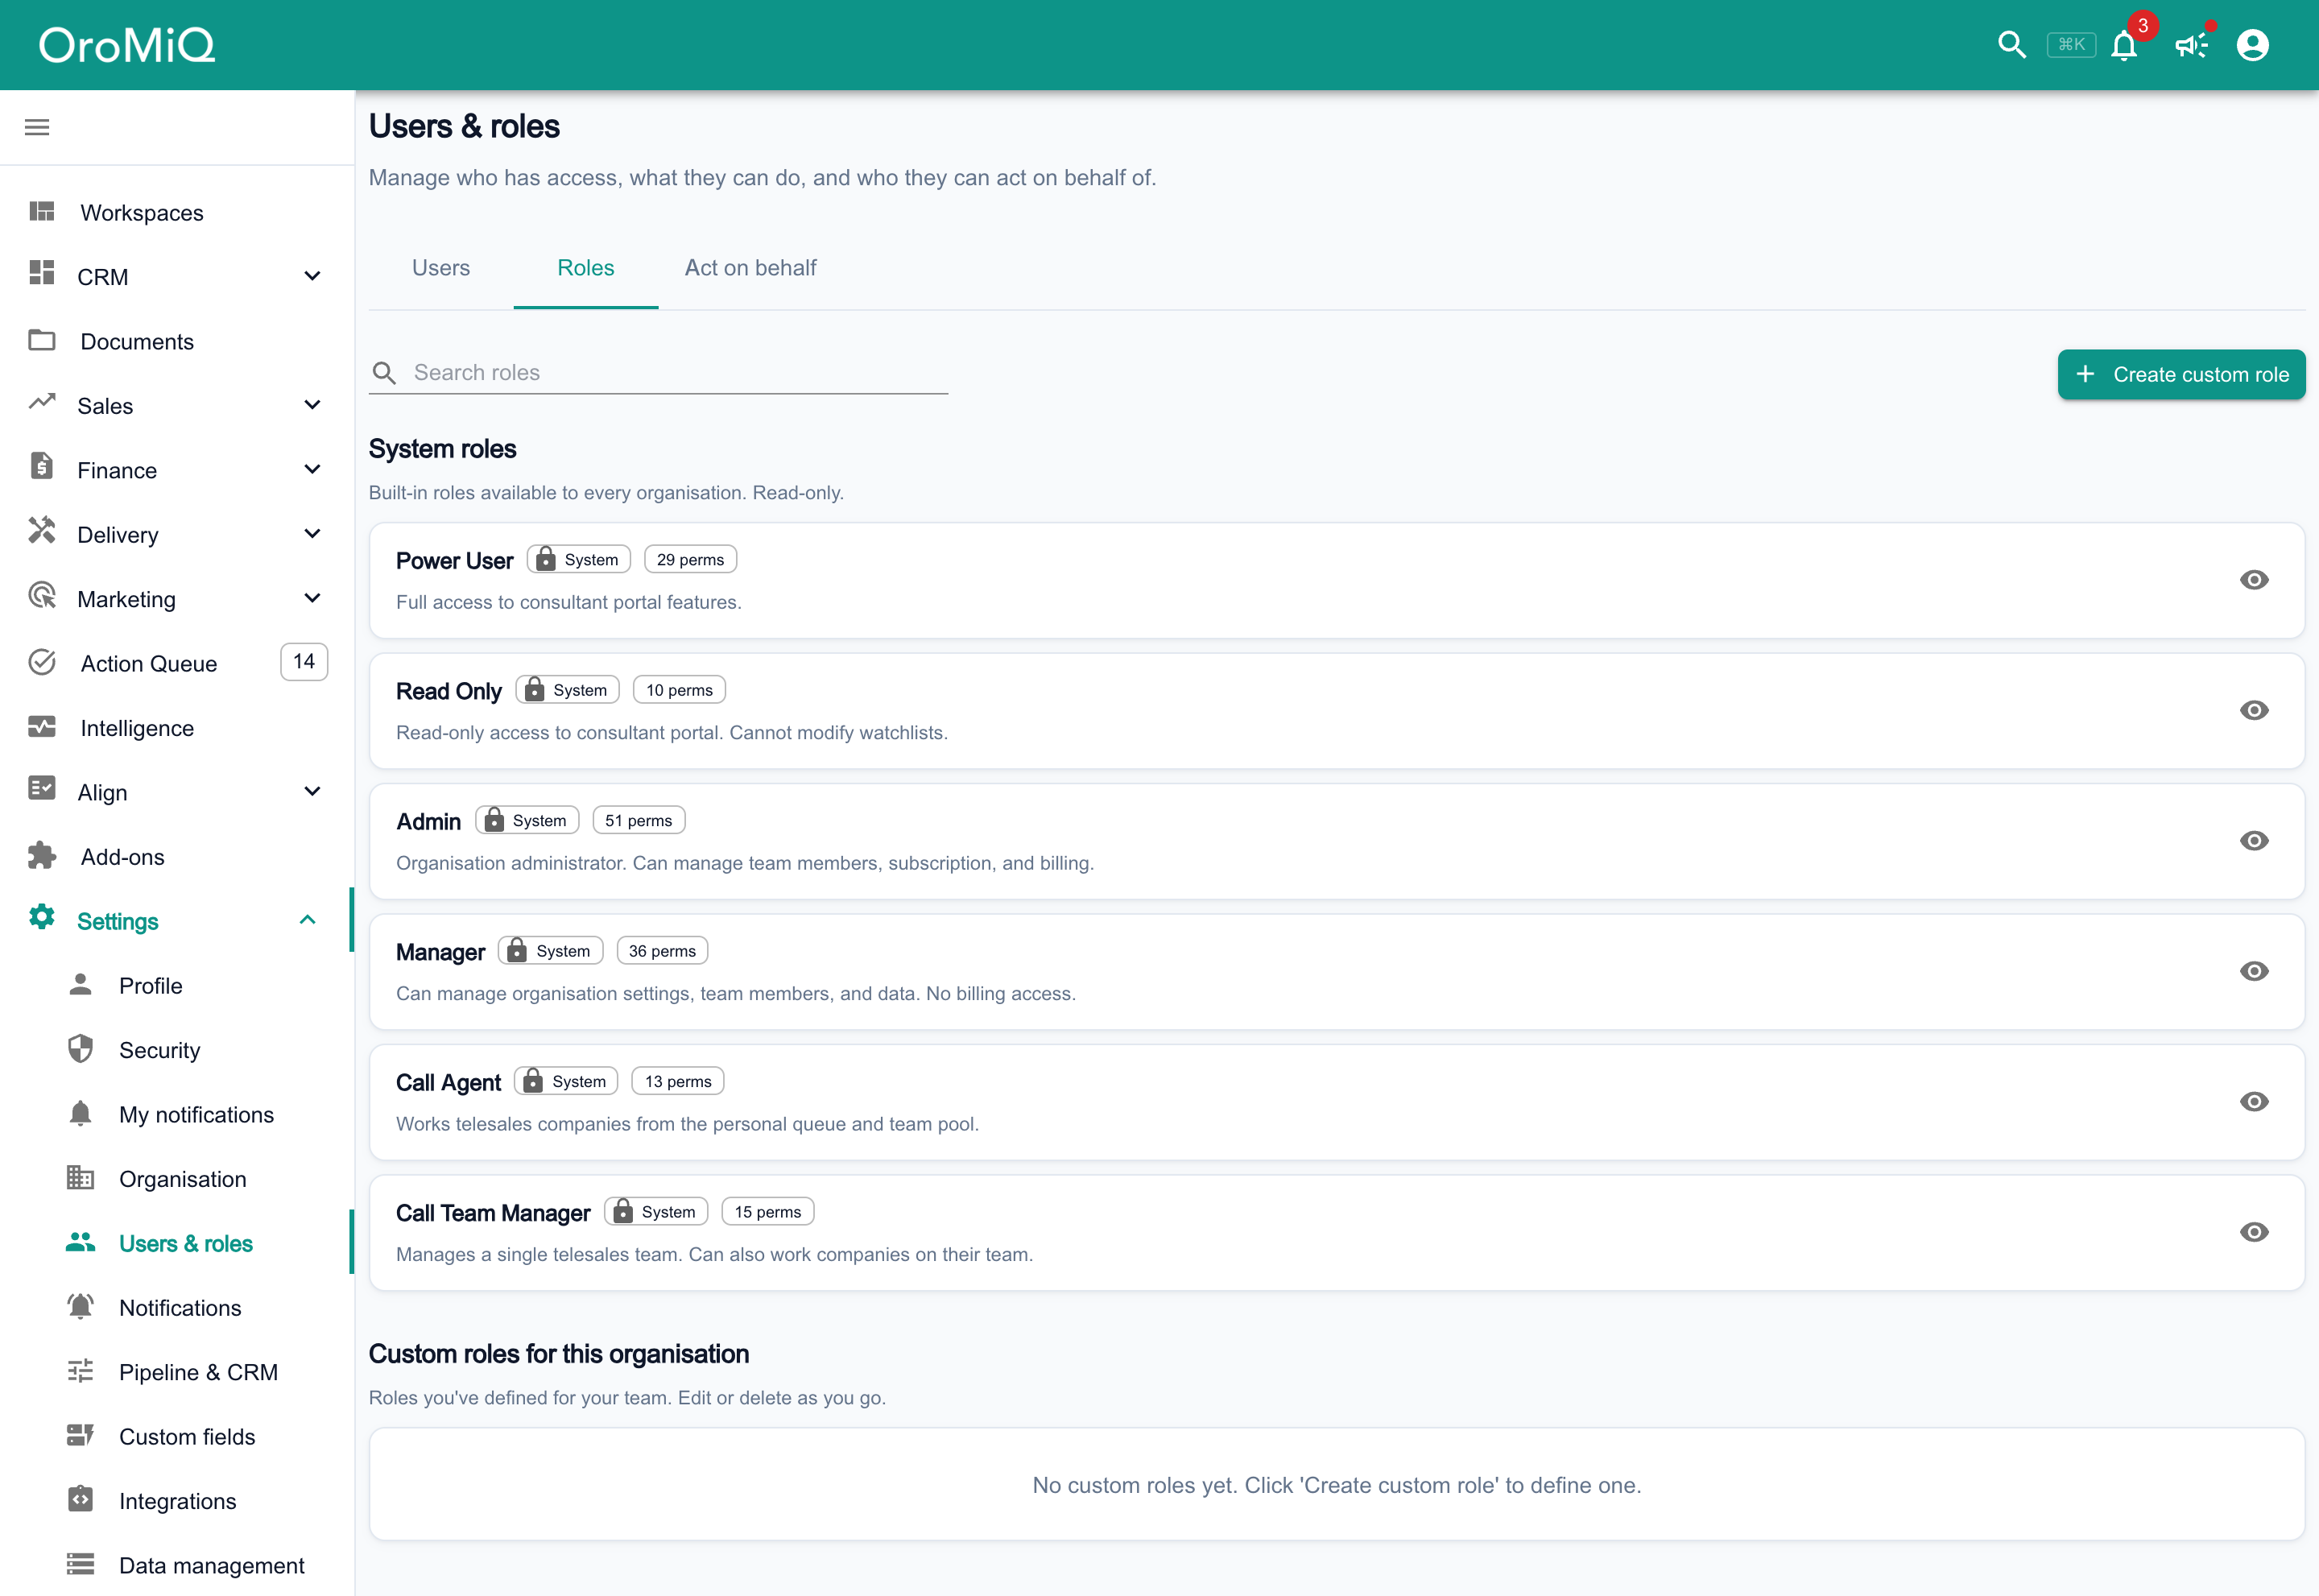
A role decides what a person can see and do. The Roles tab lists the built-in roles:
- Admin: everything, including billing, add-ons, sequences and templates.
- Manager: settings, people and data, including pipelines, custom fields, templates and data layers, but not billing or creating sequences.
- Power User: the day-to-day work of the CRM.
- Read Only: can look but not change.
- Call Team Manager and Call Agent: for teams using the Telesales Pack.
If none of them fit, click Create custom role and pick exactly the permissions you want.
Tip
Group people into teams (optional)
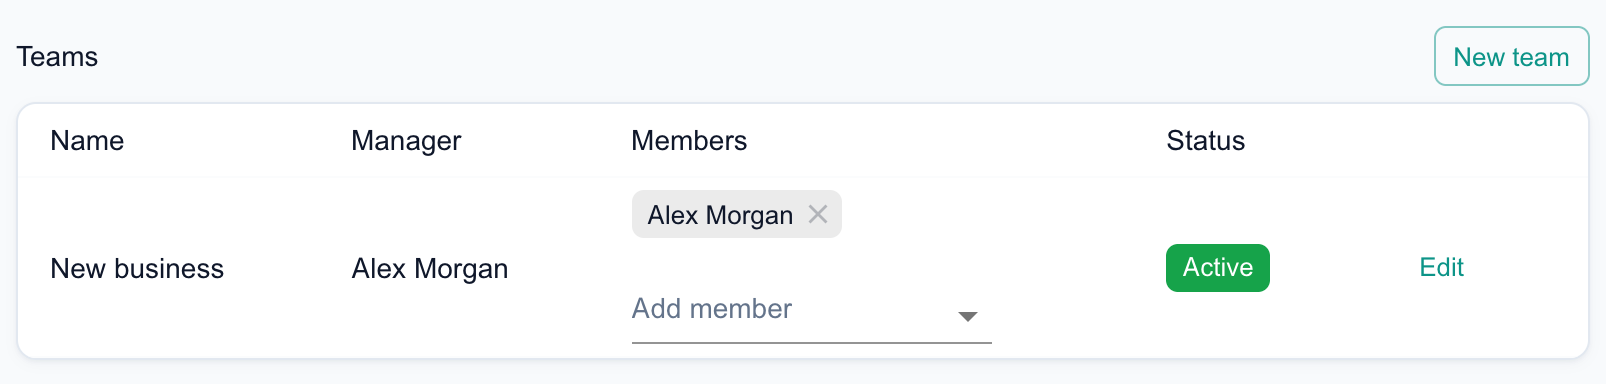
As an Admin, open your workspace’s General page, find the Teams card and click New team. Enter a Team name, choose a Manager and click Create team. Then use Add member in the team’s row to add people.
Teams are part of the core CRM, so no add-on is needed. Click Edit to rename a team, change its manager or set its status.
Covering for a colleague
What next
Cannot find what you need? Browse the Help Centre or submit a support ticket.