Getting started
Get to know OroMiQ
The shape of OroMiQ
Start in Views
When you sign in, you land in Views. Your first tab is a dashboard called Home. It starts with three widgets: Pipeline summary, Action Queue and Recent activity, and you can add more, such as the 90-day cash-in forecast and What to push shown here.
Each tab is a saved list, pipeline, dashboard or report. Related tabs can sit together in a group, such as Sales or Finance; click a group’s name to show or hide its tabs. Click the + at the end of the tab strip to add your own. To come back here, click Views at the top of the sidebar or the OroMiQ logo.
Use the sidebar to move around
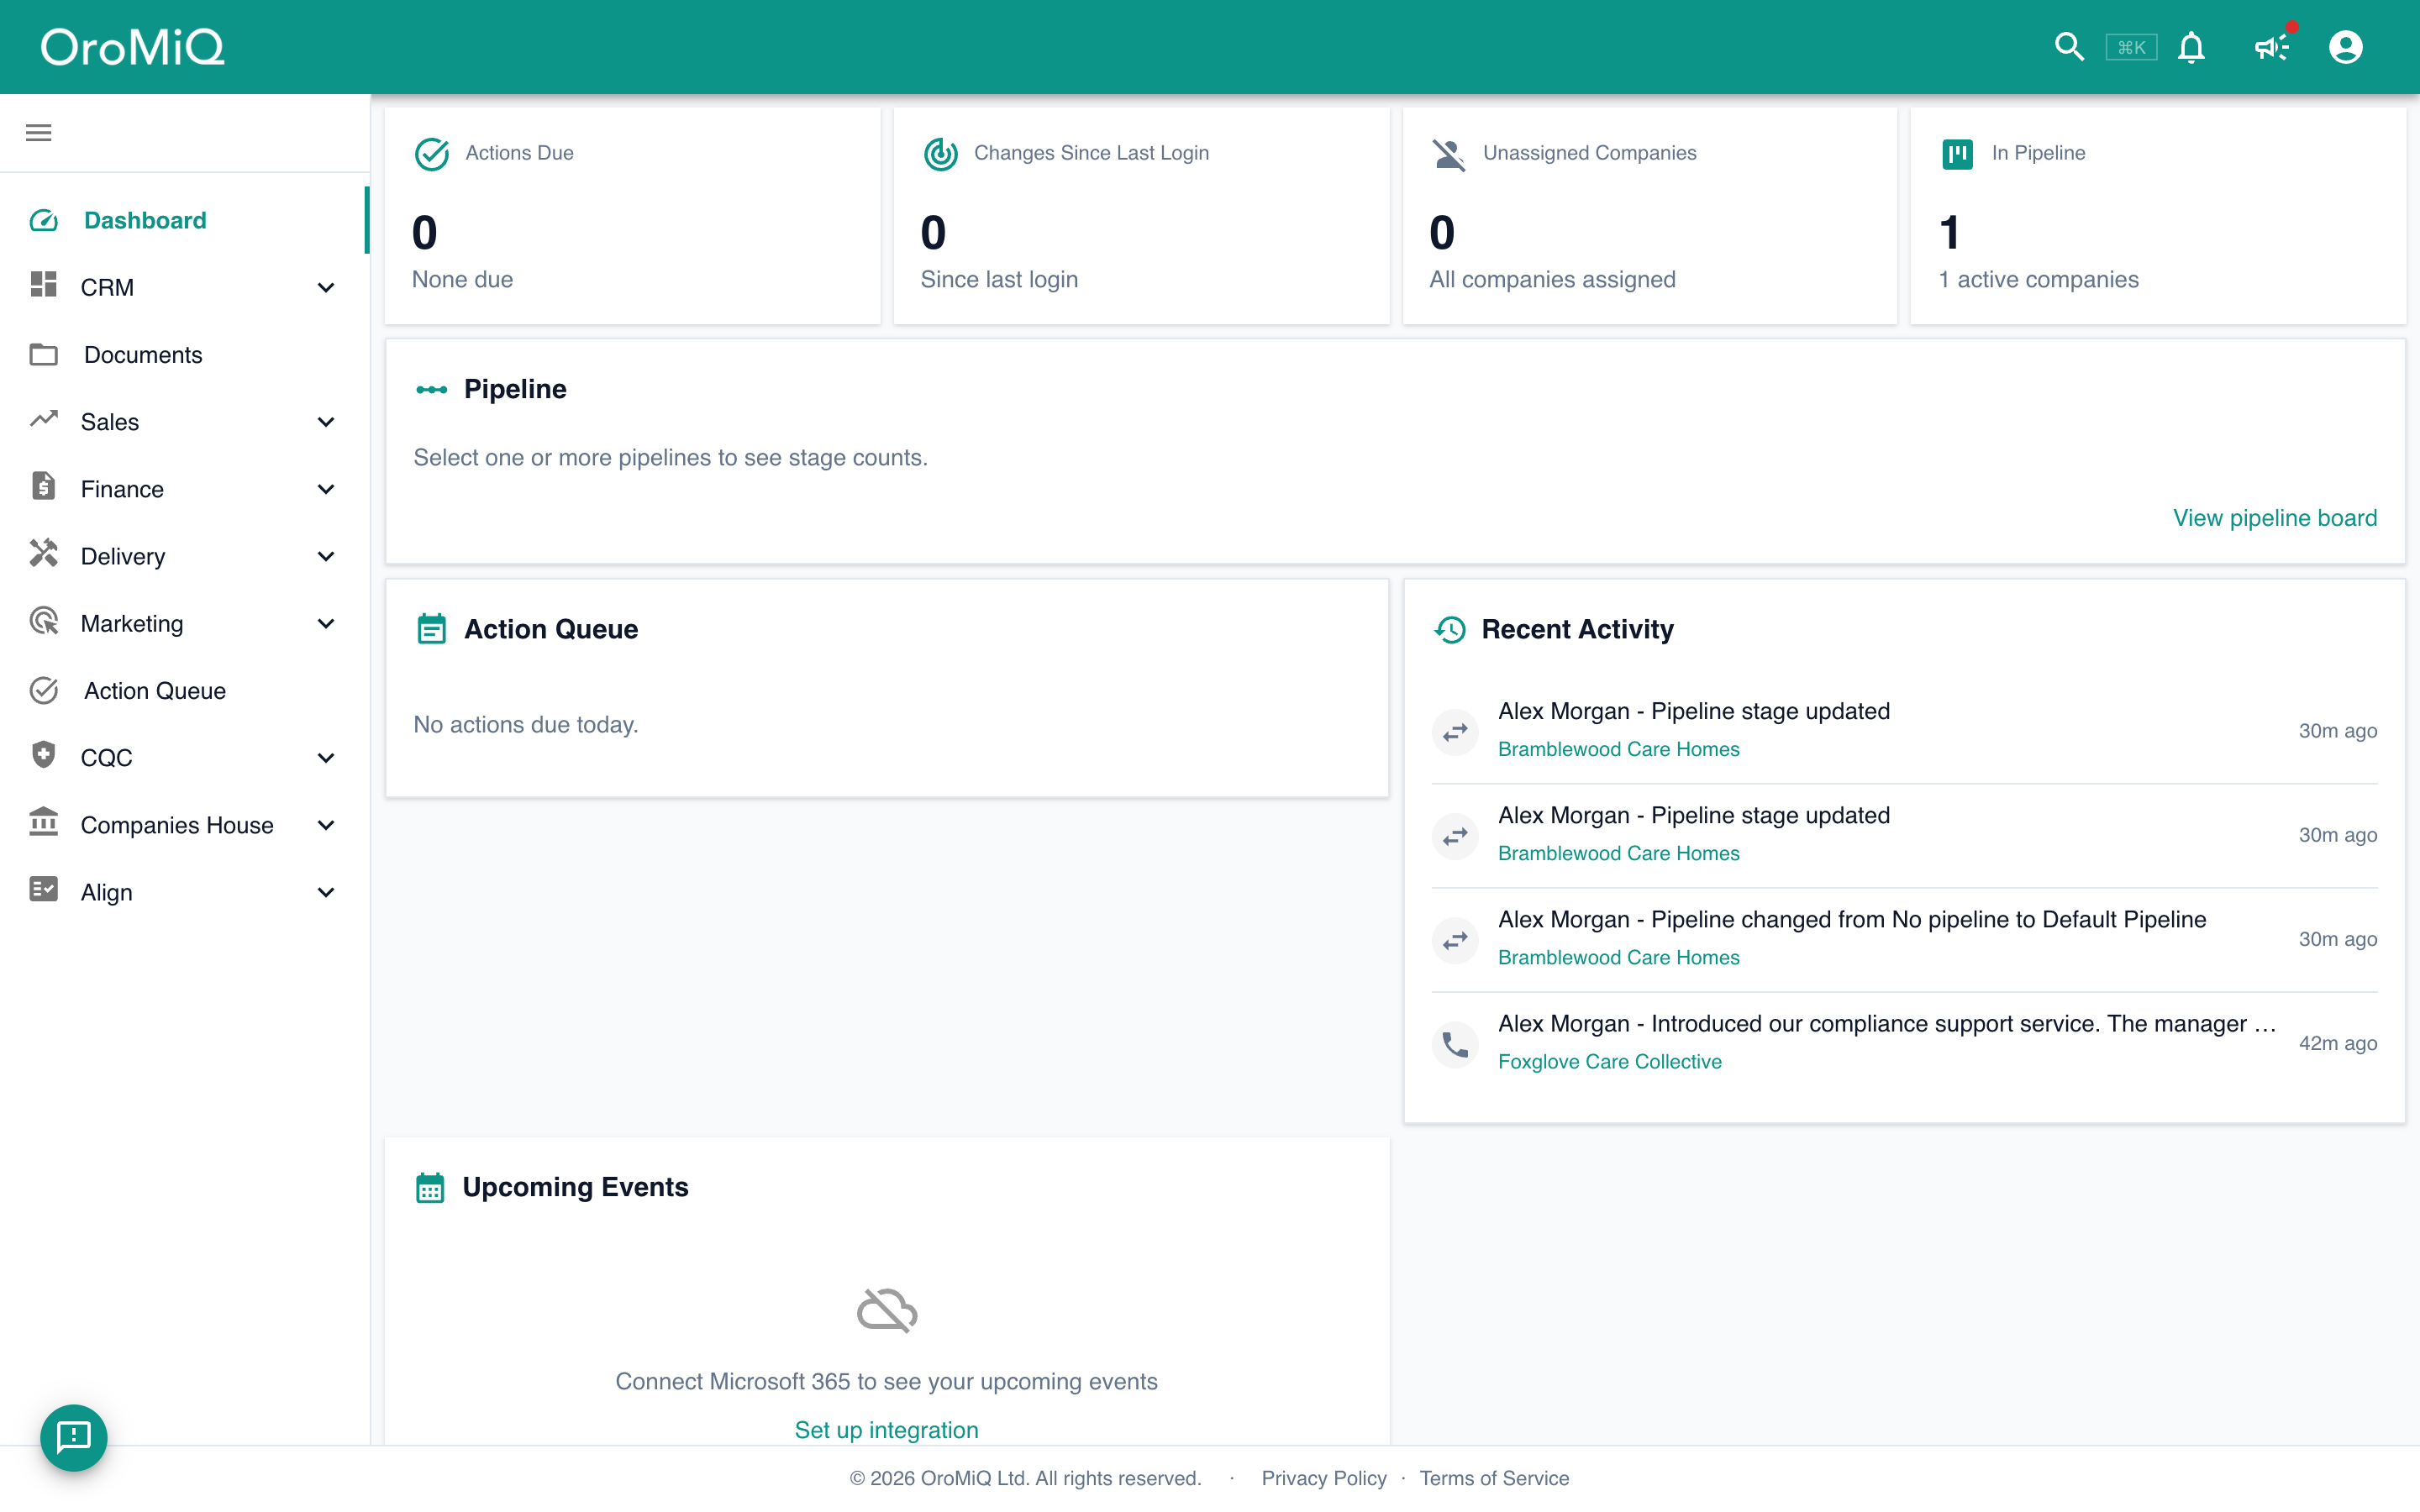
The left sidebar is your main navigation. From the top:
- CRM: Companies, Contacts, Activity, Email, Calendar and Bulk edit
- Documents
- Sales: Pipeline, Opportunities, Meetings and Telesales
- Finance: Quotes, Invoices, Contracts, Products, Expenses and Time
- Delivery: Outreach, Playbooks, Engagements, Projects and Rooms
- Marketing: Campaigns, Sequences, Postal Outbox and Web forms
- Action Queue, which opens your to-do list in a drawer on the right, with a badge showing what is due
- Intelligence
- Align: Assessments, Reports, Frameworks and Team
- Add-ons and Settings
Click a group to expand it, then choose a page. A padlock next to an item means it is not part of your plan yet.
Note
Search anything with the command palette
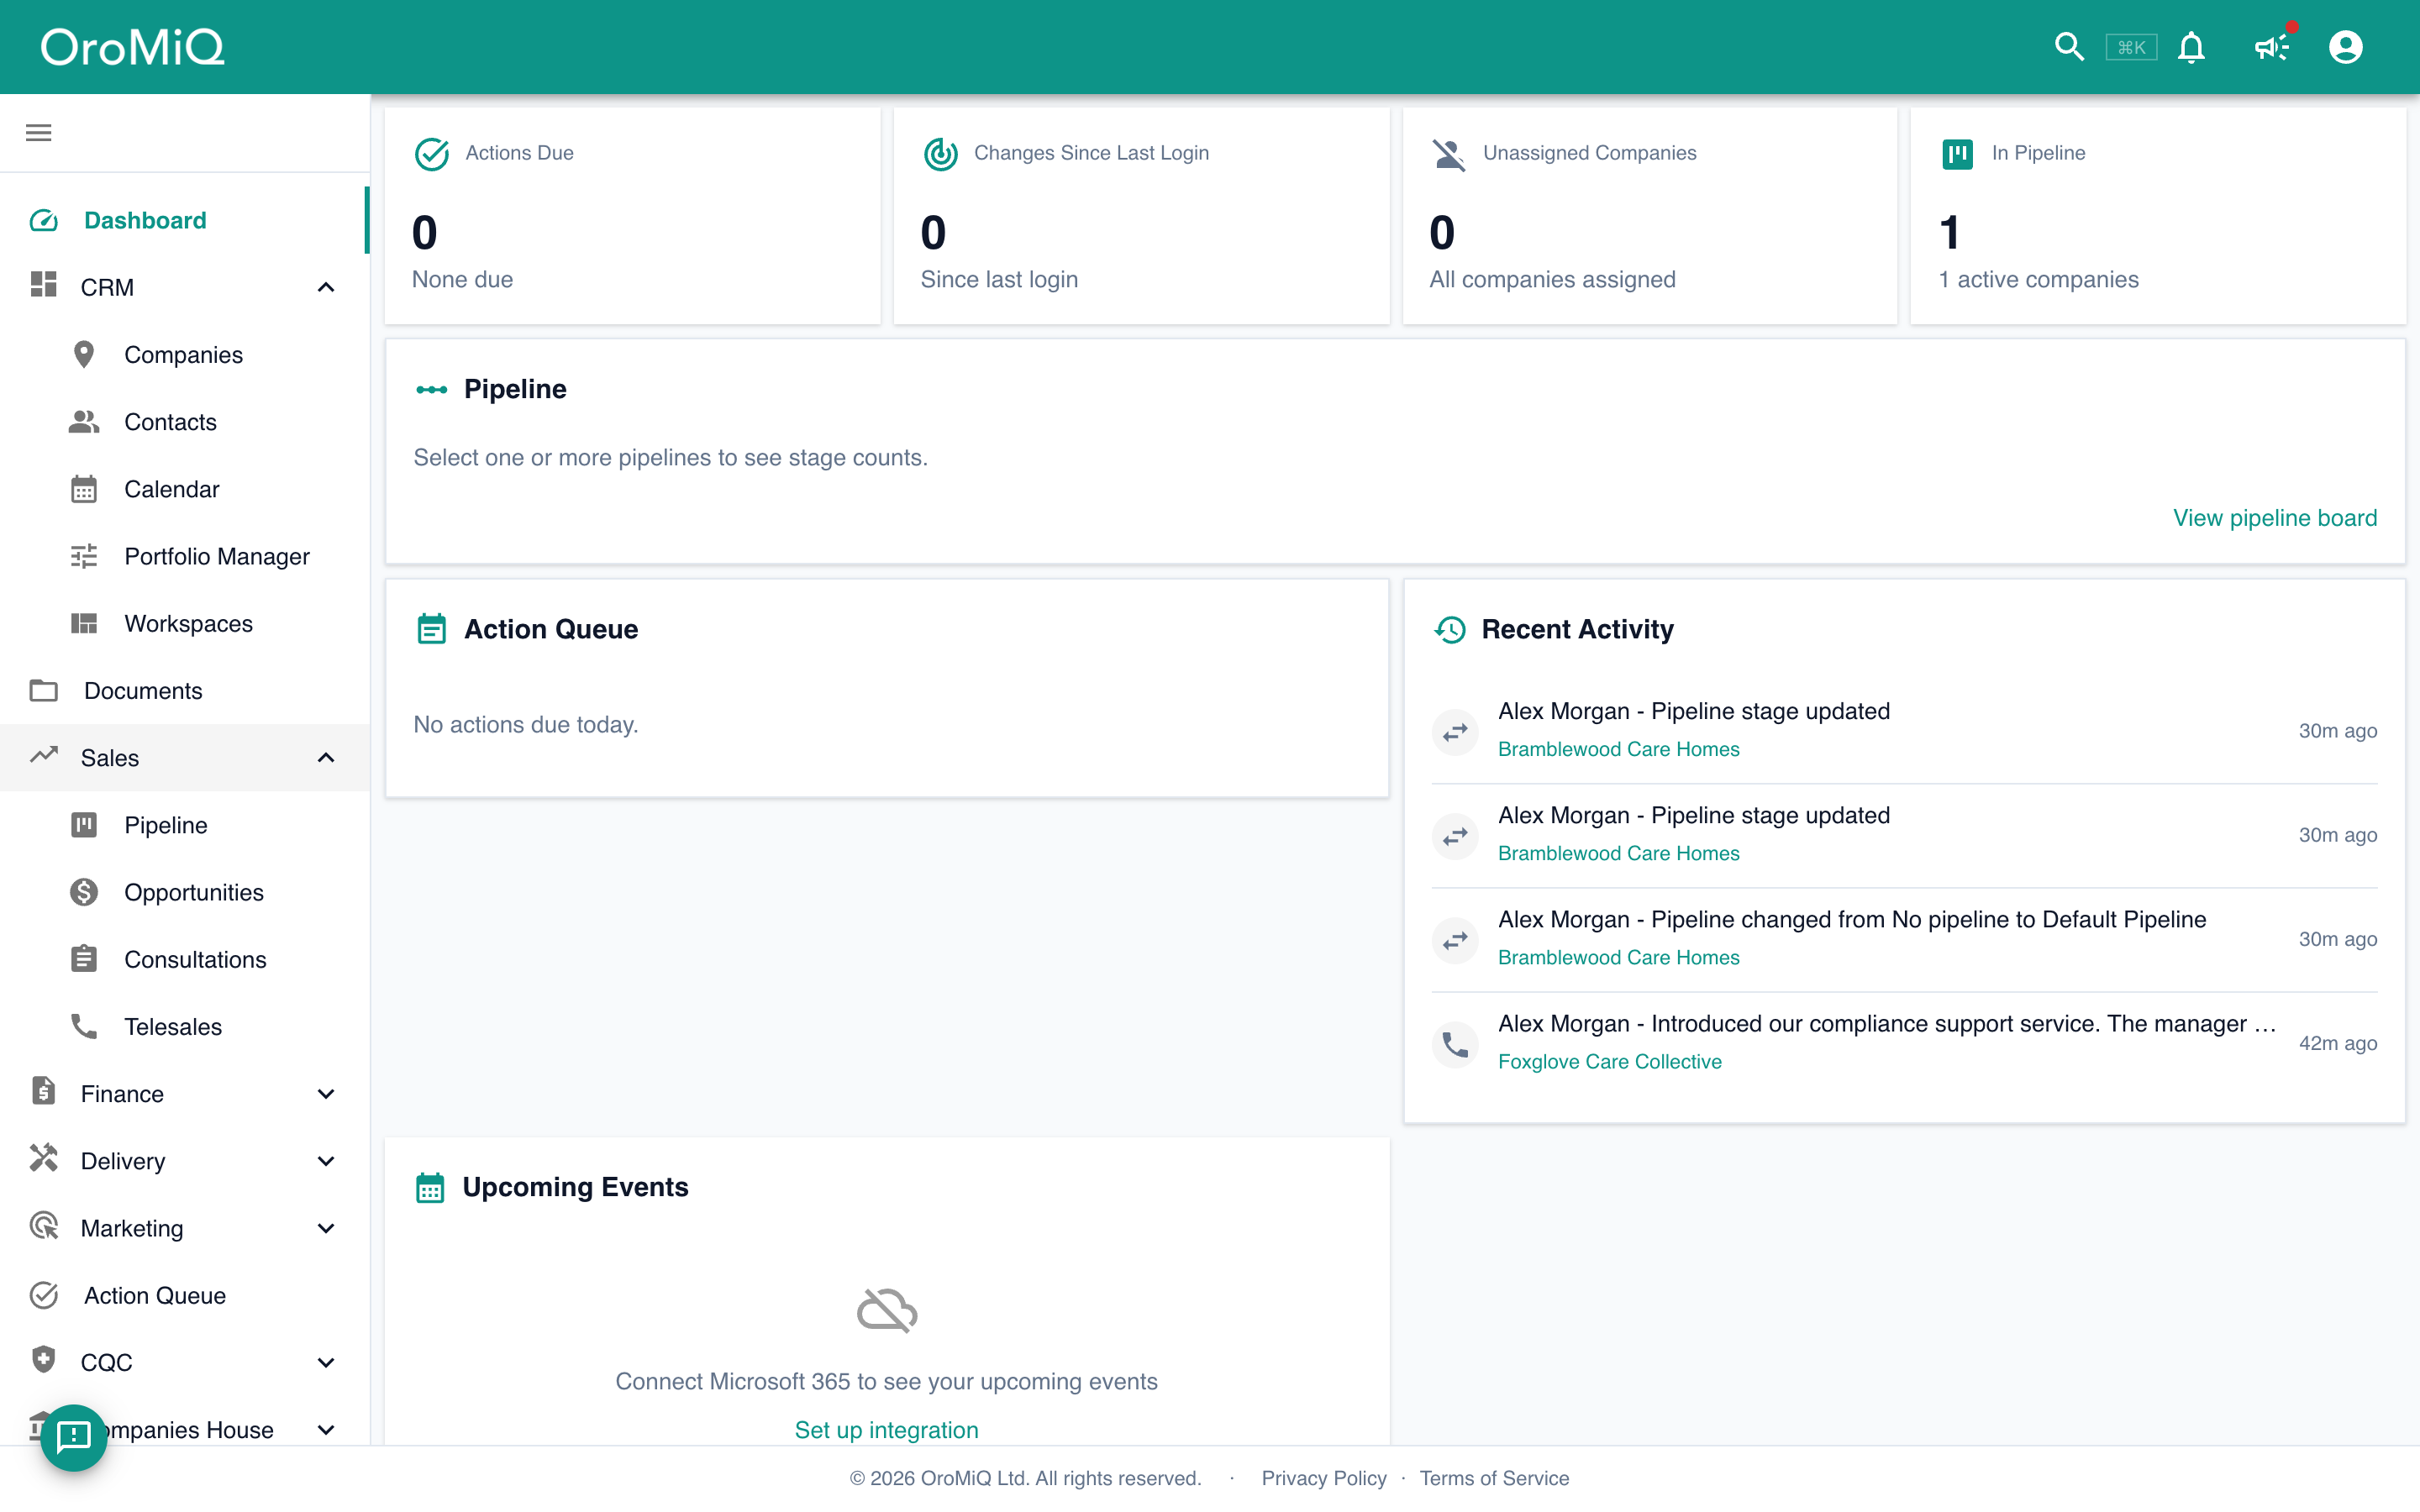
Click the search icon in the top bar (or press ⌘ K on a Mac, Ctrl K on Windows) to open the command palette.
Start typing to jump to a page, a setting, a company or a person. Results are grouped under Recent, Pages, Settings, Companies, People and Actions. Companies and people show once you have typed two characters. Press Esc to close it.
Find your profile and settings
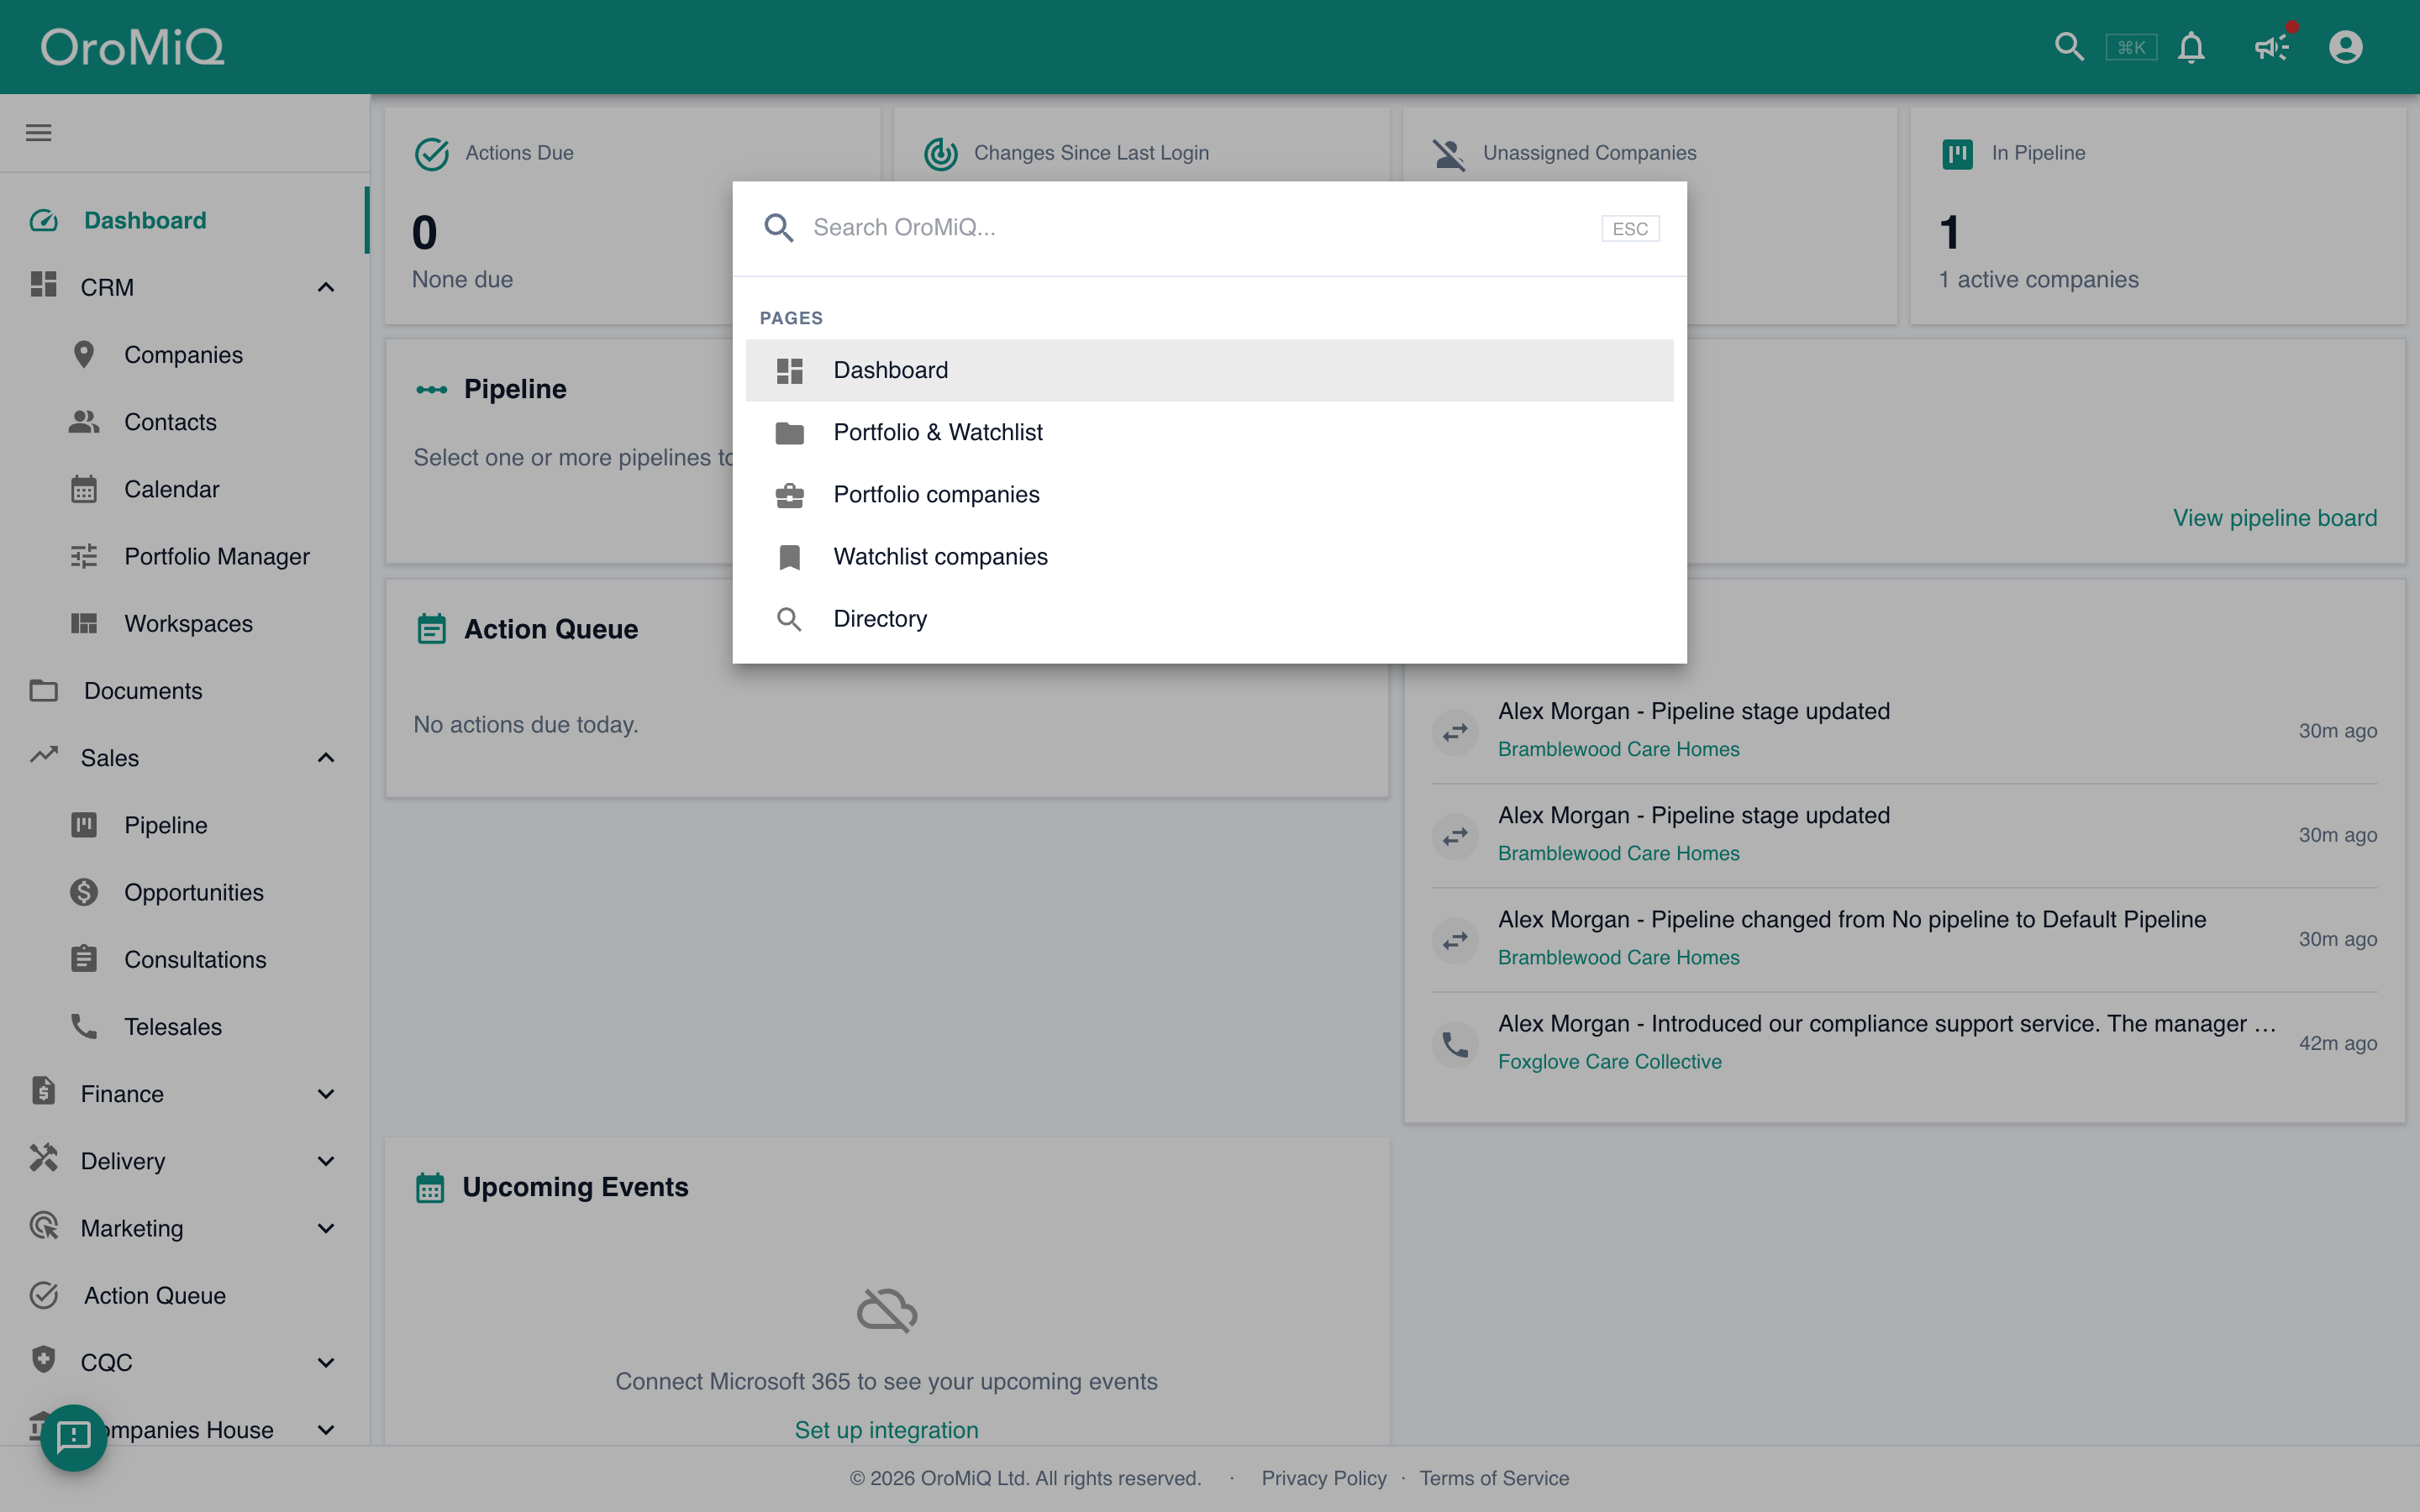
Your avatar sits in the top-right corner. Click it to open your menu: My account (your profile), Settings (your workspace), Change Password and Logout.
Every settings page, including Security for your password, two-factor sign-in and passkeys, is also listed under Settings at the bottom of the sidebar. Add-ons sits just above it.
Tip
What next
Cannot find what you need? Browse the Help Centre or submit a support ticket.