Engagements, contracts & e-sign
Send a contract for e-signature
Before you start
A few things need to be in place first:
- the Sales Pack. Without it, Contracts shows a padlock. The Sales Pack includes 5 e-signature envelopes a month, and each contract you send for e-signature uses one. For more, add an E-signature tier of 15, 30, 75 or 150 envelopes a month. An Admin can add both from Settings → Subscription & billing (see pricing),
- a role that can manage the pipeline, such as the built-in Admin, Manager or Power User roles, and
- a desktop or laptop screen, to place signature fields on the document.
Start a contract
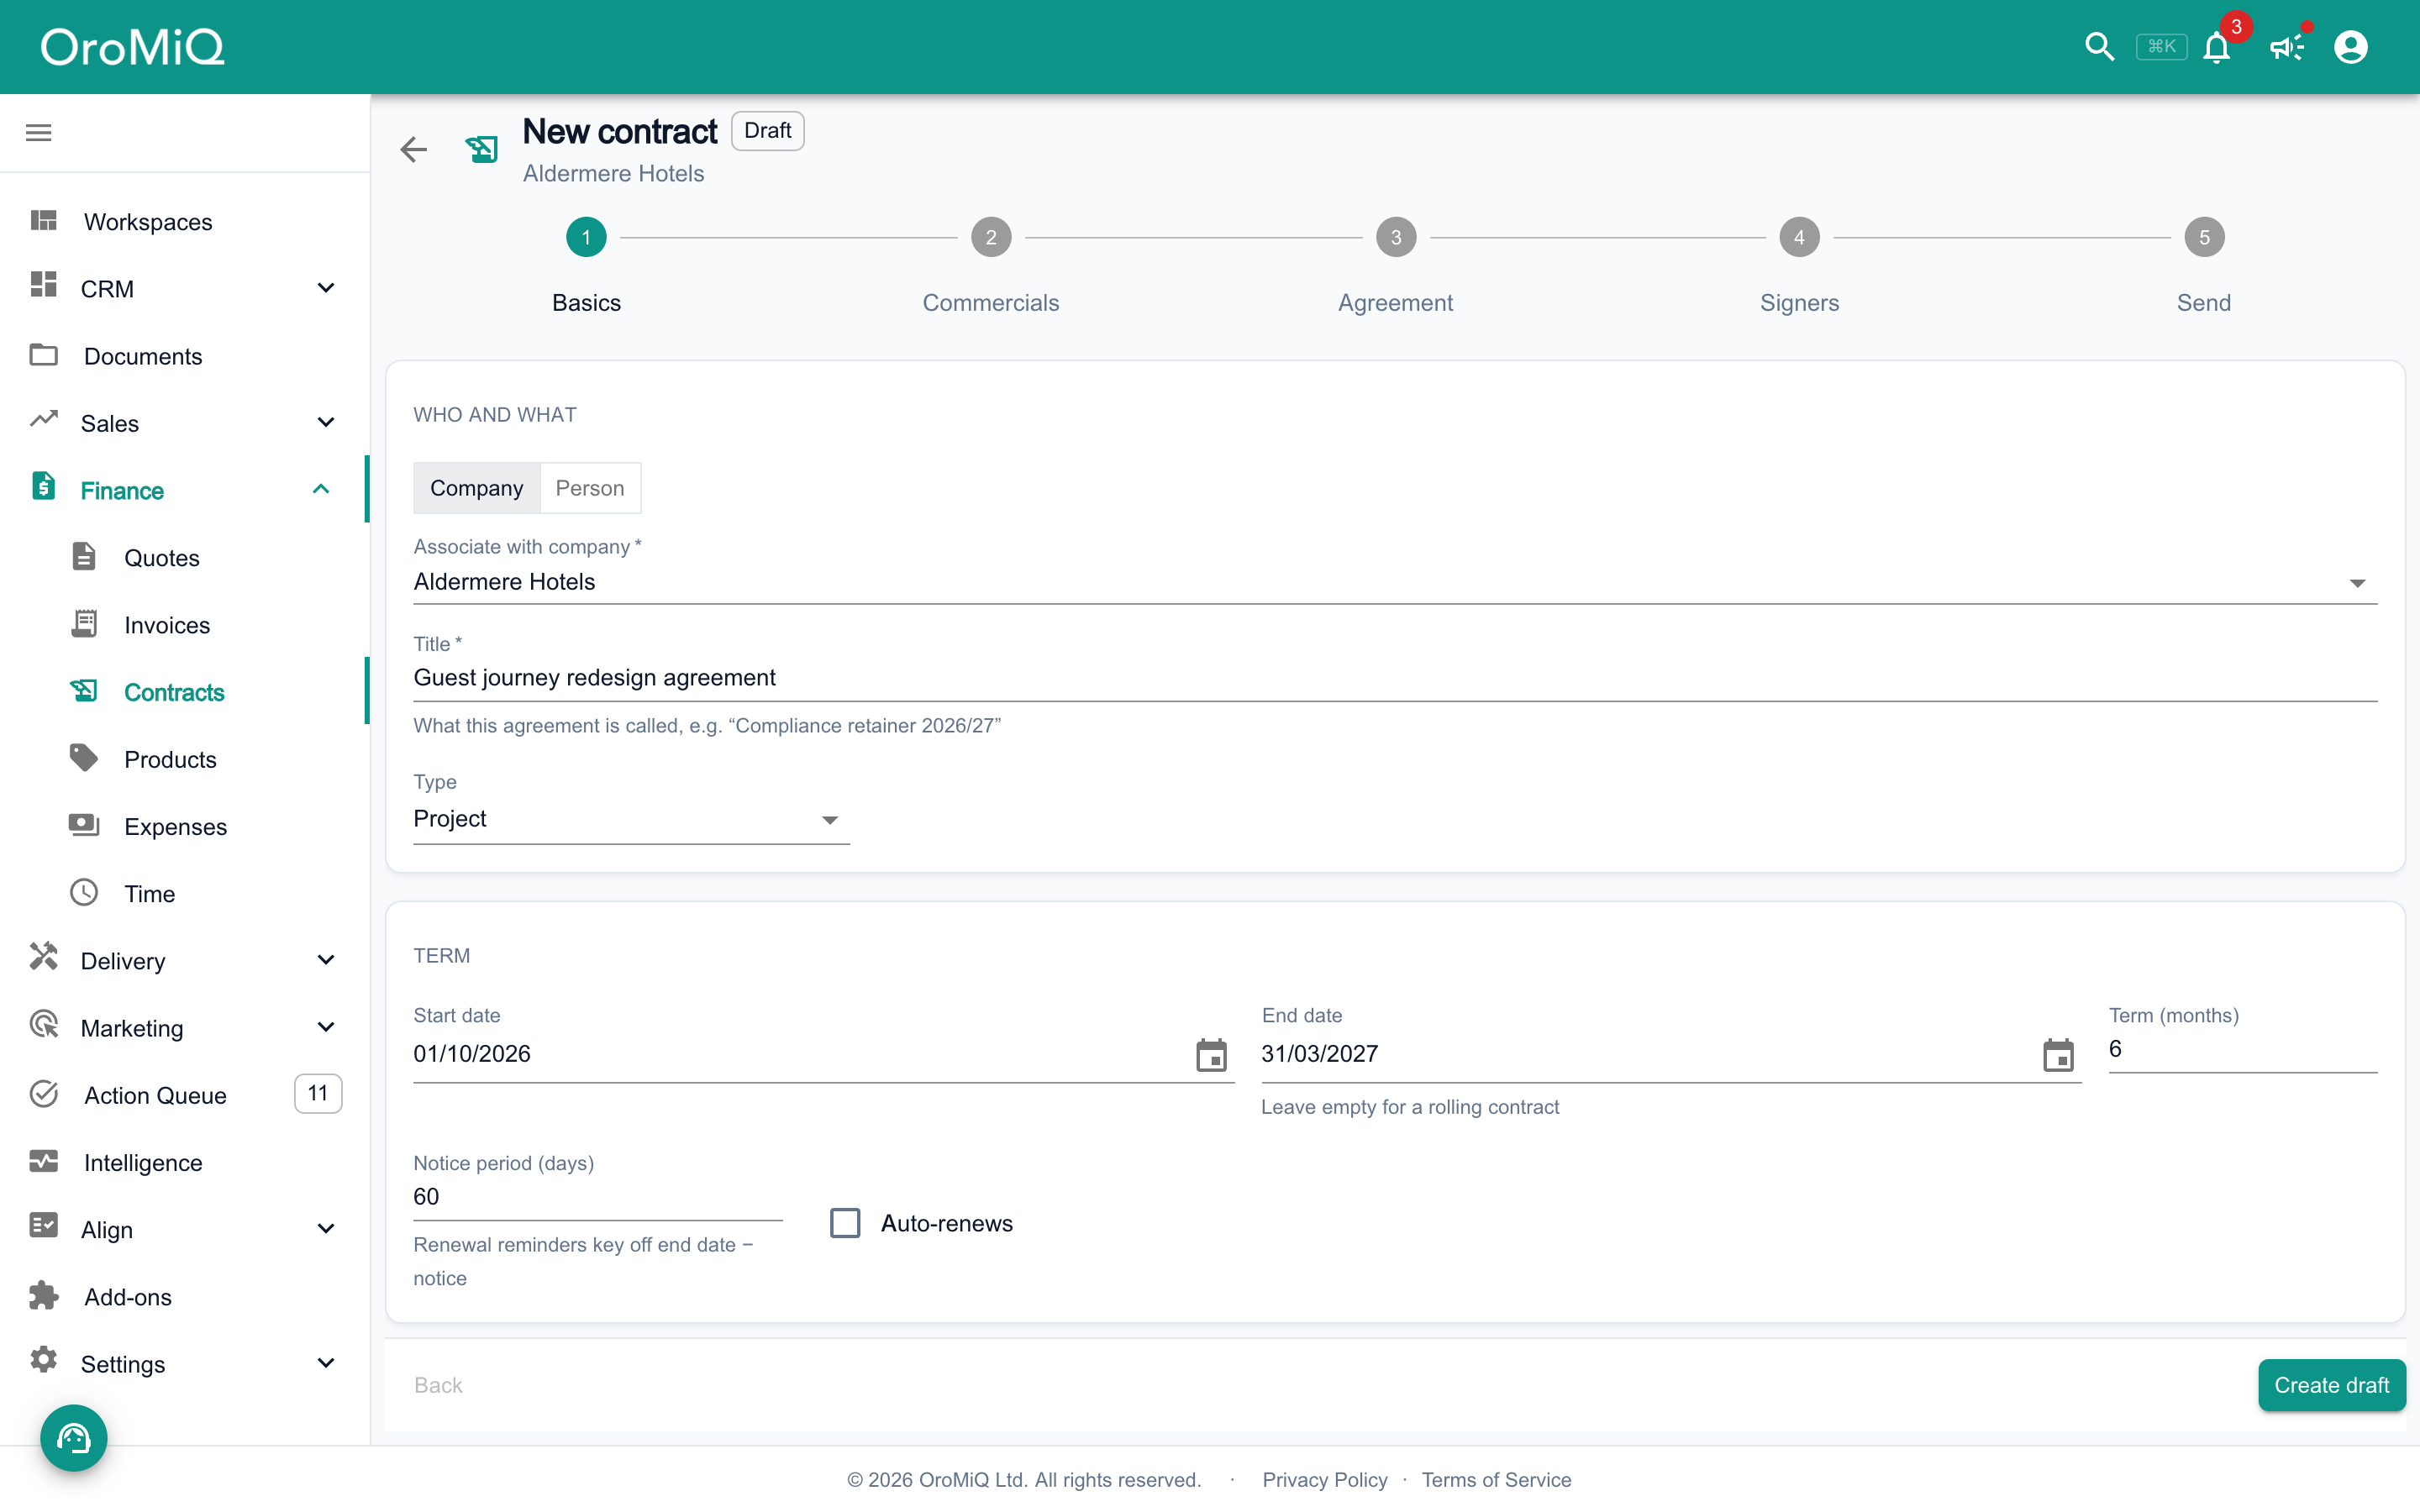
In the sidebar, open Finance then Contracts, and click Add contract. The wizard runs in five steps: Basics, Commercials, Agreement, Signers and Send.
On Basics, choose Company or Person and search for who the contract is with. Add a Title and Type, set the Start date, and fill in their legal details. Click Create draft. From here, each Next saves your progress.
Tip
Add the commercials
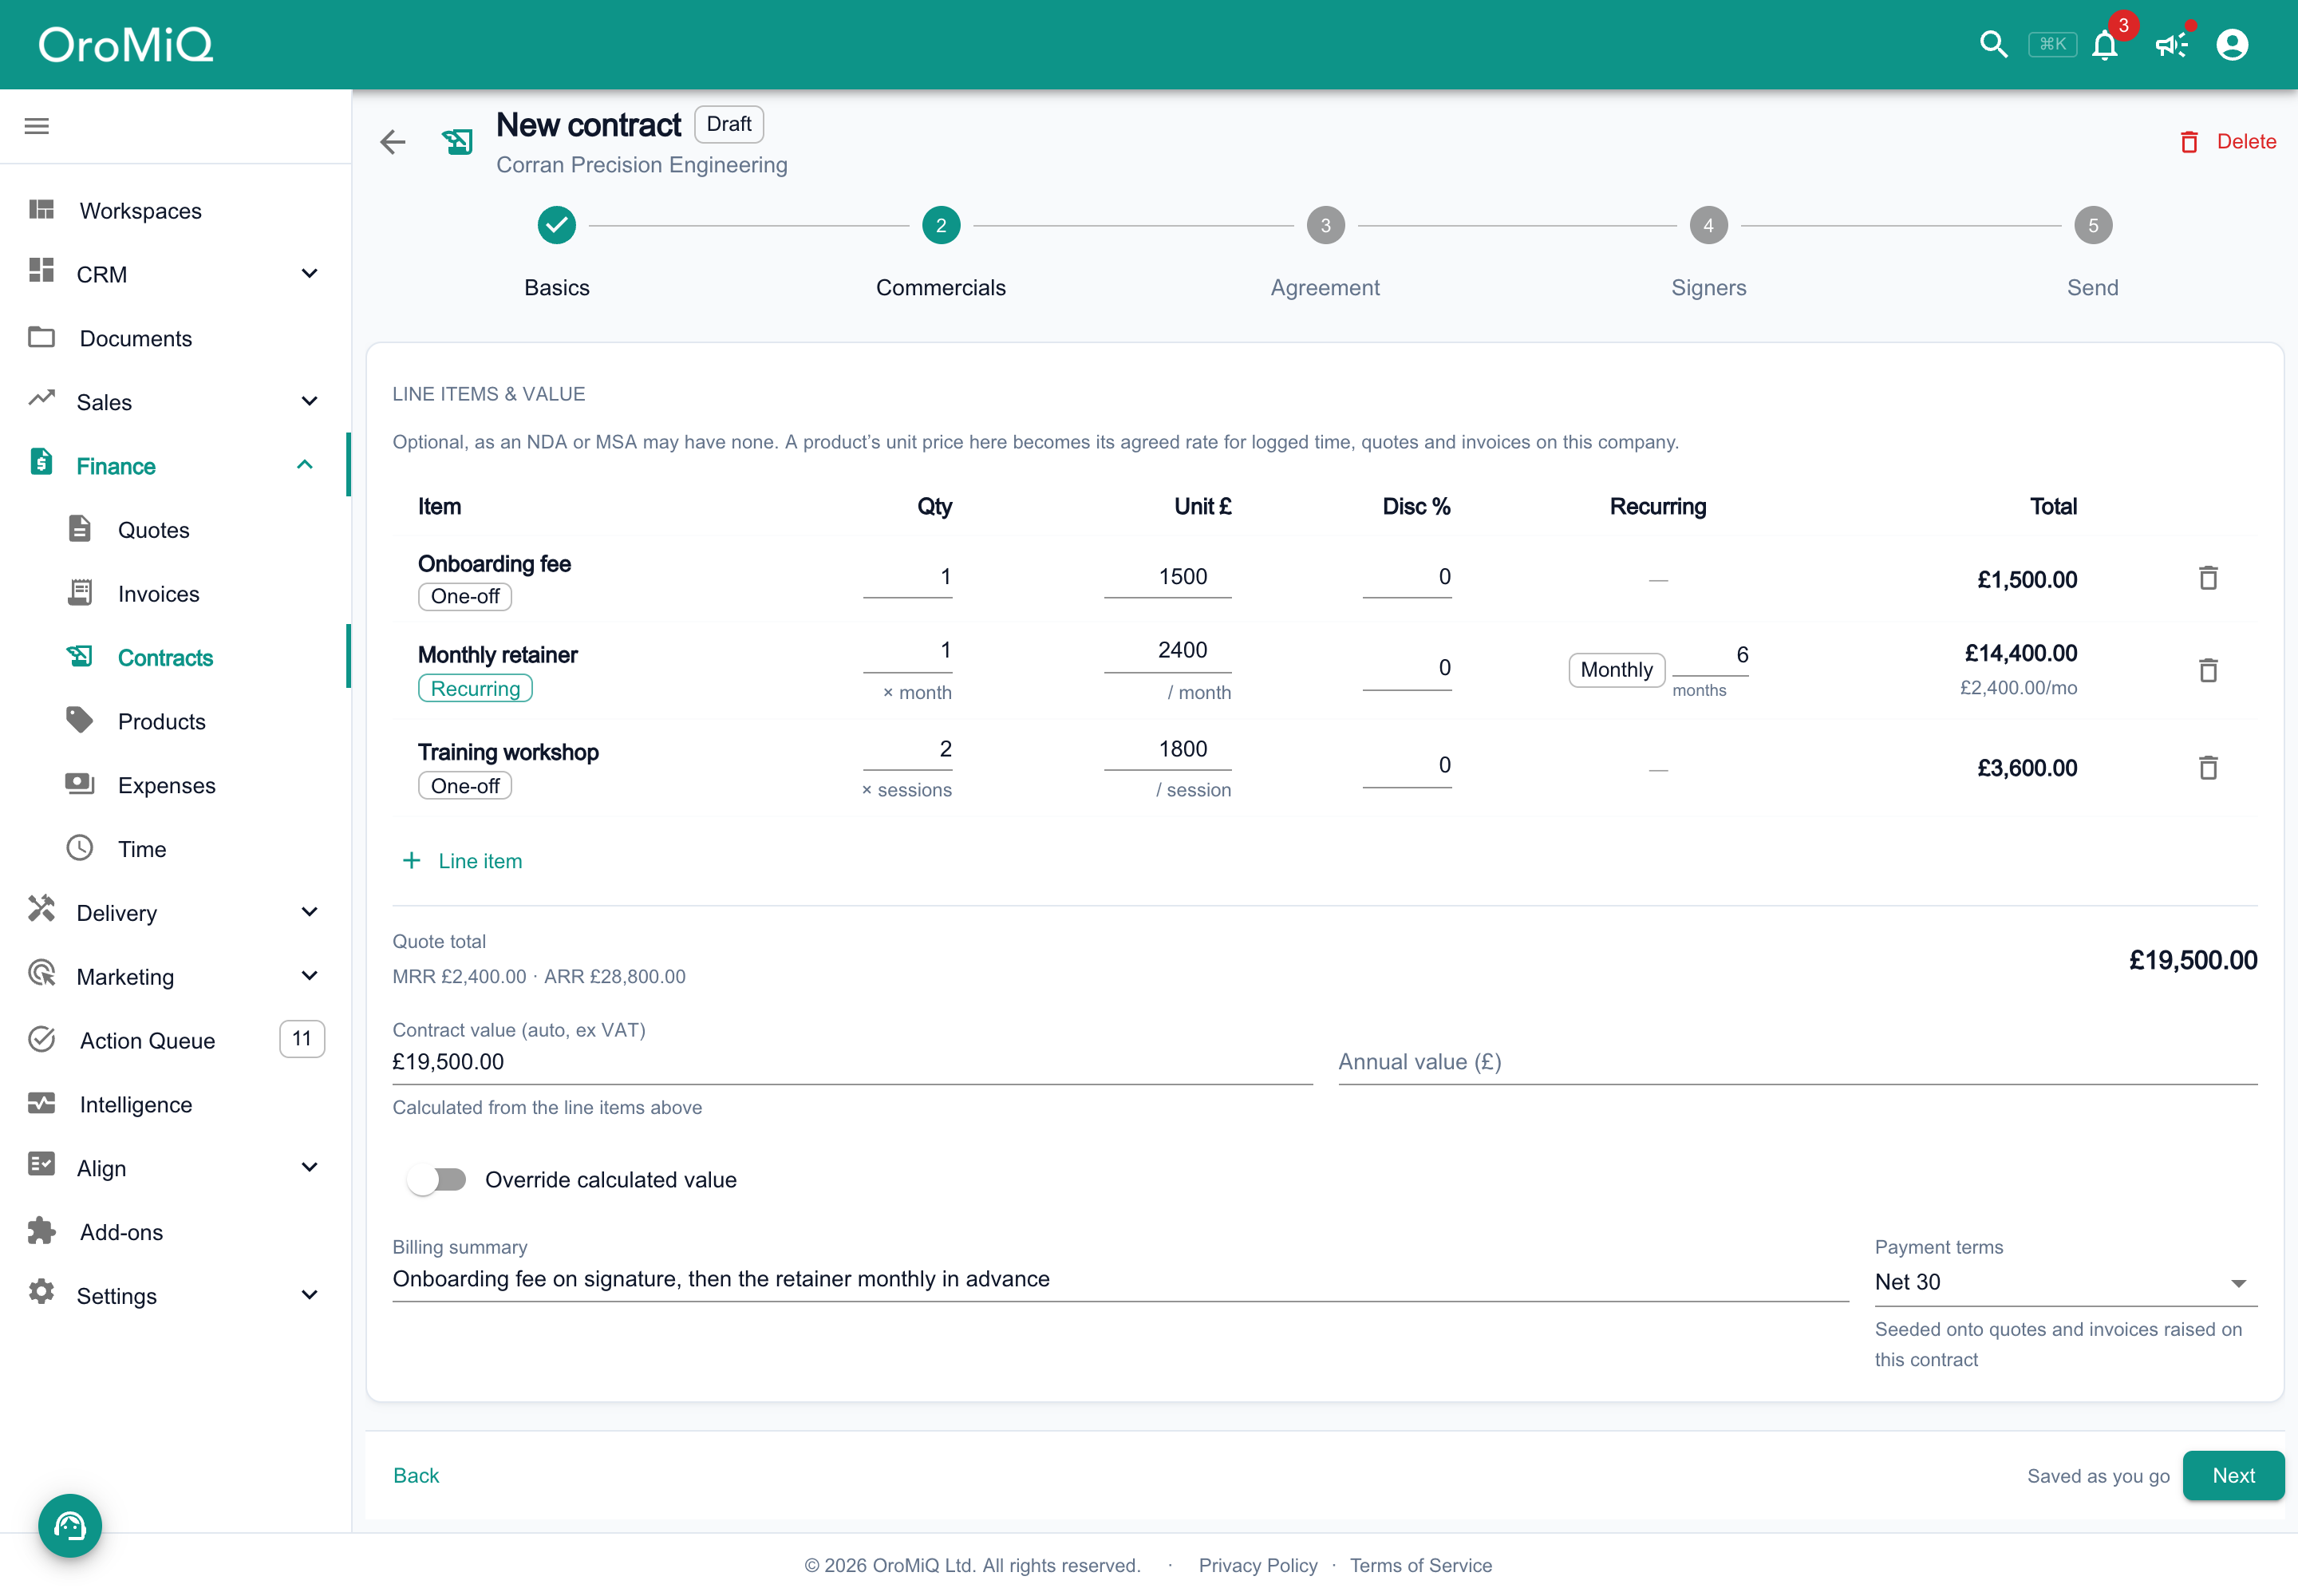
On Commercials, add line items from your catalogue or type them in. The contract value is worked out from the lines. Add a Billing summary and Payment terms if you want them on record.
Note
Write the agreement or use a template
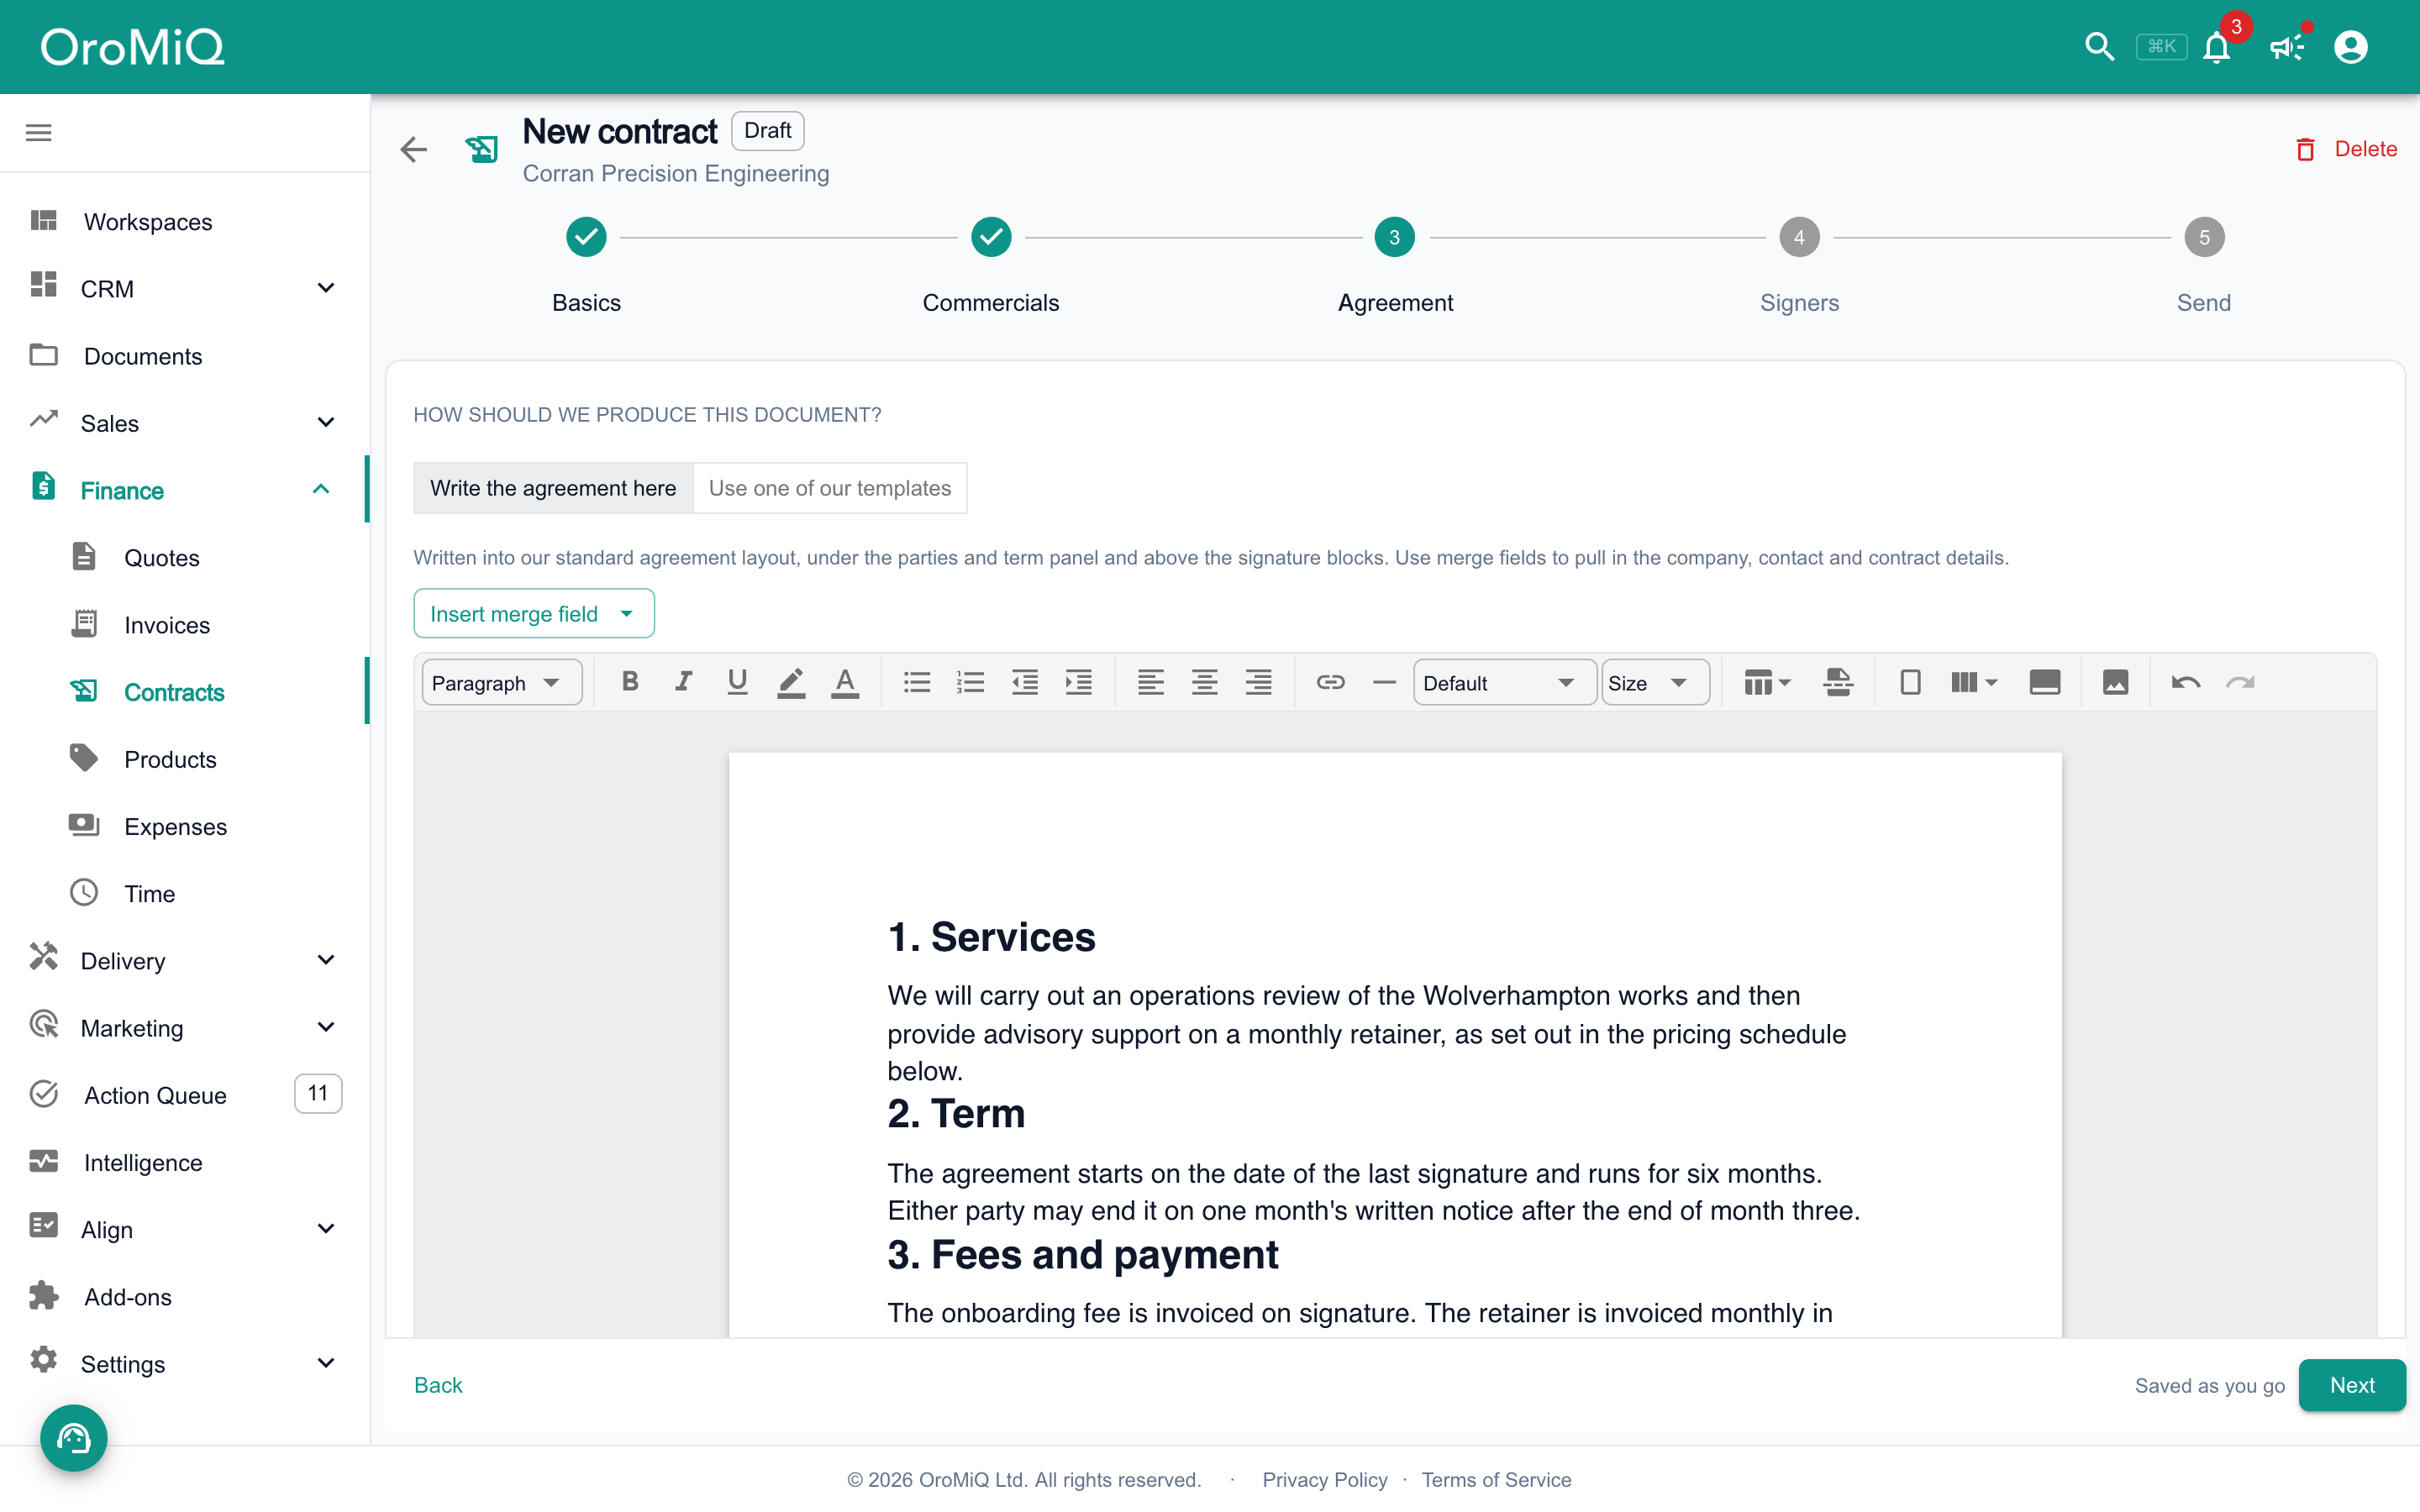
On Agreement, choose how to produce the document. Write the agreement here gives you an editor. Click Insert merge field to pull in company, contact and contract details.
Or choose Use one of our templates and pick a contract template from Documents → Templates. If the template asks for extra details, fill them in under Template fields.
Add signers and place their fields
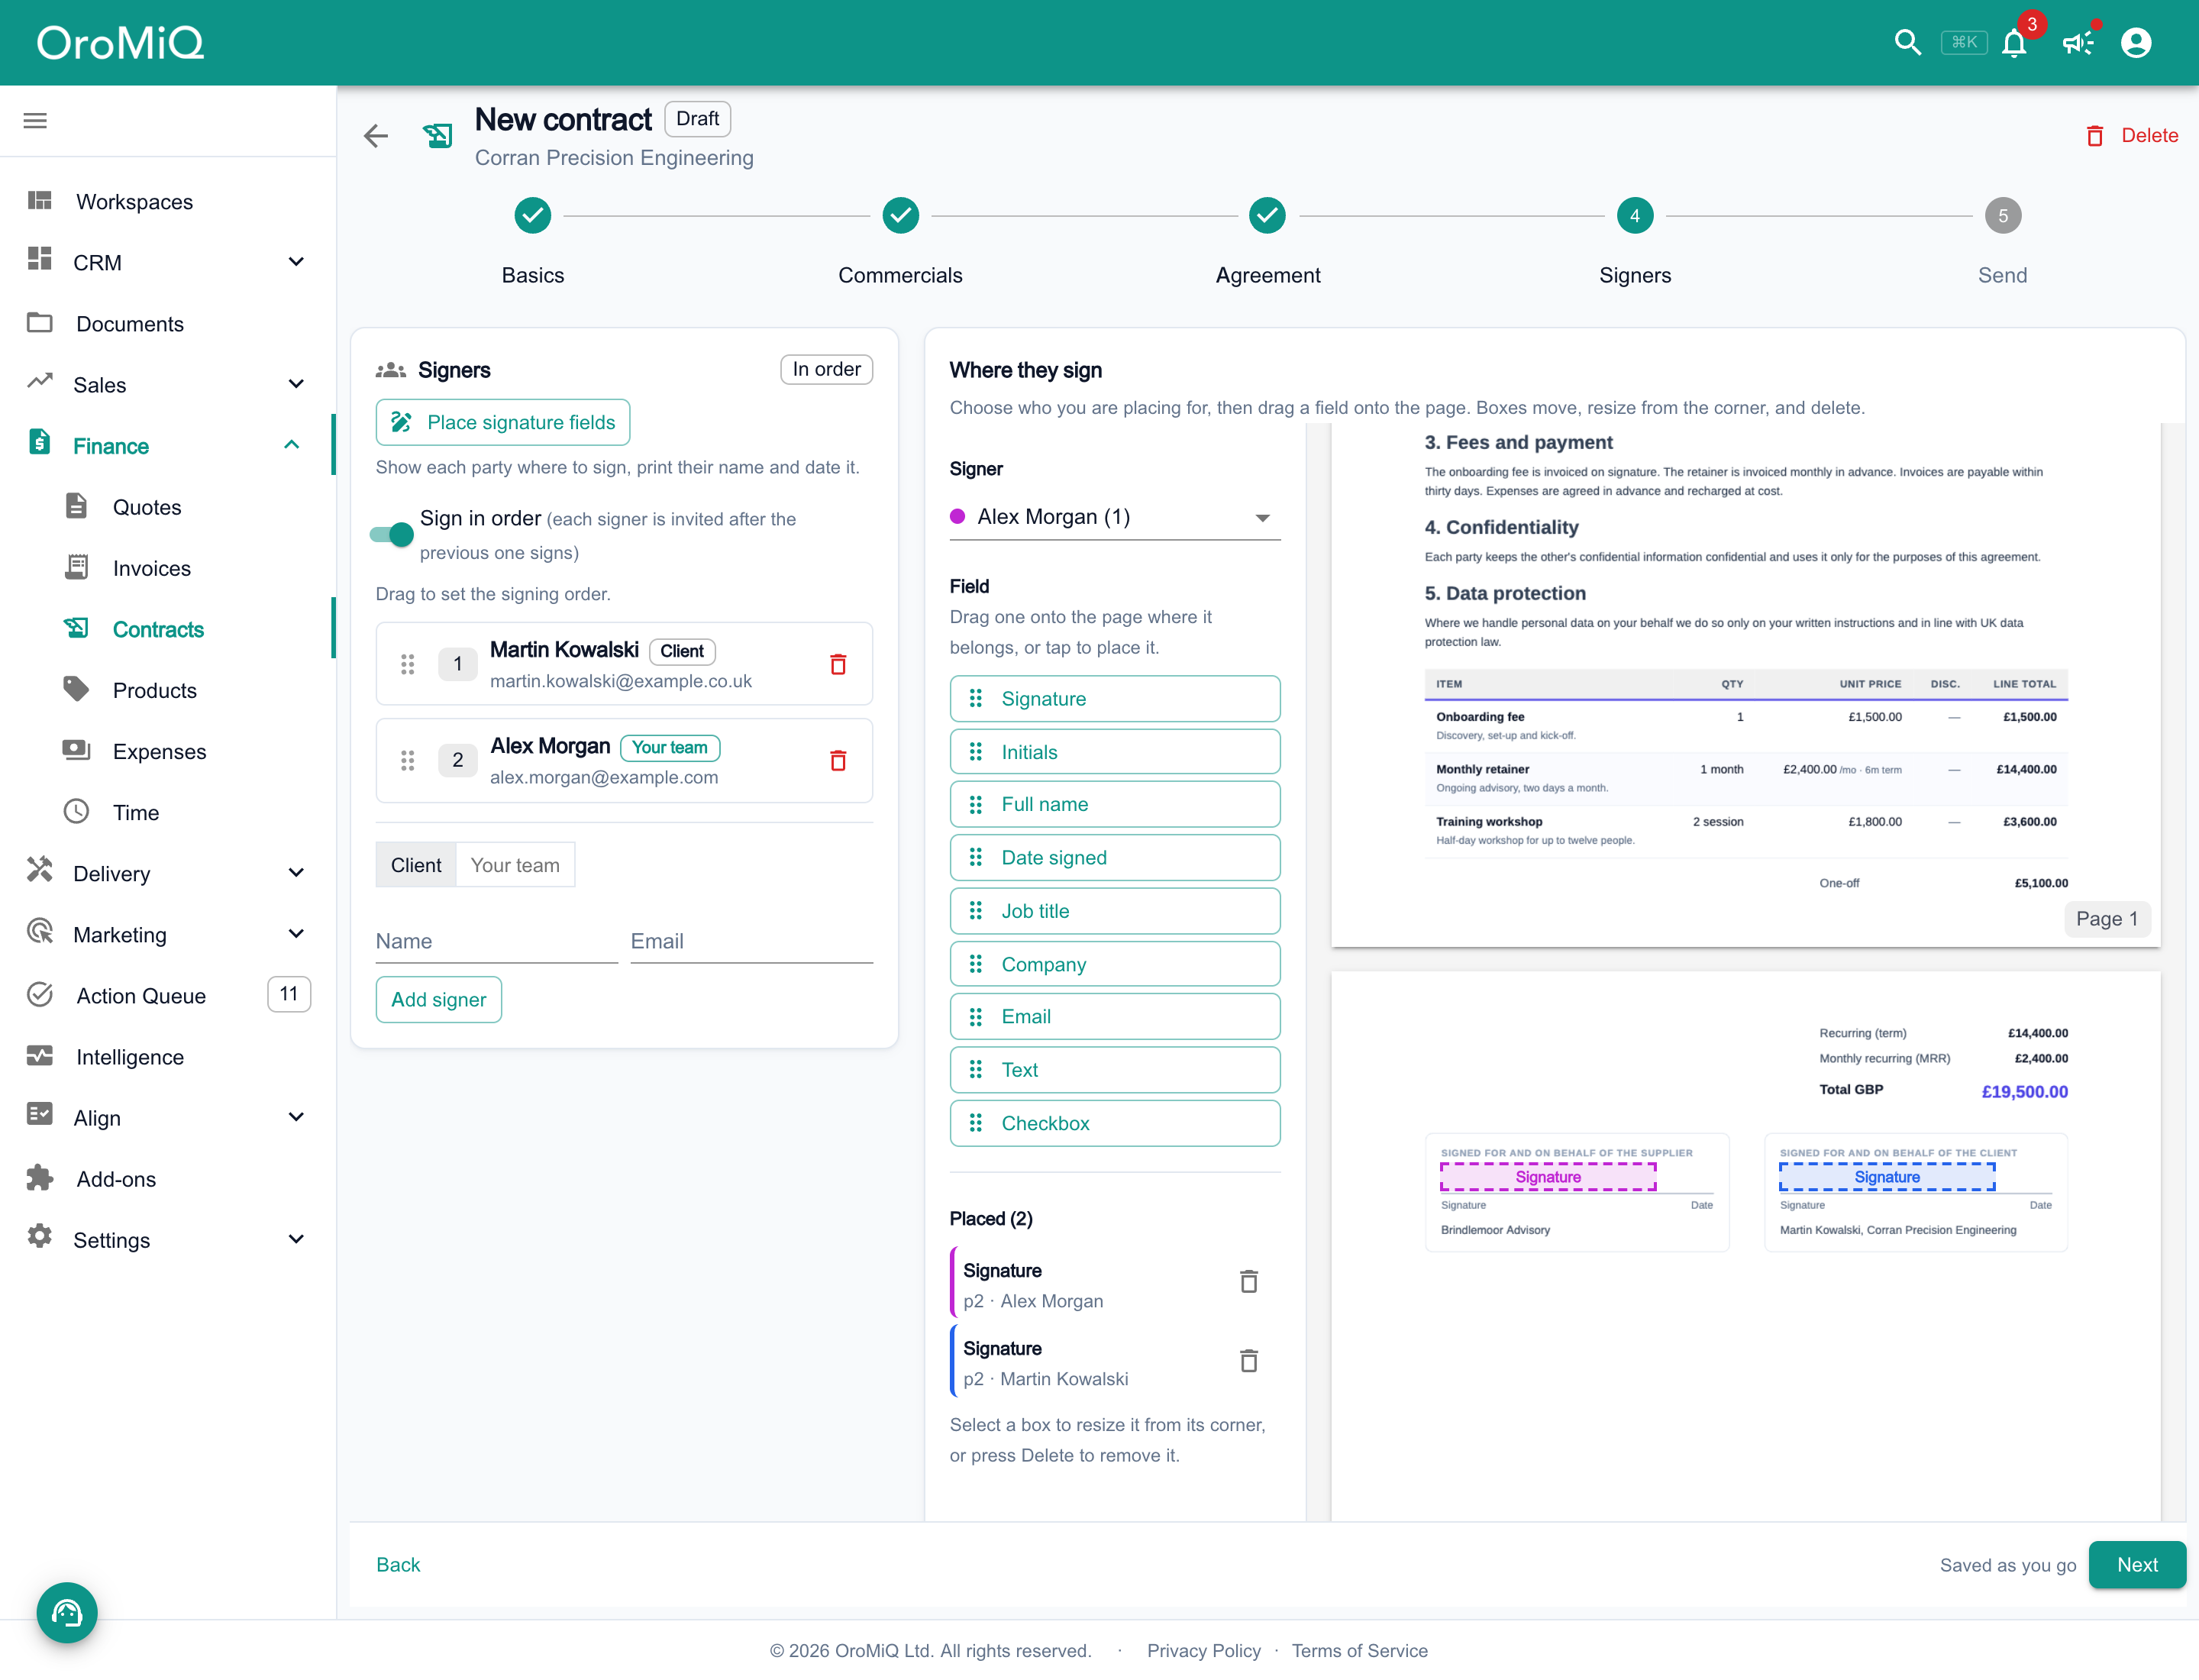
On Signers, choose Client or Your team, enter or pick the signer, and click Add signer. Repeat for everyone who needs to sign.
With two or more signers, Sign in order invites each signer after the previous one signs. Drag signers to set the order. Switch it off to invite everyone at once.
Under Where they sign, choose a Signer, then drag fields such as Signature, Initials and Date signedonto the page. Drag a placed box to move it, or drag its corner to fit it to the signature line. Each signer’s boxes have their own colour.
Note
Finalise and send for e-signature
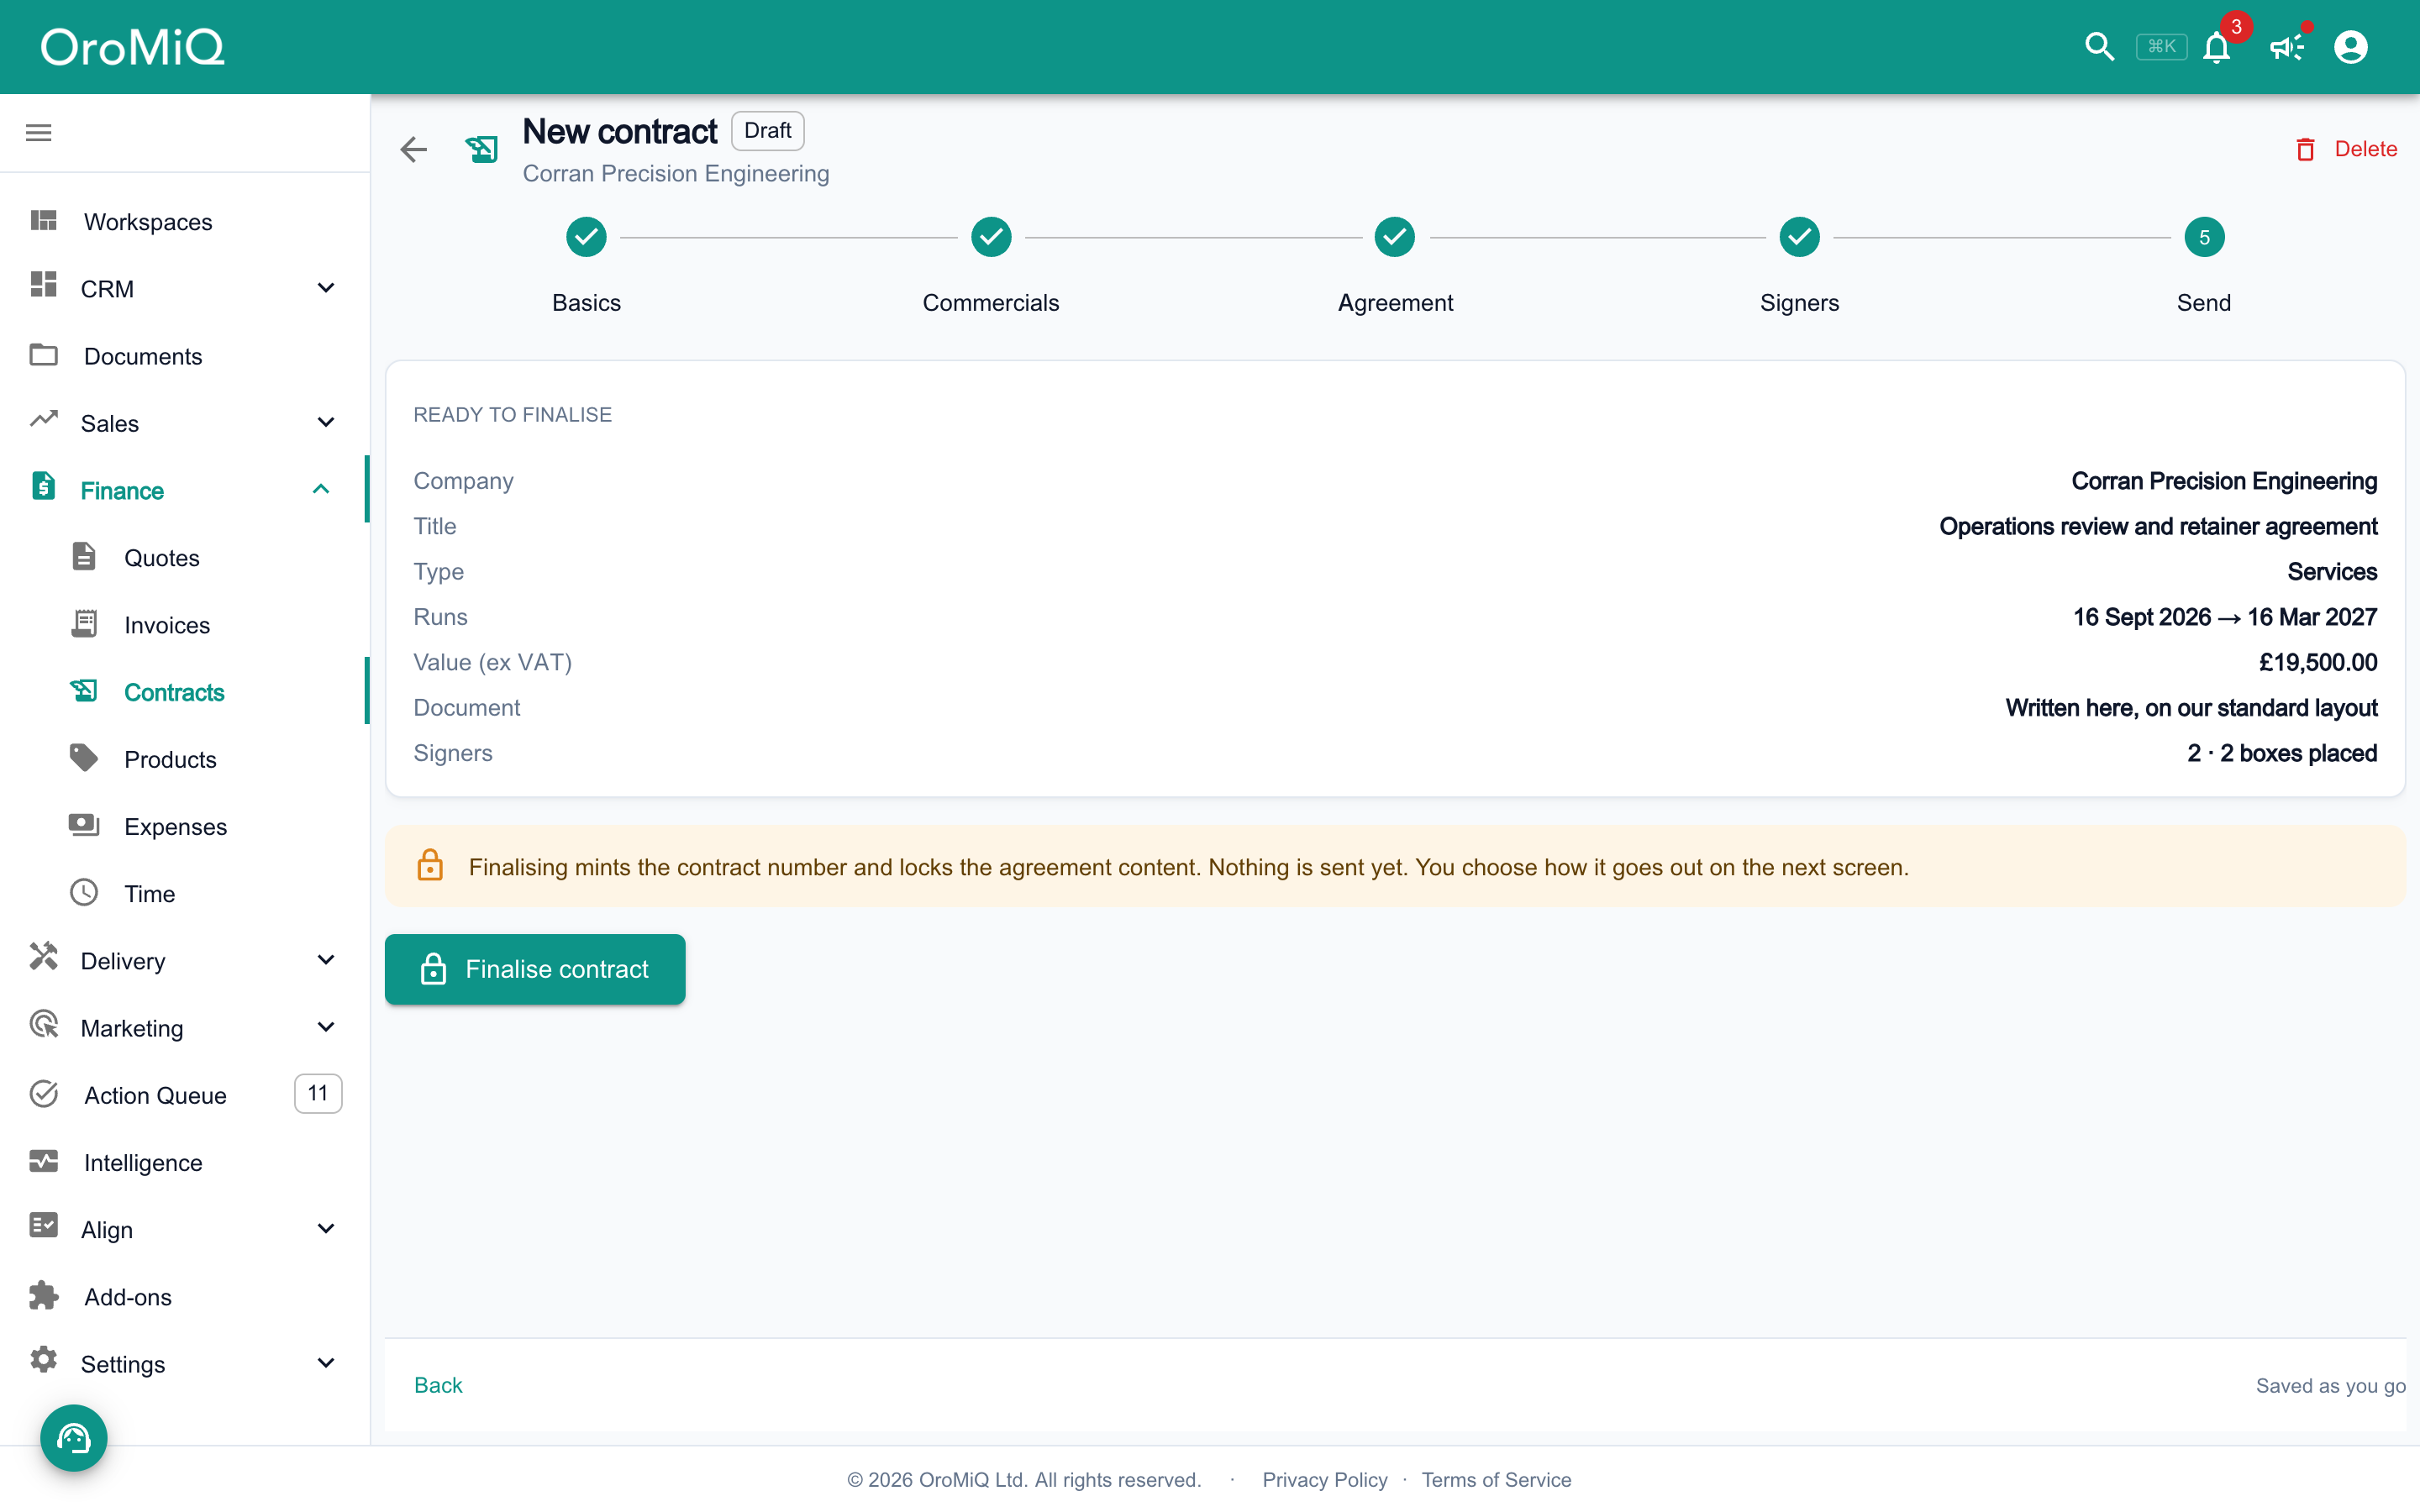
On Send, check the summary and click Finalise contract. The contract gets its number and the wording is locked. Nothing is sent yet.
In the E-signature panel, leave Email the invites on and click Send for e-signature. Each signer is emailed a secure link.
Warning
Track signatures and find the signed copy
Signers do not need an OroMiQ account. Their link opens the document, and they enter their full legal name, agree to sign electronically and click Adopt and sign, or Decline.
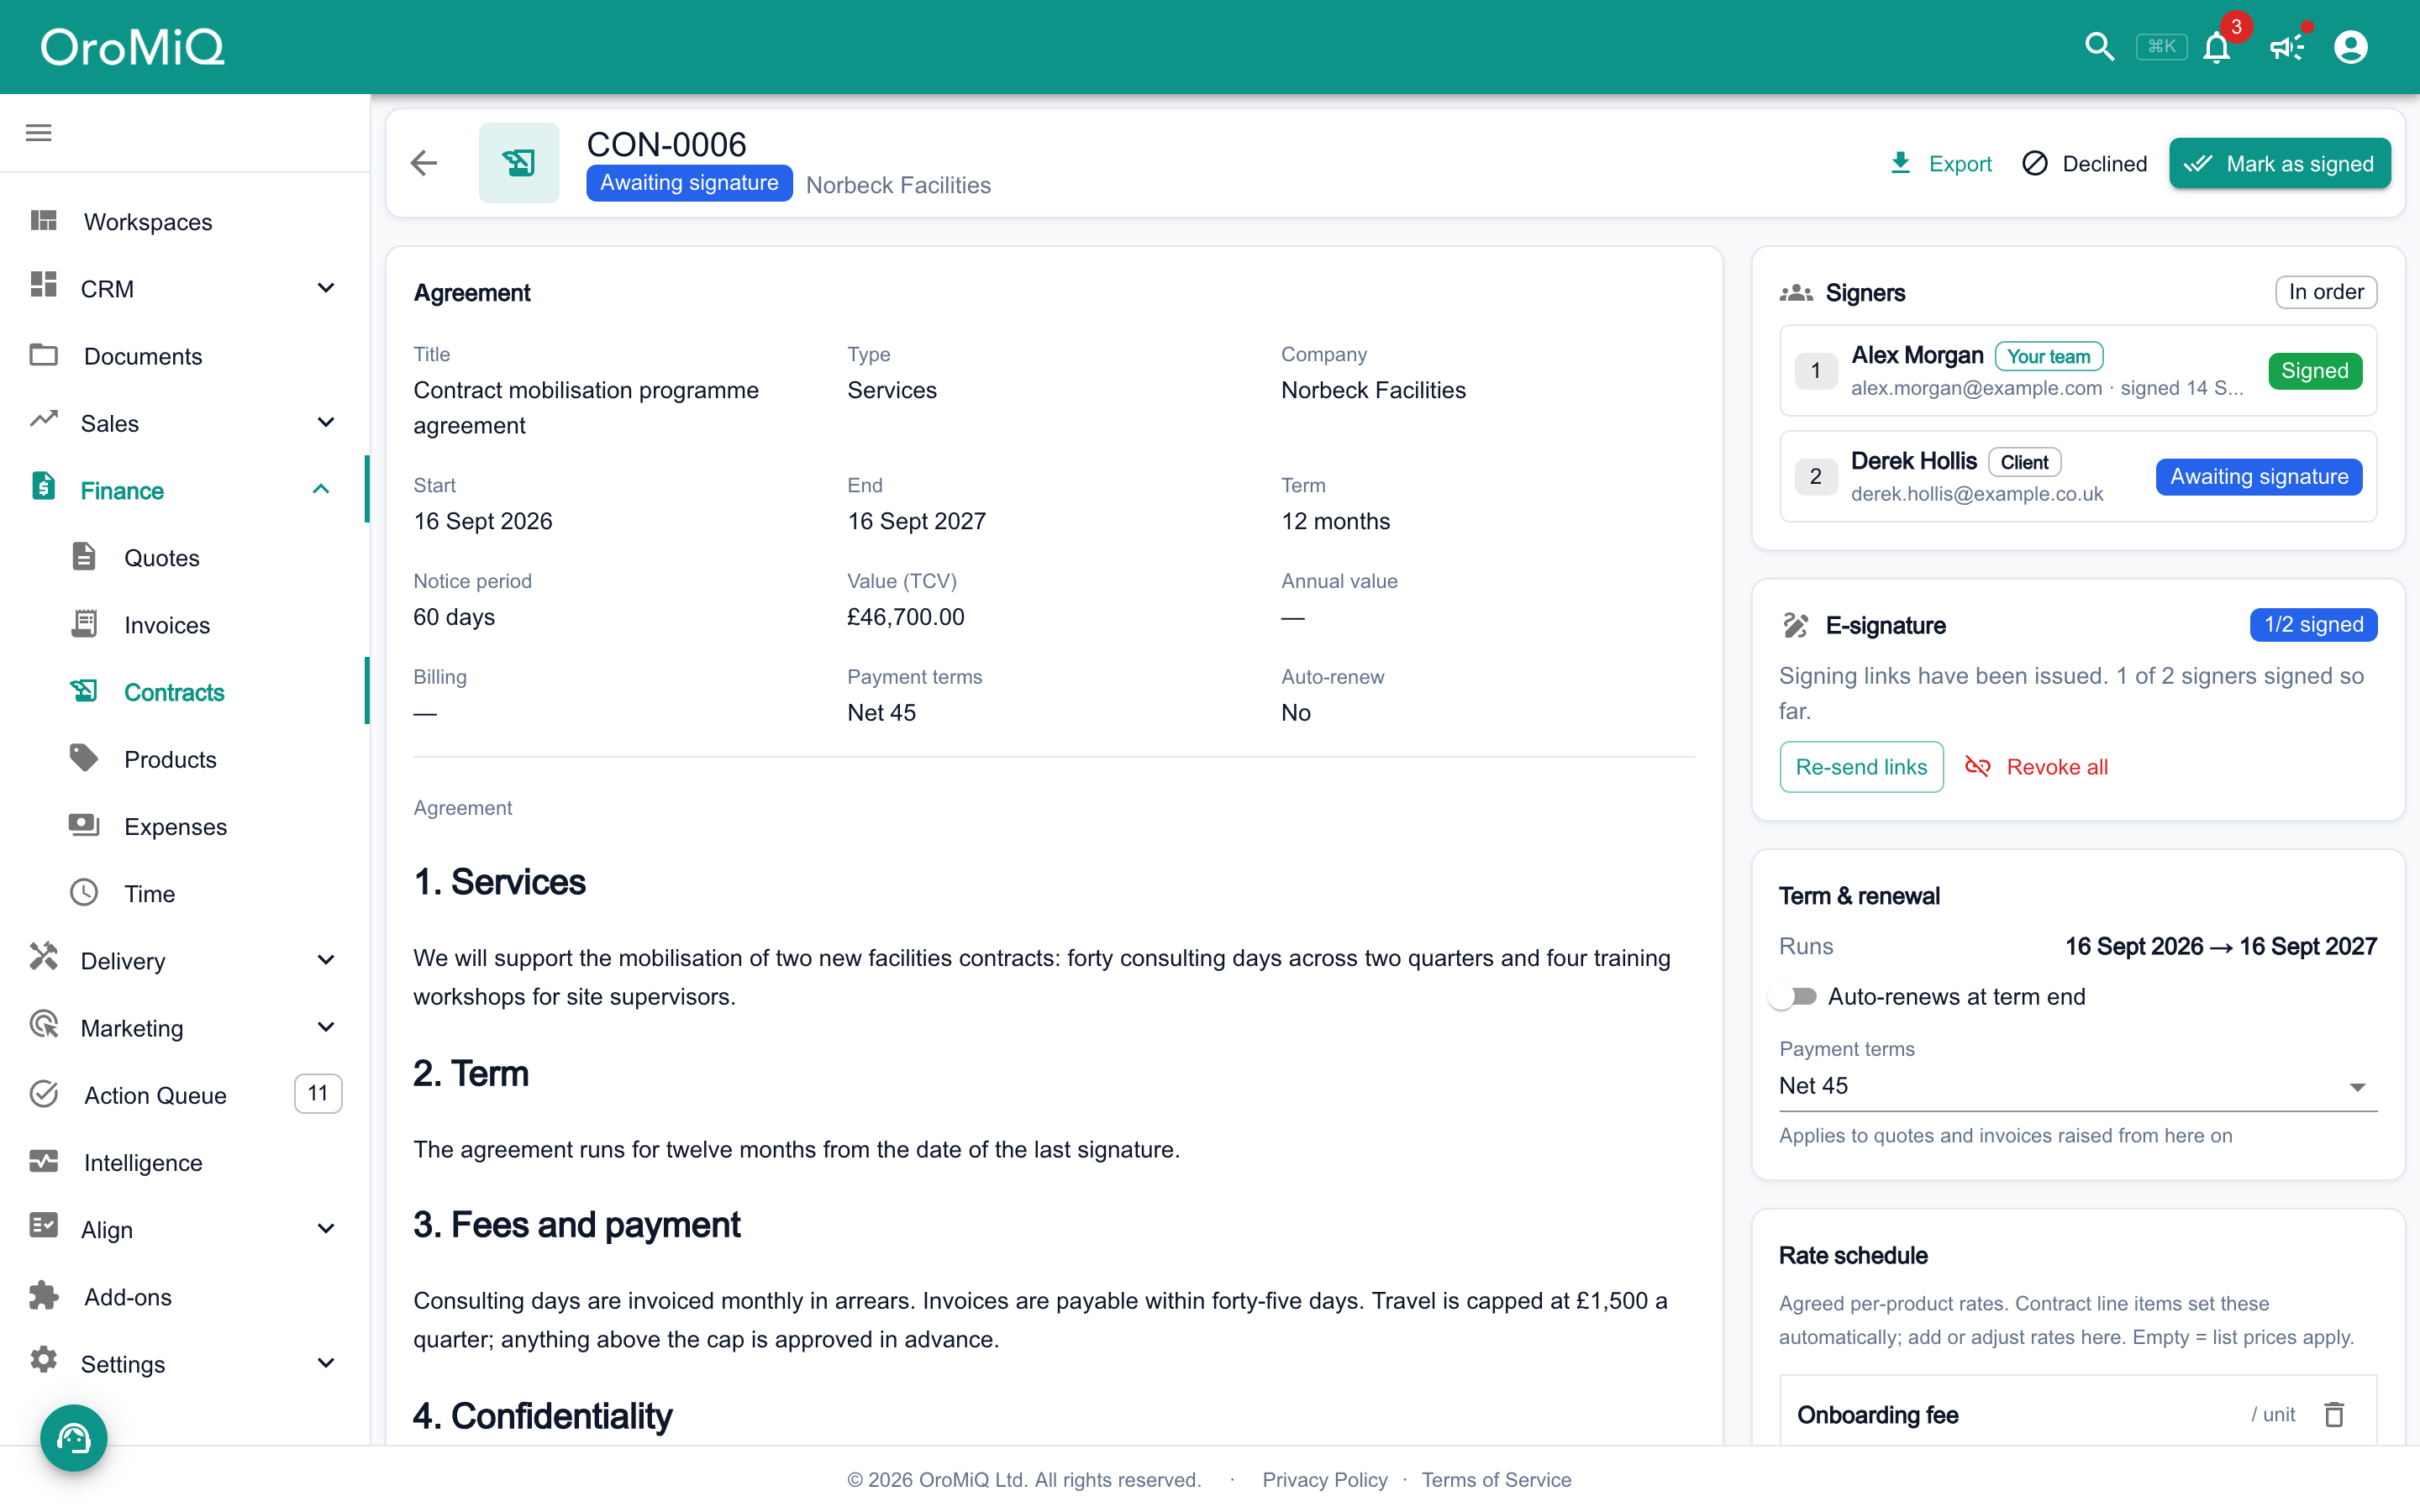
While you wait, the contract shows Awaiting signature and the panel counts how many have signed. Use Re-send links if someone has lost theirs. When everyone has signed, the contract becomes Active.
The signed PDF, with a certificate of completion, is emailed to the signers and saved to the company or person’s documents. Find it in the contract’s Documents card.
Tip
What next
Cannot find what you need? Browse the Help Centre or submit a support ticket.