Email, sequences & enquiries
Capture enquiries with web forms and a booking link
Before you start
Before you start:
- the Admin role, or a custom role that can manage web forms,
- one web form is included. For unlimited forms, add the Web Forms add-on or the Marketing Pack from Settings → Subscription & billing (see pricing), and
- for a booking link, a connected Microsoft 365 calendar. Without one, your booking page shows no available times.
Create a form and choose its fields
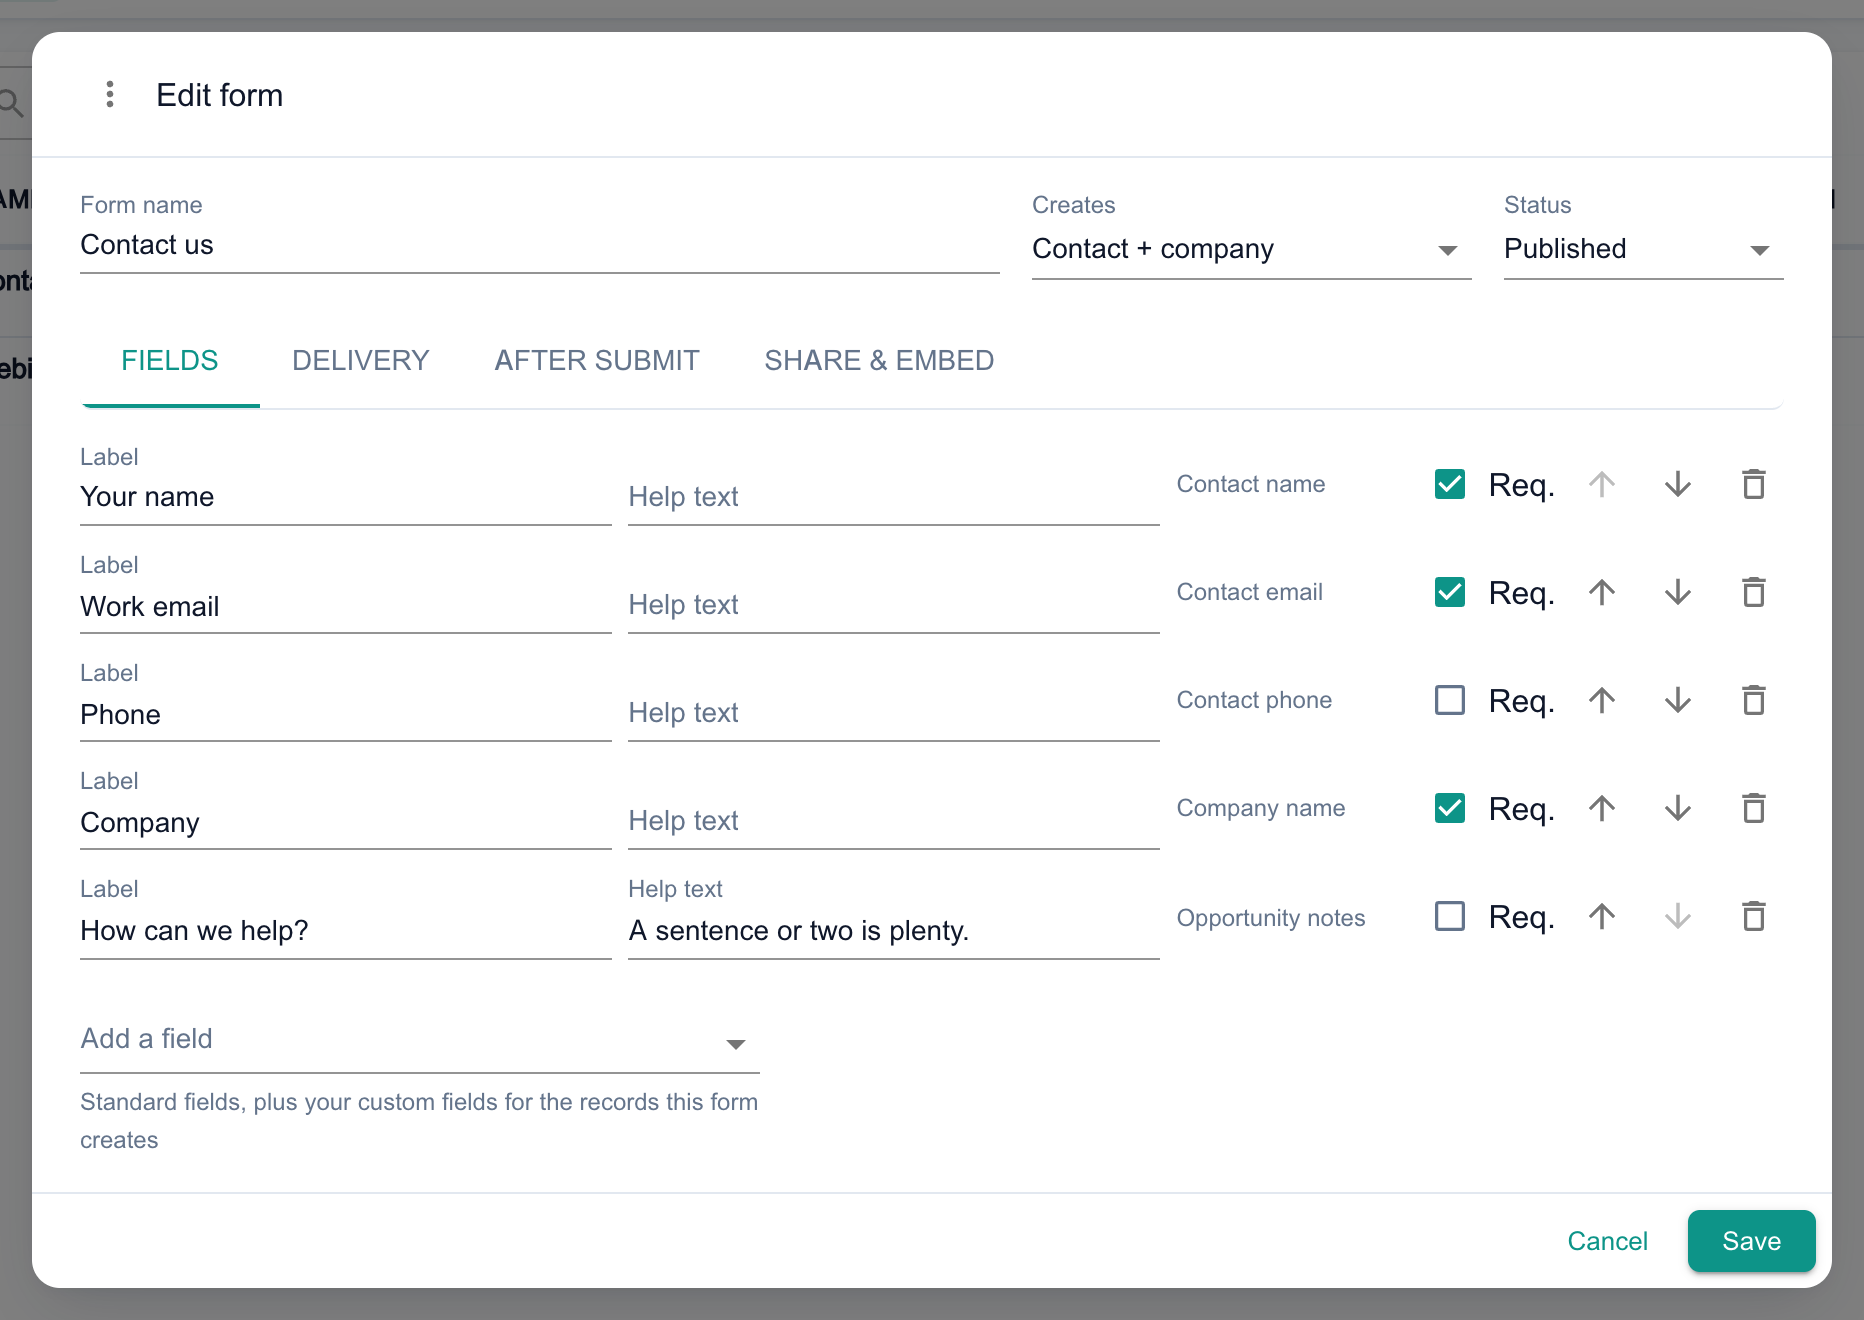
In the sidebar, open Marketing then Web forms, and click New form. You only see it if your role can manage web forms, as Admins can. Give it a Form name and choose what it Creates: Contact + company, Contact only or Company only.
On the Fields tab, a new form starts with Your name, Email address and Company name. Edit each Label and Help text, tick Req. for required answers, and use Add a field to add standard fields or your own custom fields.
Route what comes in
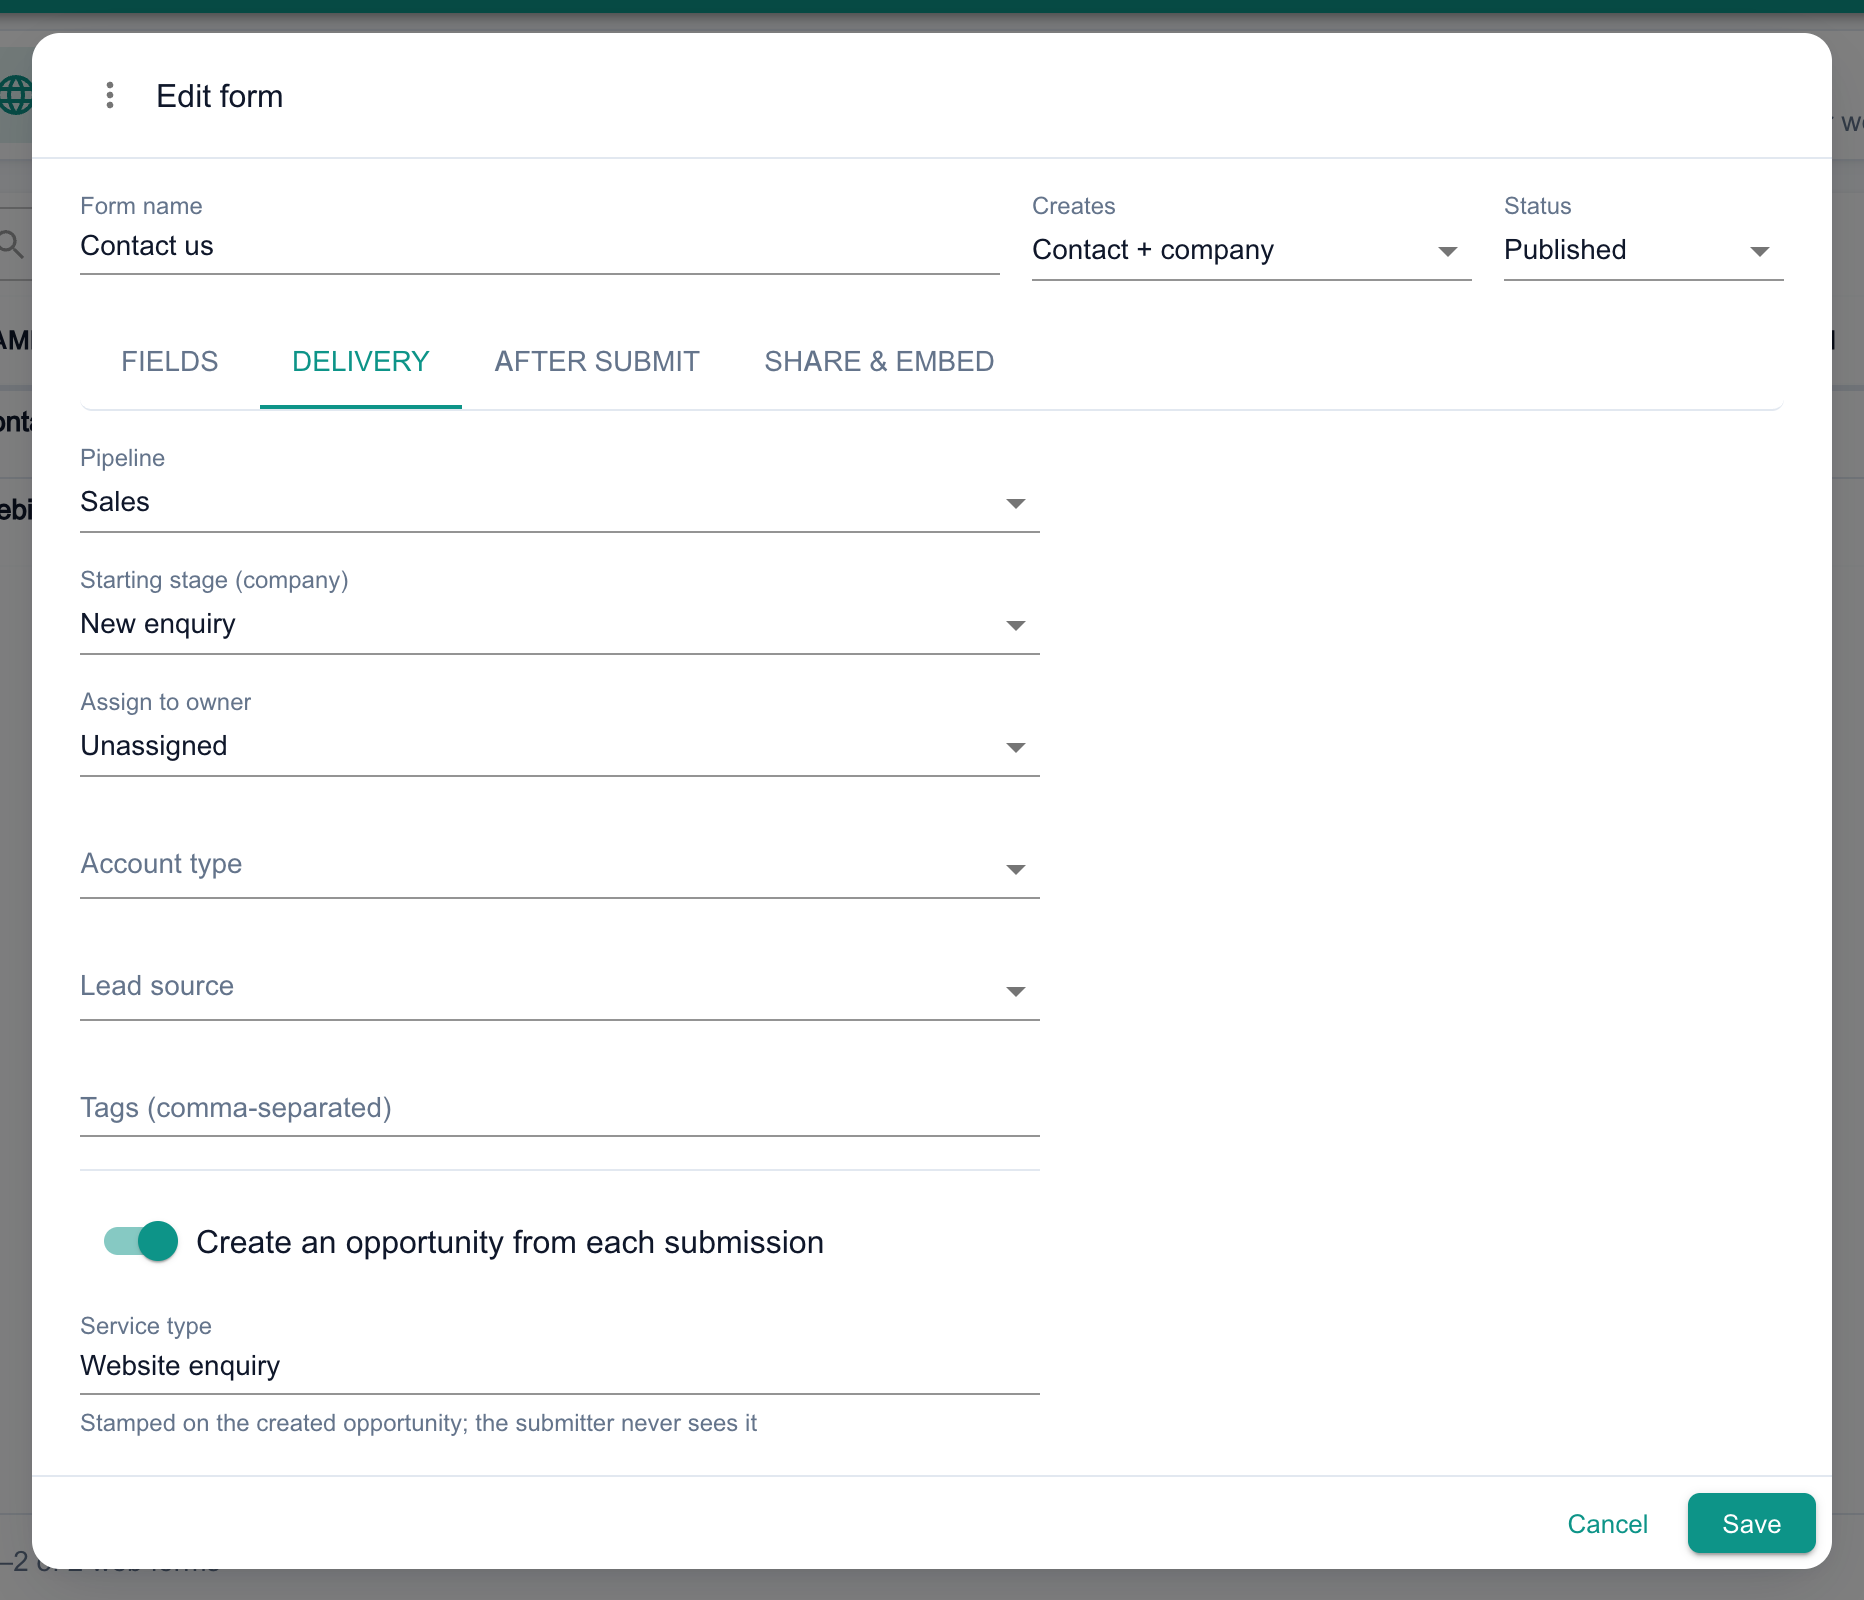
On the Delivery tab, choose the Pipeline and Starting stage (company) for new companies, and who to Assign to owner. You can also set an Account type, Lead source and Tags (comma-separated).
Switch on Create an opportunity from each submission and enter a Service type if every enquiry should open a deal.
Tip
Decide what happens after someone submits
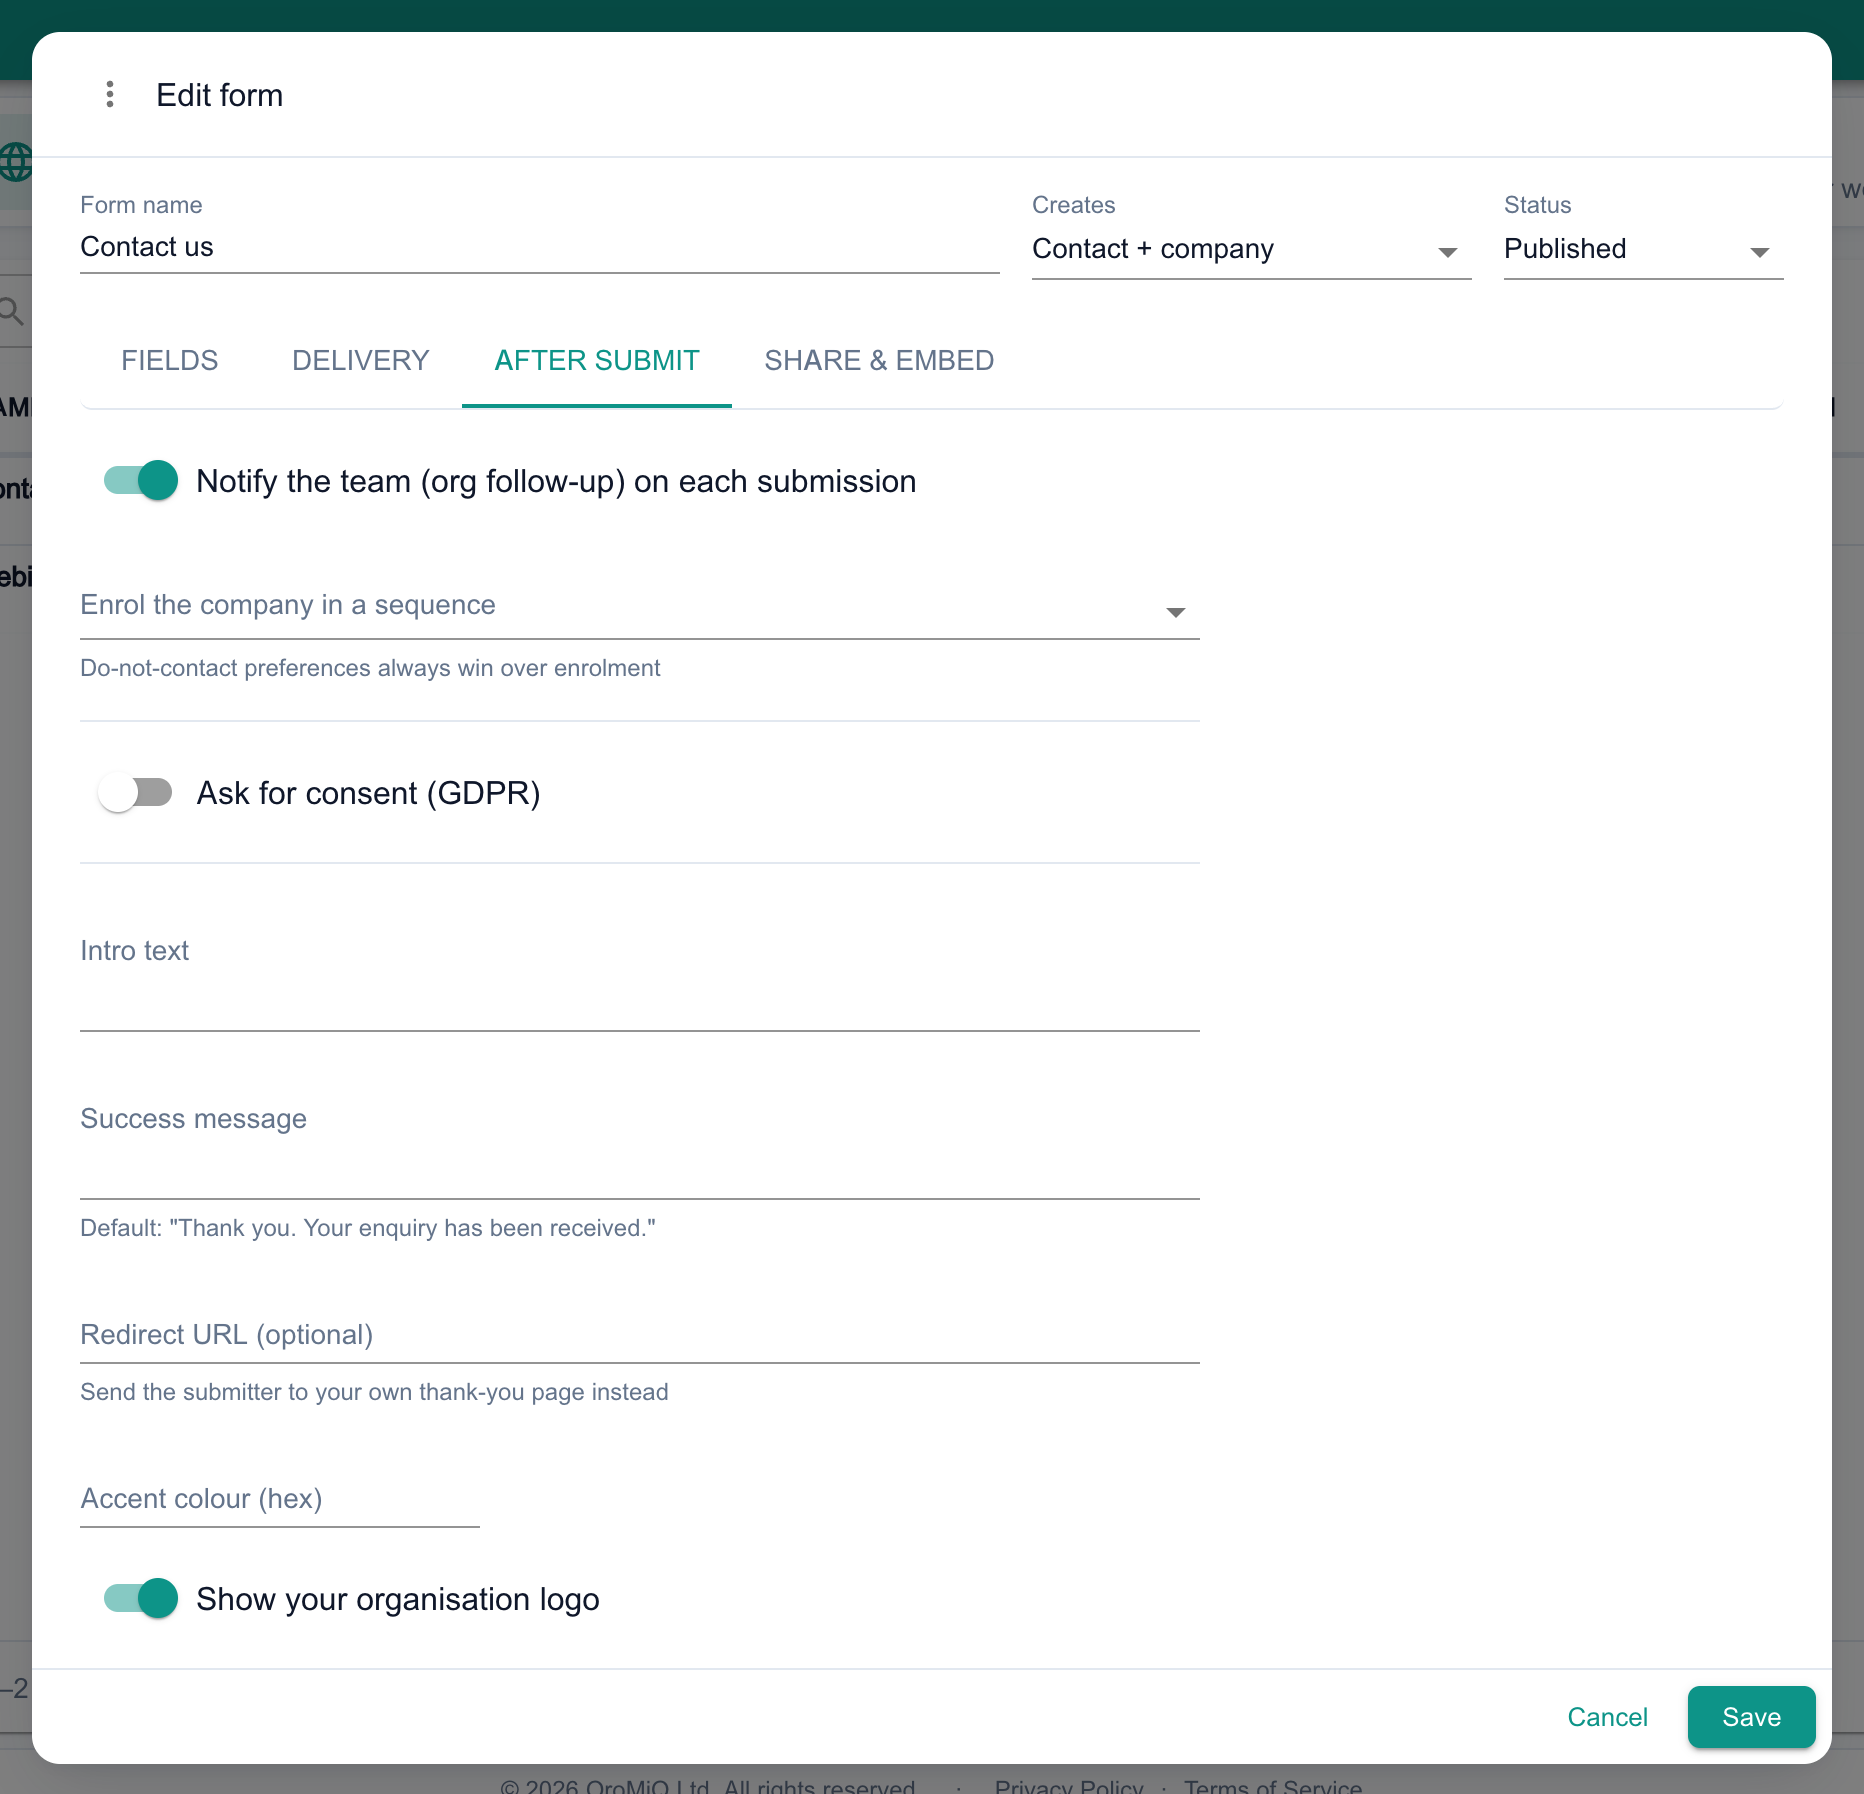
On the After submit tab, keep Notify the team (org follow-up) on each submission switched on so every enquiry raises a follow-up and notifies your team.
To collect consent, switch on Ask for consent (GDPR) and write the Consent statement. It is stored with every submission. Set a Success message, or a Redirect URL (optional) to send people to your own thank-you page.
To match your website, set an Accent colour (hex) and choose whether to Show your organisation logo on the form.
With the Marketing Pack, Enrol the company in a sequence starts a published sequence for each new enquiry. Do-not-contact preferences always win.
Note
Publish and share the form
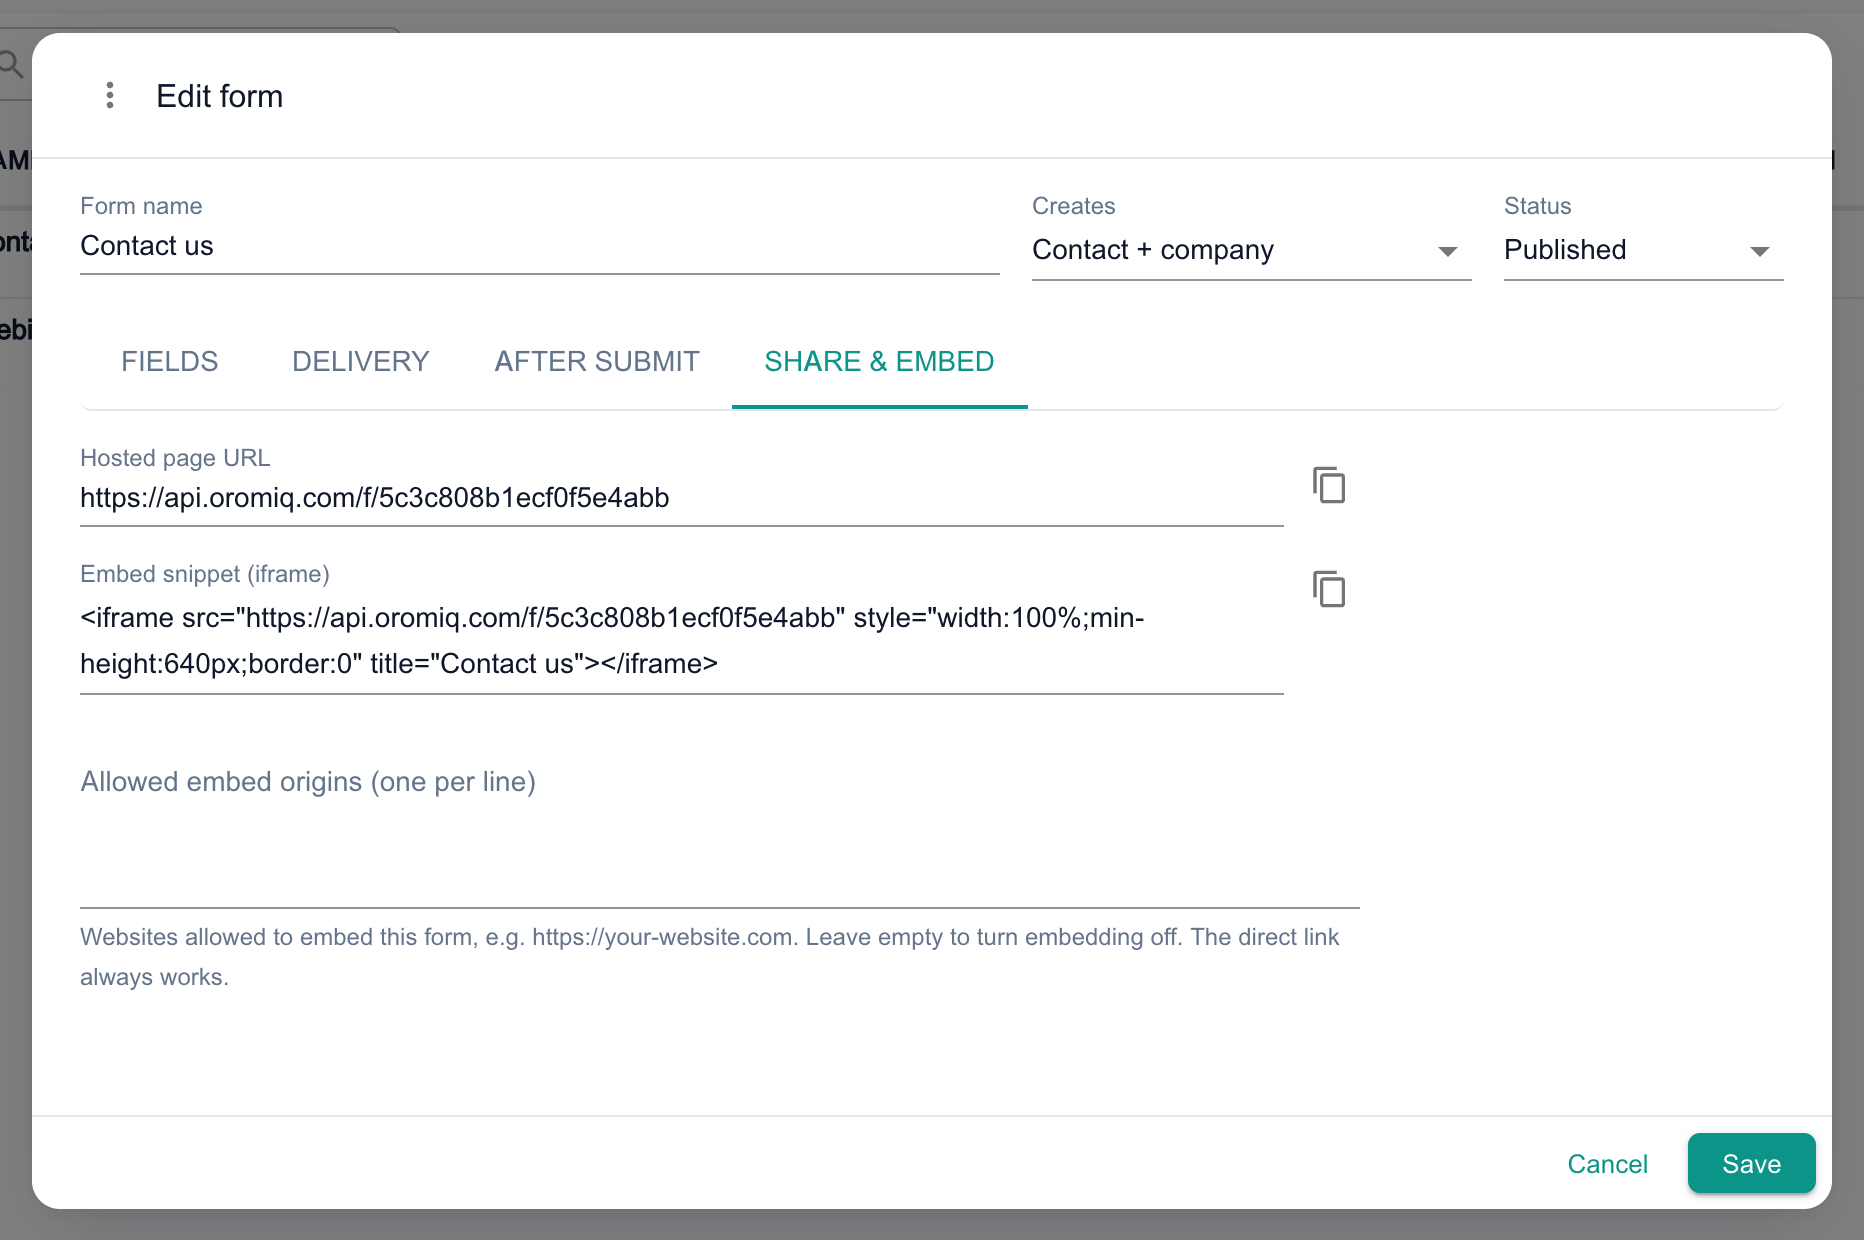
Set Status to Published and click Save. Reopen the form and go to the Share & embed tab to copy the Hosted page URL, or the Embed snippet (iframe) for your website.
To embed the form, list your website under Allowed embed origins (one per line), for example https://your-website.com. The hosted link always works.
Note
Work your enquiries
Each submission creates the contact and company your form asks for. If the email address already belongs to a contact, OroMiQ links the enquiry to them, and to their existing company, rather than creating duplicates.
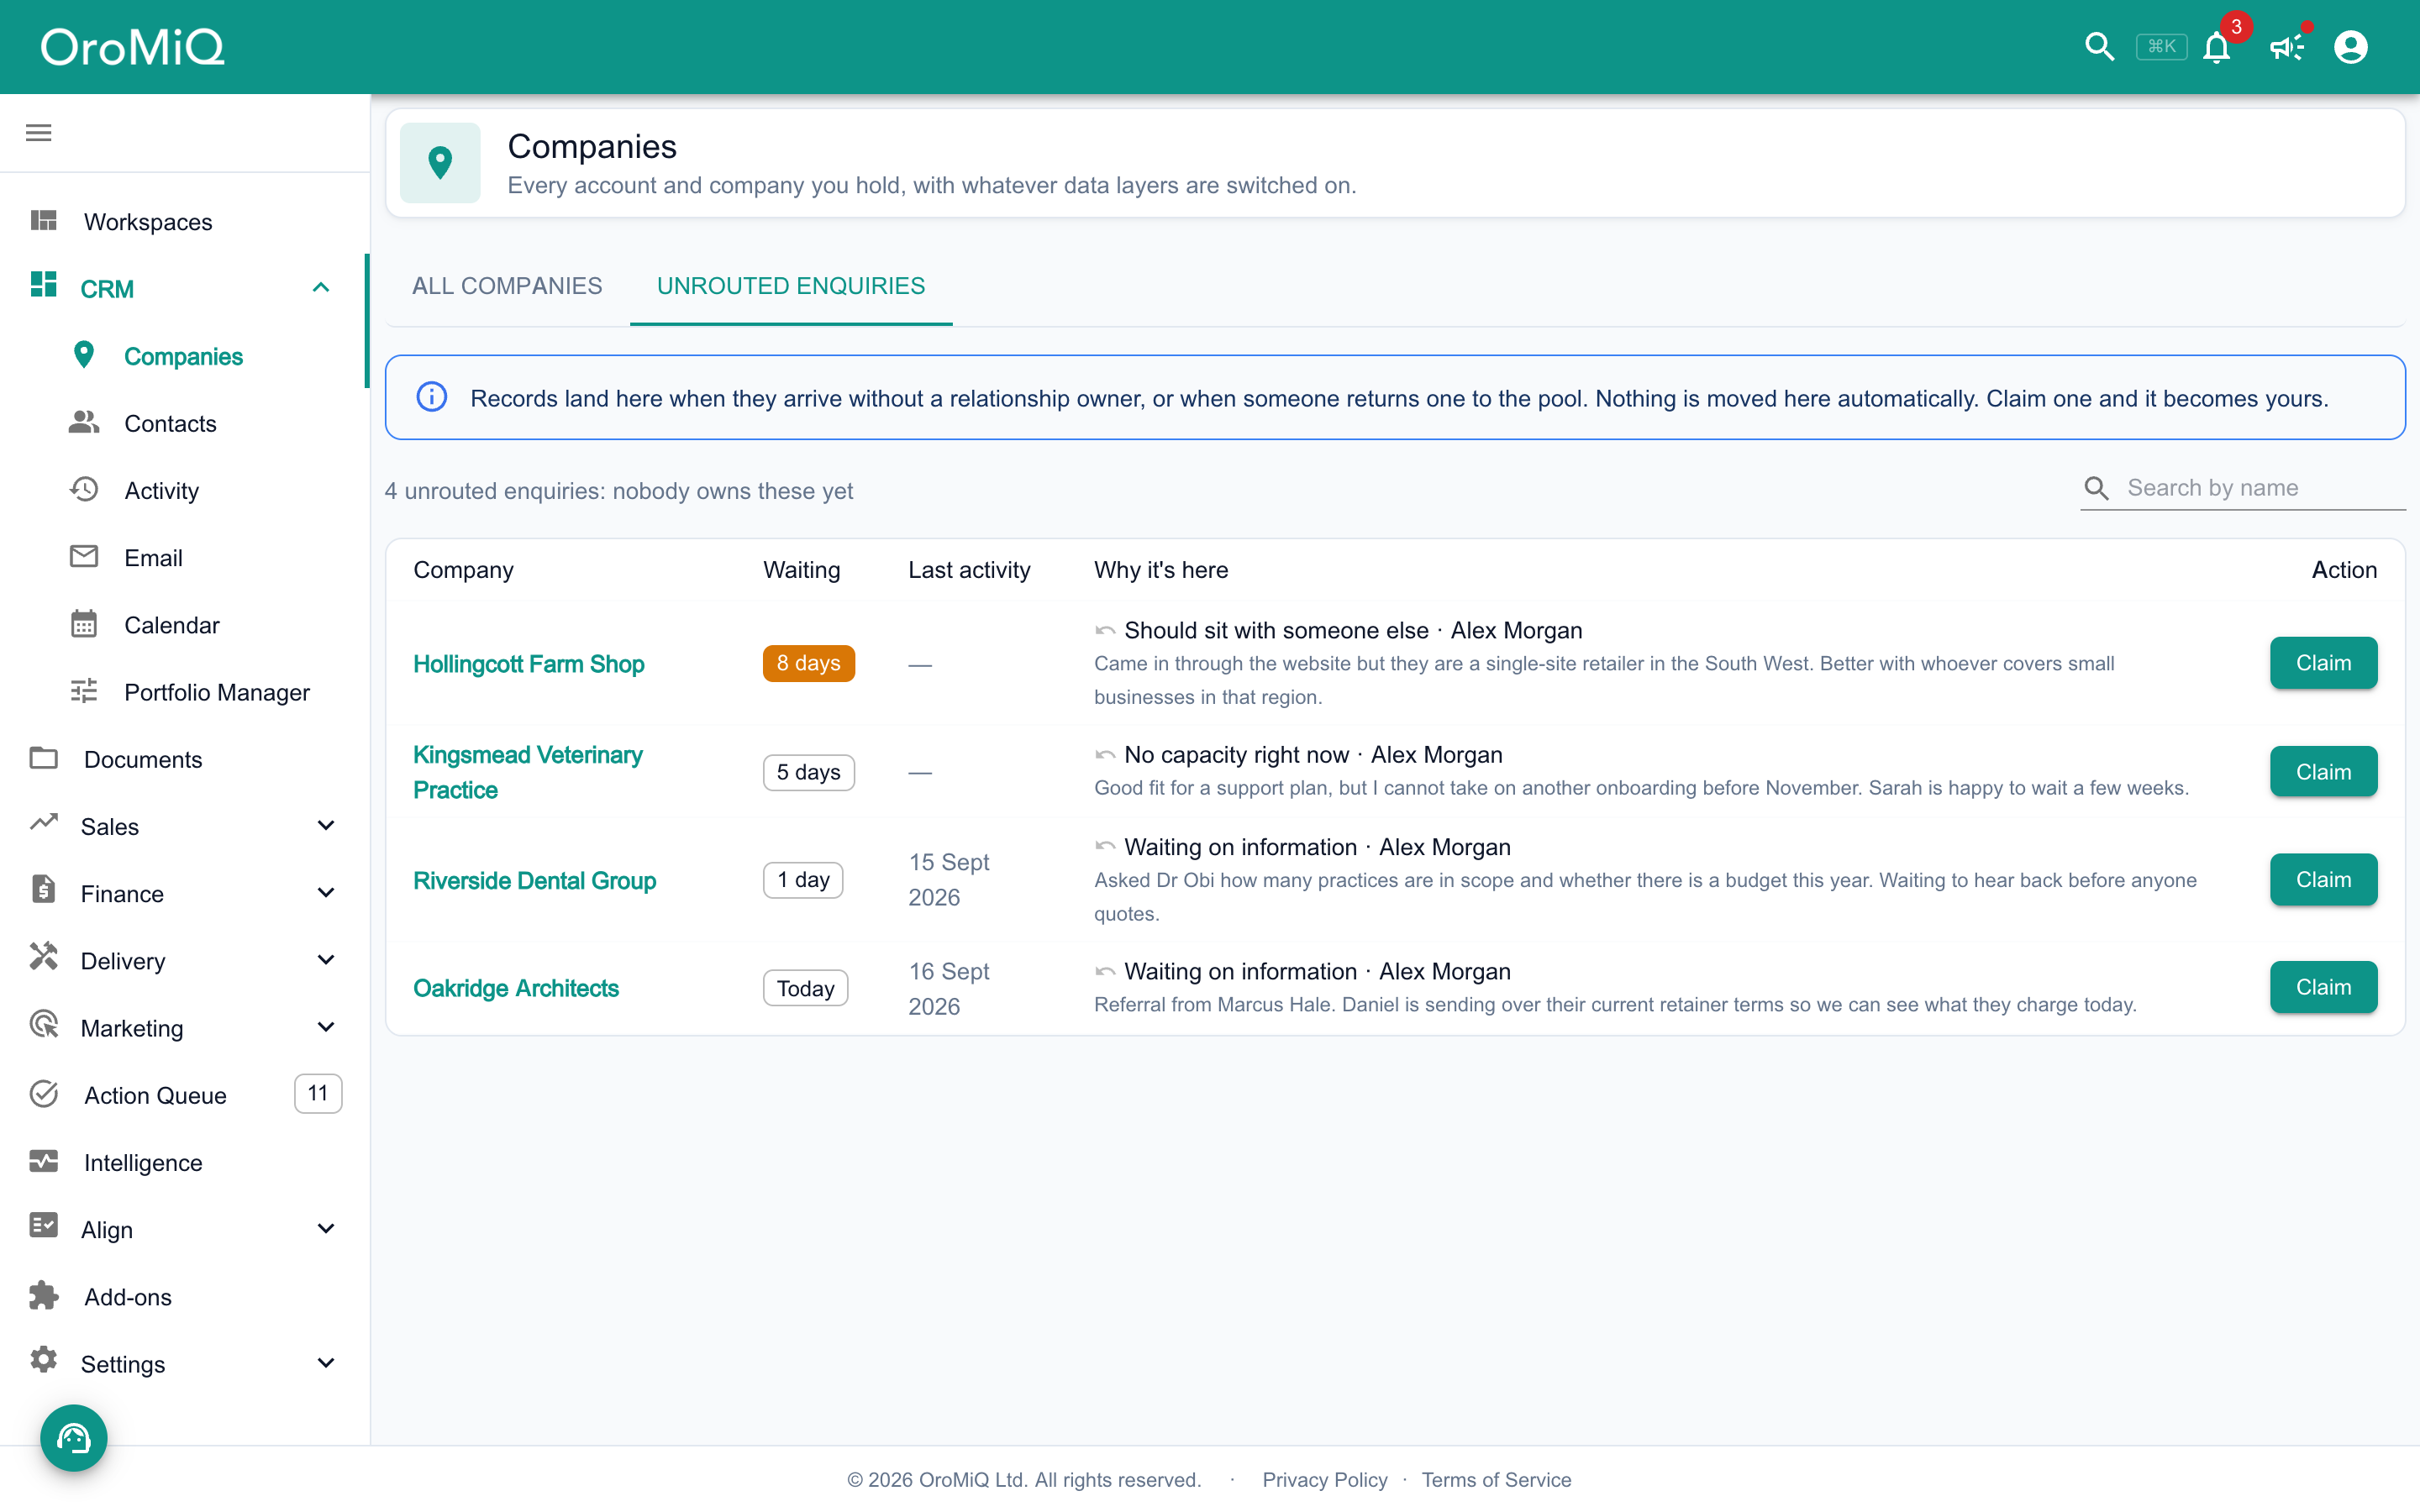
Enquiries with no owner appear in Companies under the Unrouted enquiries tab. Click Claim to make one yours.
To see everything a form has received, click its Submissions icon in the Web forms list. Each submission shows whether it was Added to CRM, Partly added or Failed, and what it created or matched.
Set your availability for bookings
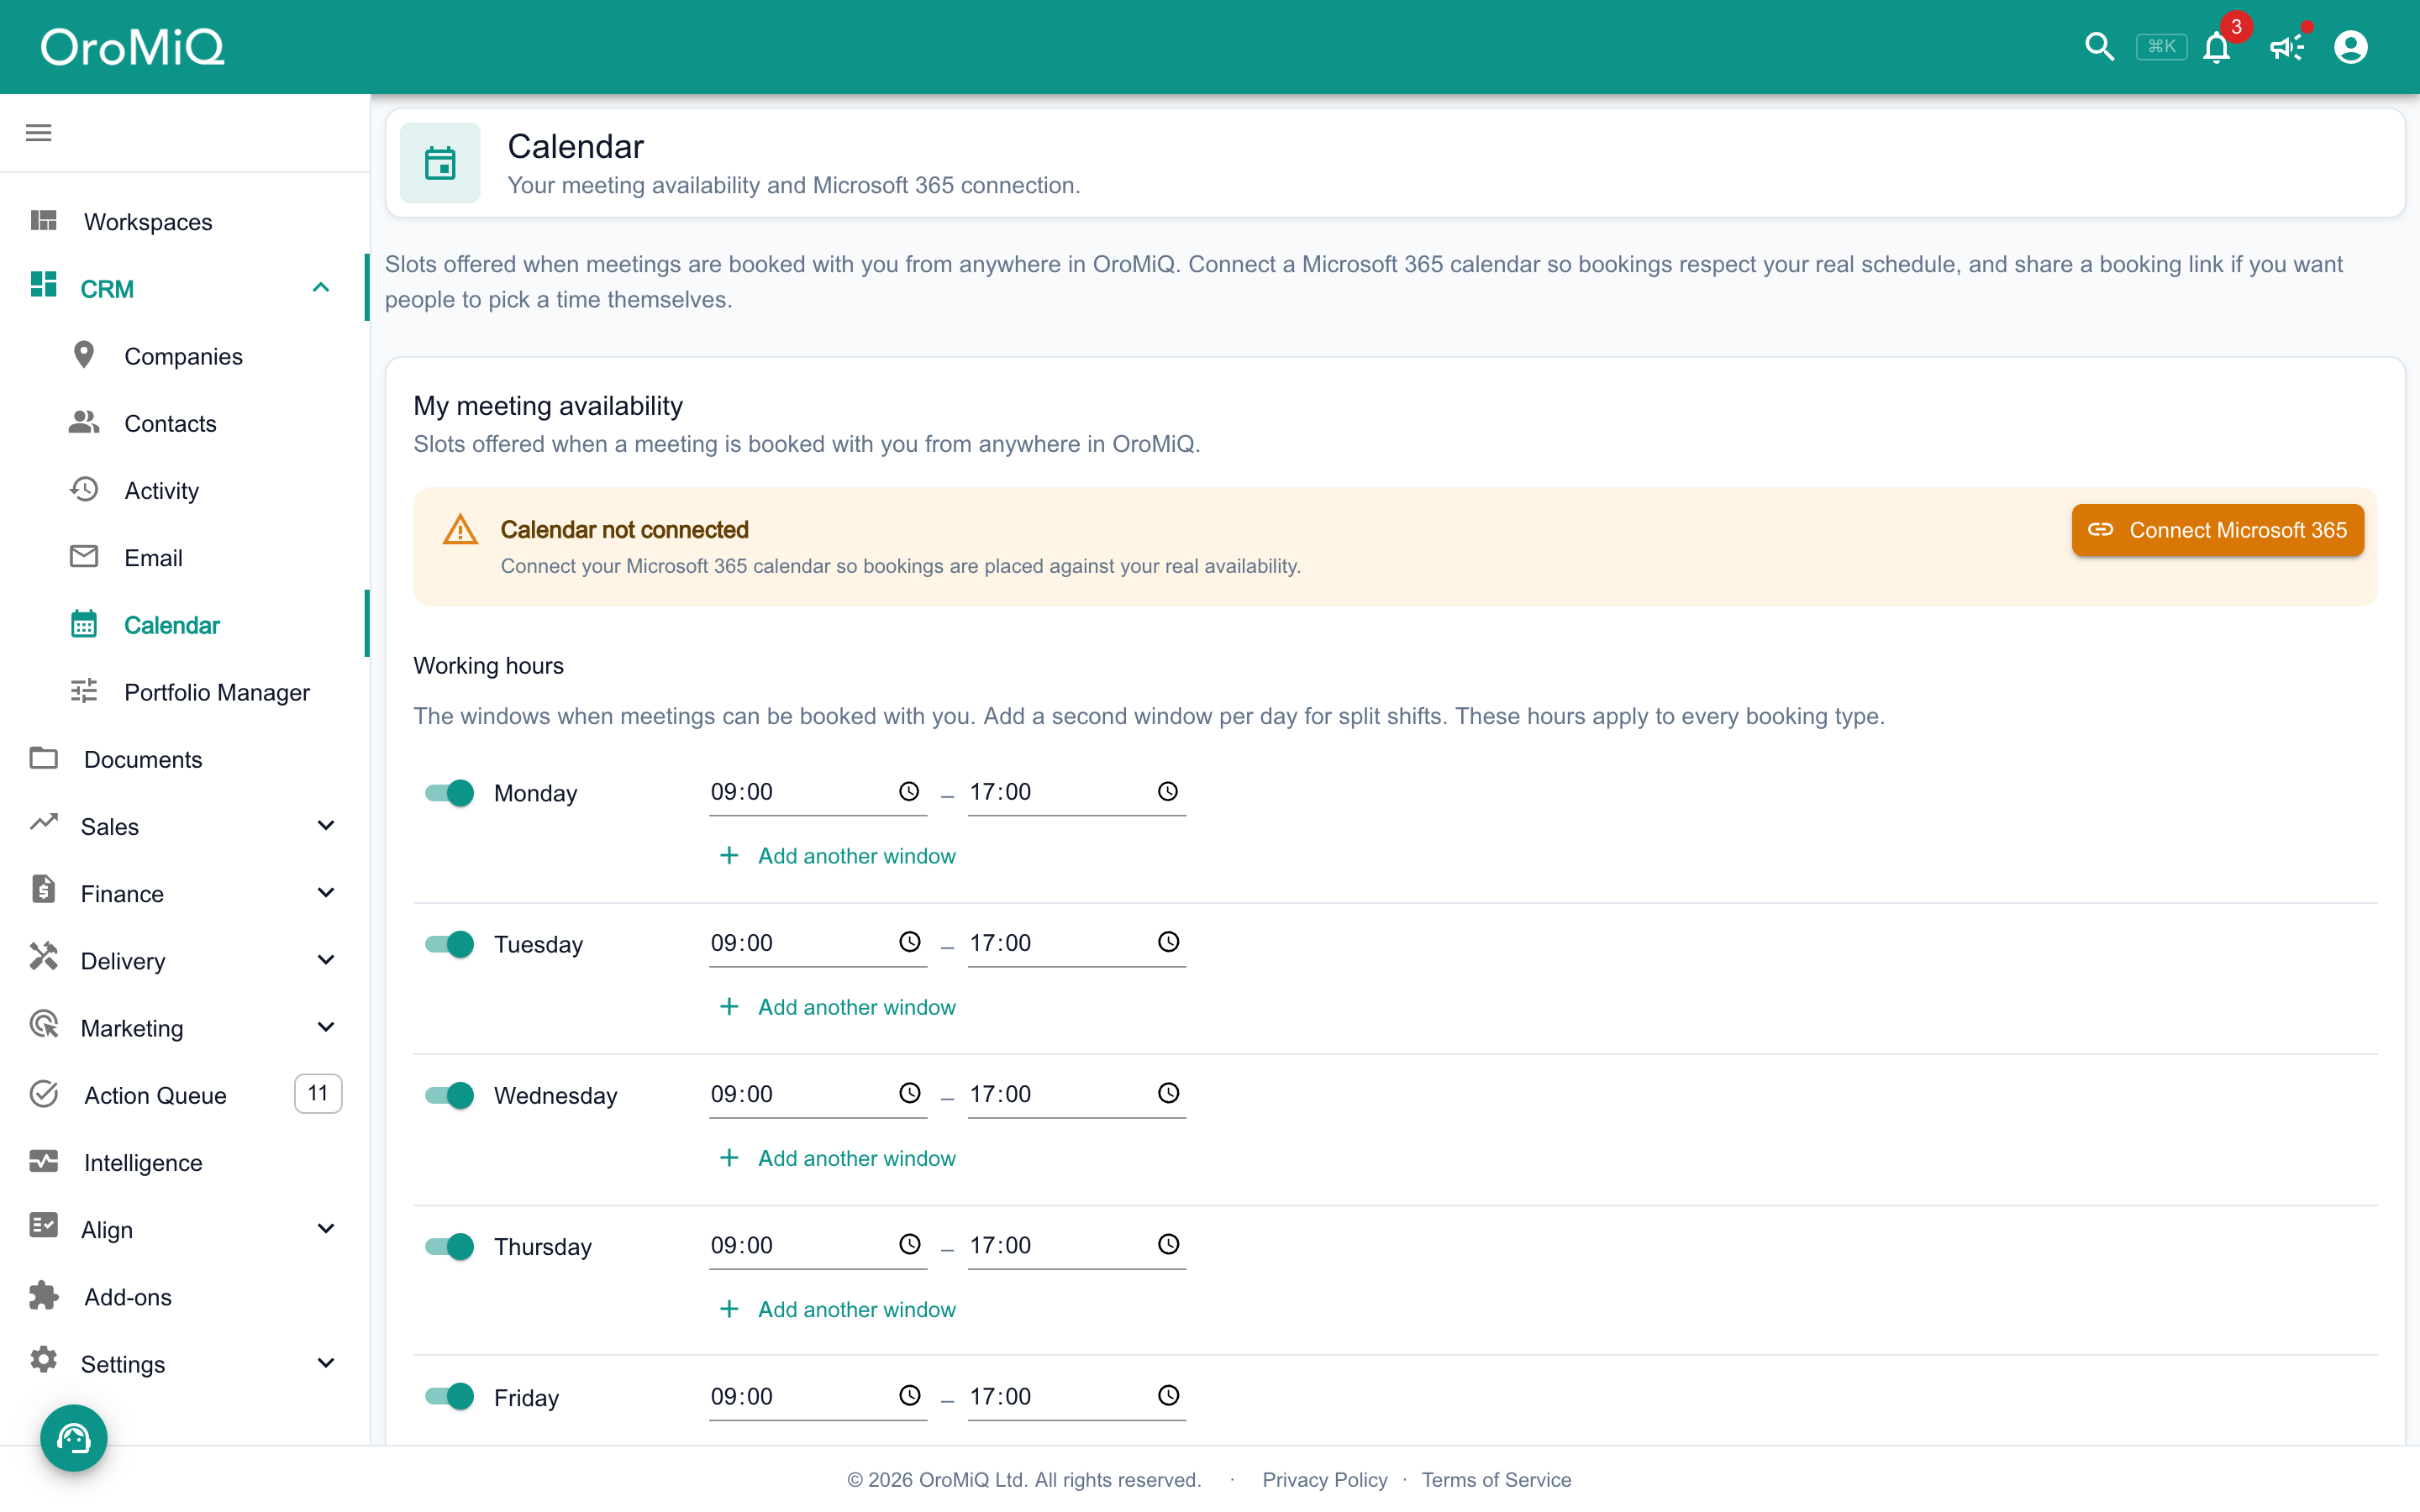
Open CRM then Calendar, and click the Calendar settings cog. If you see Calendar not connected, click Connect Microsoft 365 first.
Under My meeting availability, set your Working hours and Timezone, check Available for booking is on, and click Save changes.
Create and share a booking link
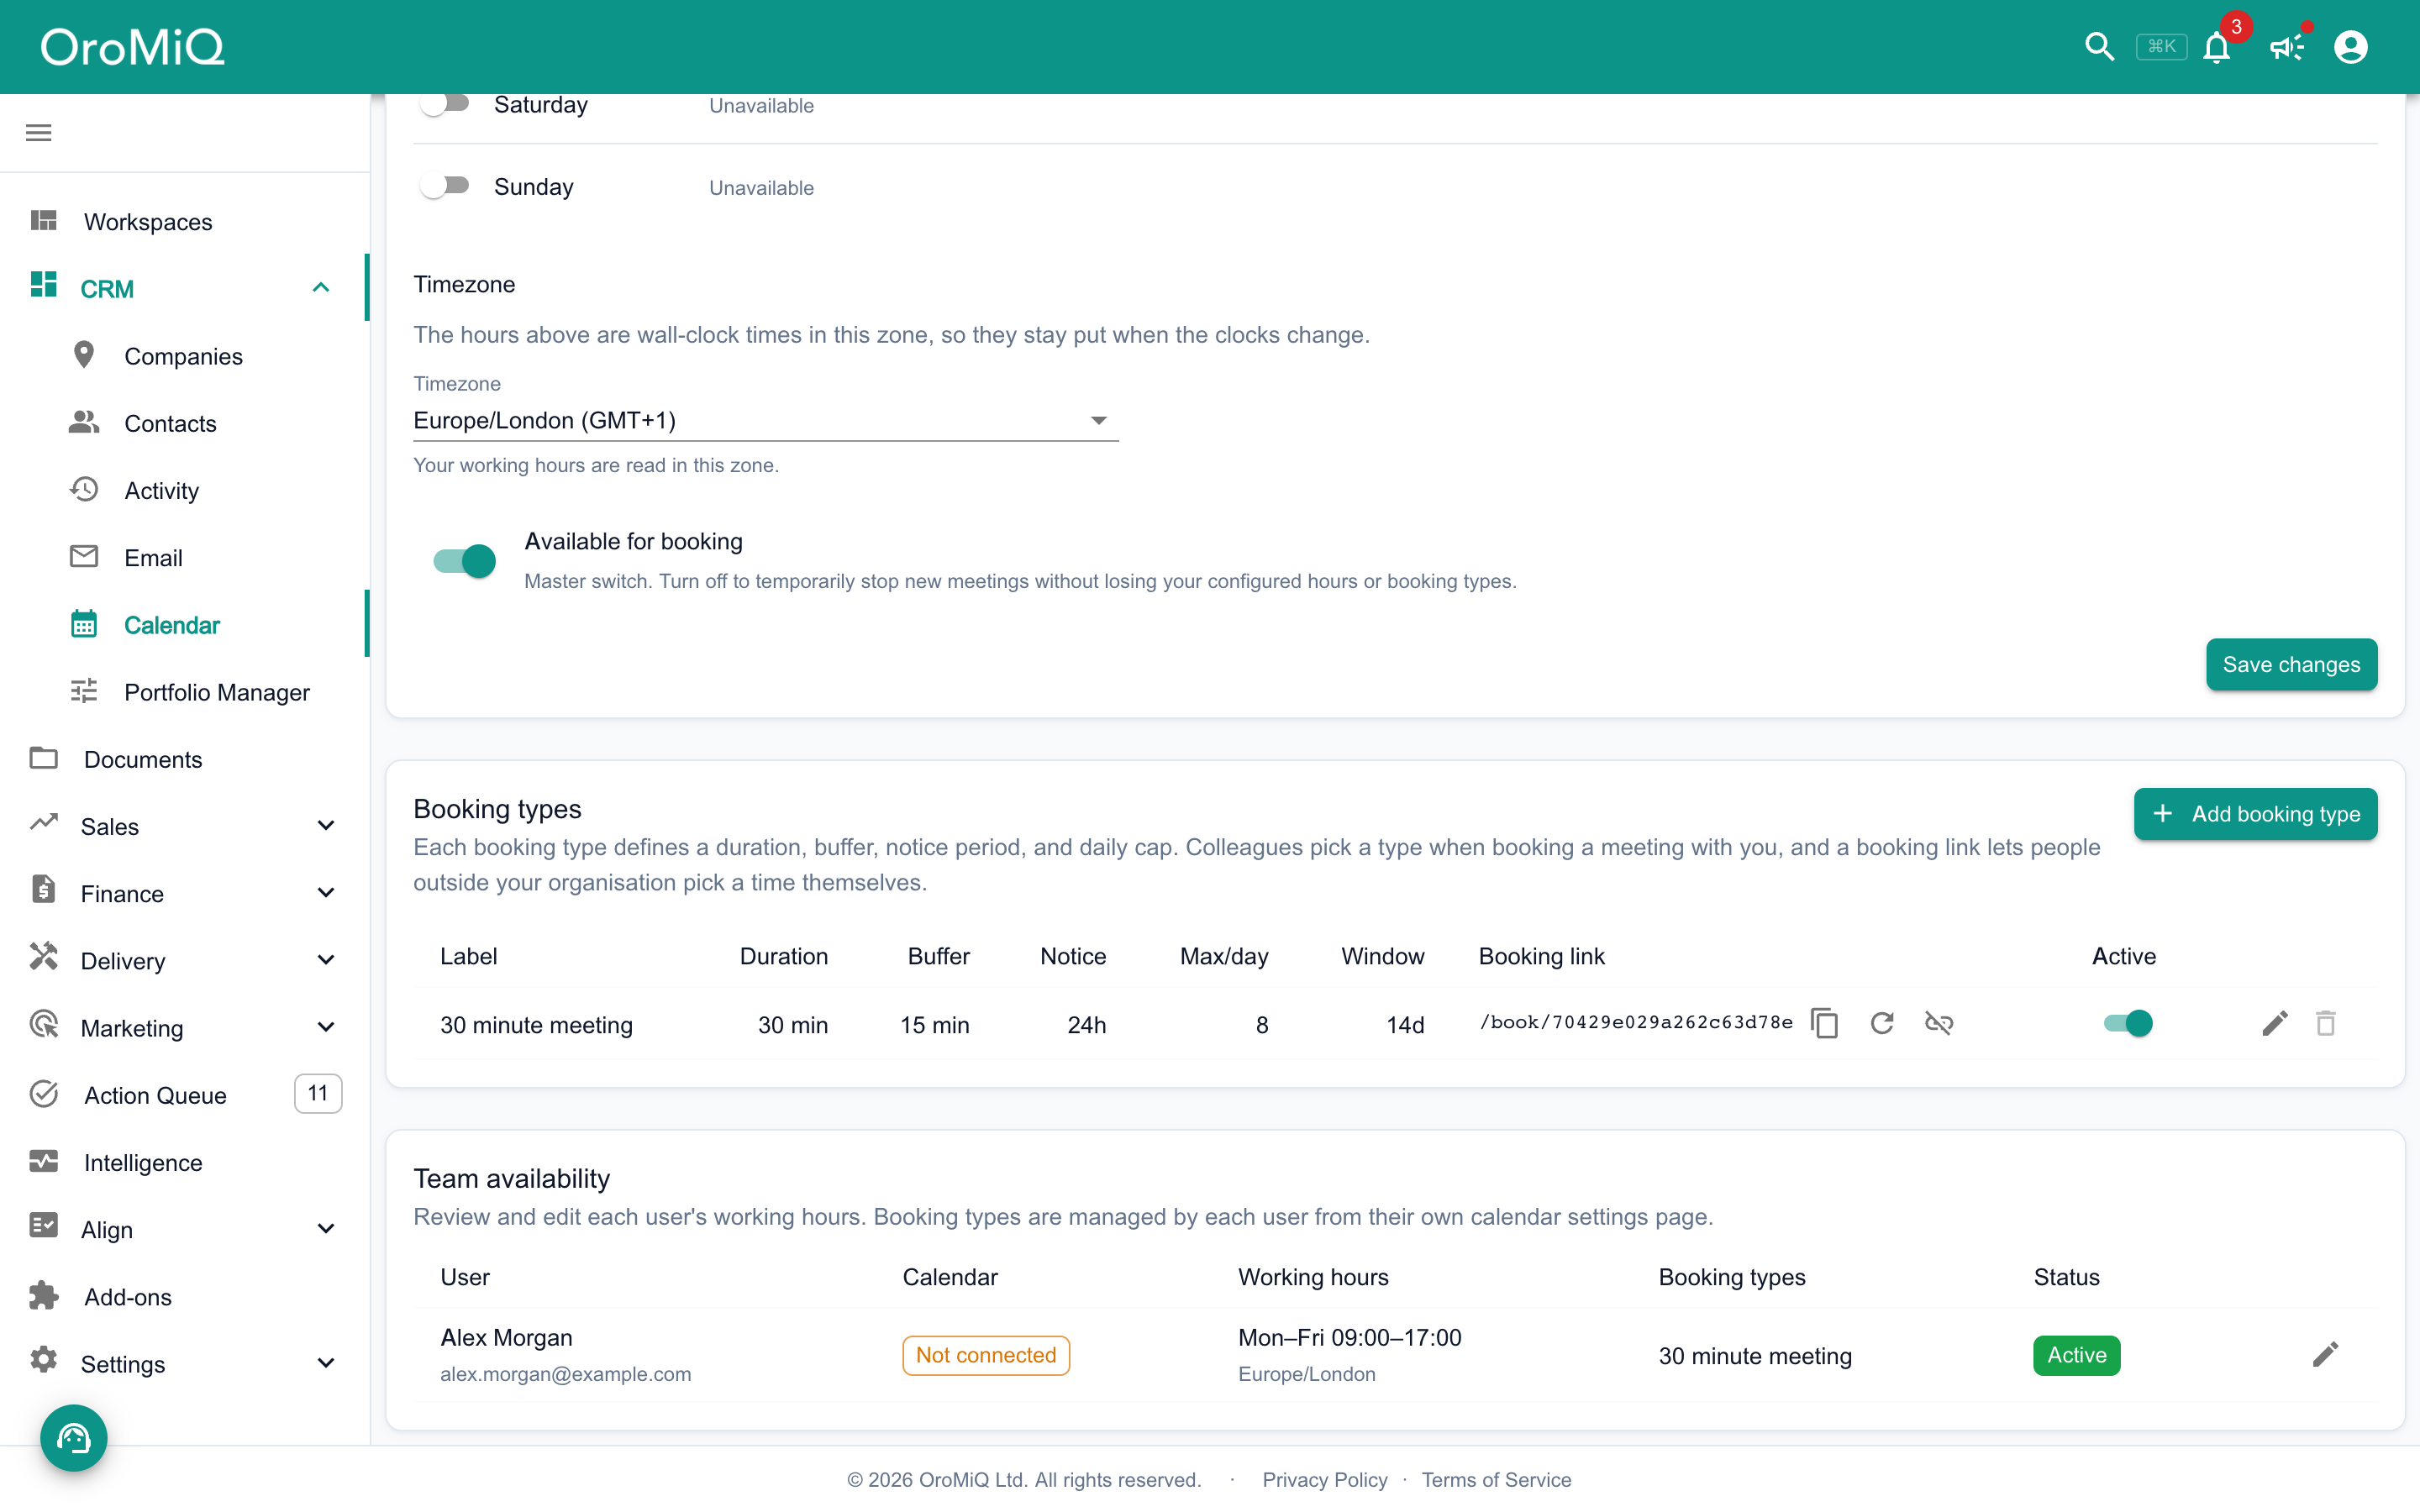
Under Booking types, click Add booking type. Set a Label, the Duration (minutes), any buffer, notice and daily limit, and the Meeting mode. Online (Teams) adds a Microsoft Teams join link.
In the Booking link column, click Create link, then copy it and share it in your email signature or on your website. Visitors pick a time and enter their details, and the meeting goes straight into your calendar.
Tip
What next
Cannot find what you need? Browse the Help Centre or submit a support ticket.