Contacts & companies

Import your companies and contacts

6 min read
Already keep your companies and contacts in a spreadsheet? Import them in one go from a CSV file. OroMiQ checks every row before anything is saved, shows you what will be created, and lets you decide what happens to records you already have.

Before you start

You need the Admin or Manager role to open Data management.

Have your data saved as a .csv file, with column headings in the first row.

Open Data management

In the sidebar, open Settings then Data management. The Import & export panel opens on the Import tab, with the steps Data type, Template, Upload, Match columns, Validate and Import along the top.
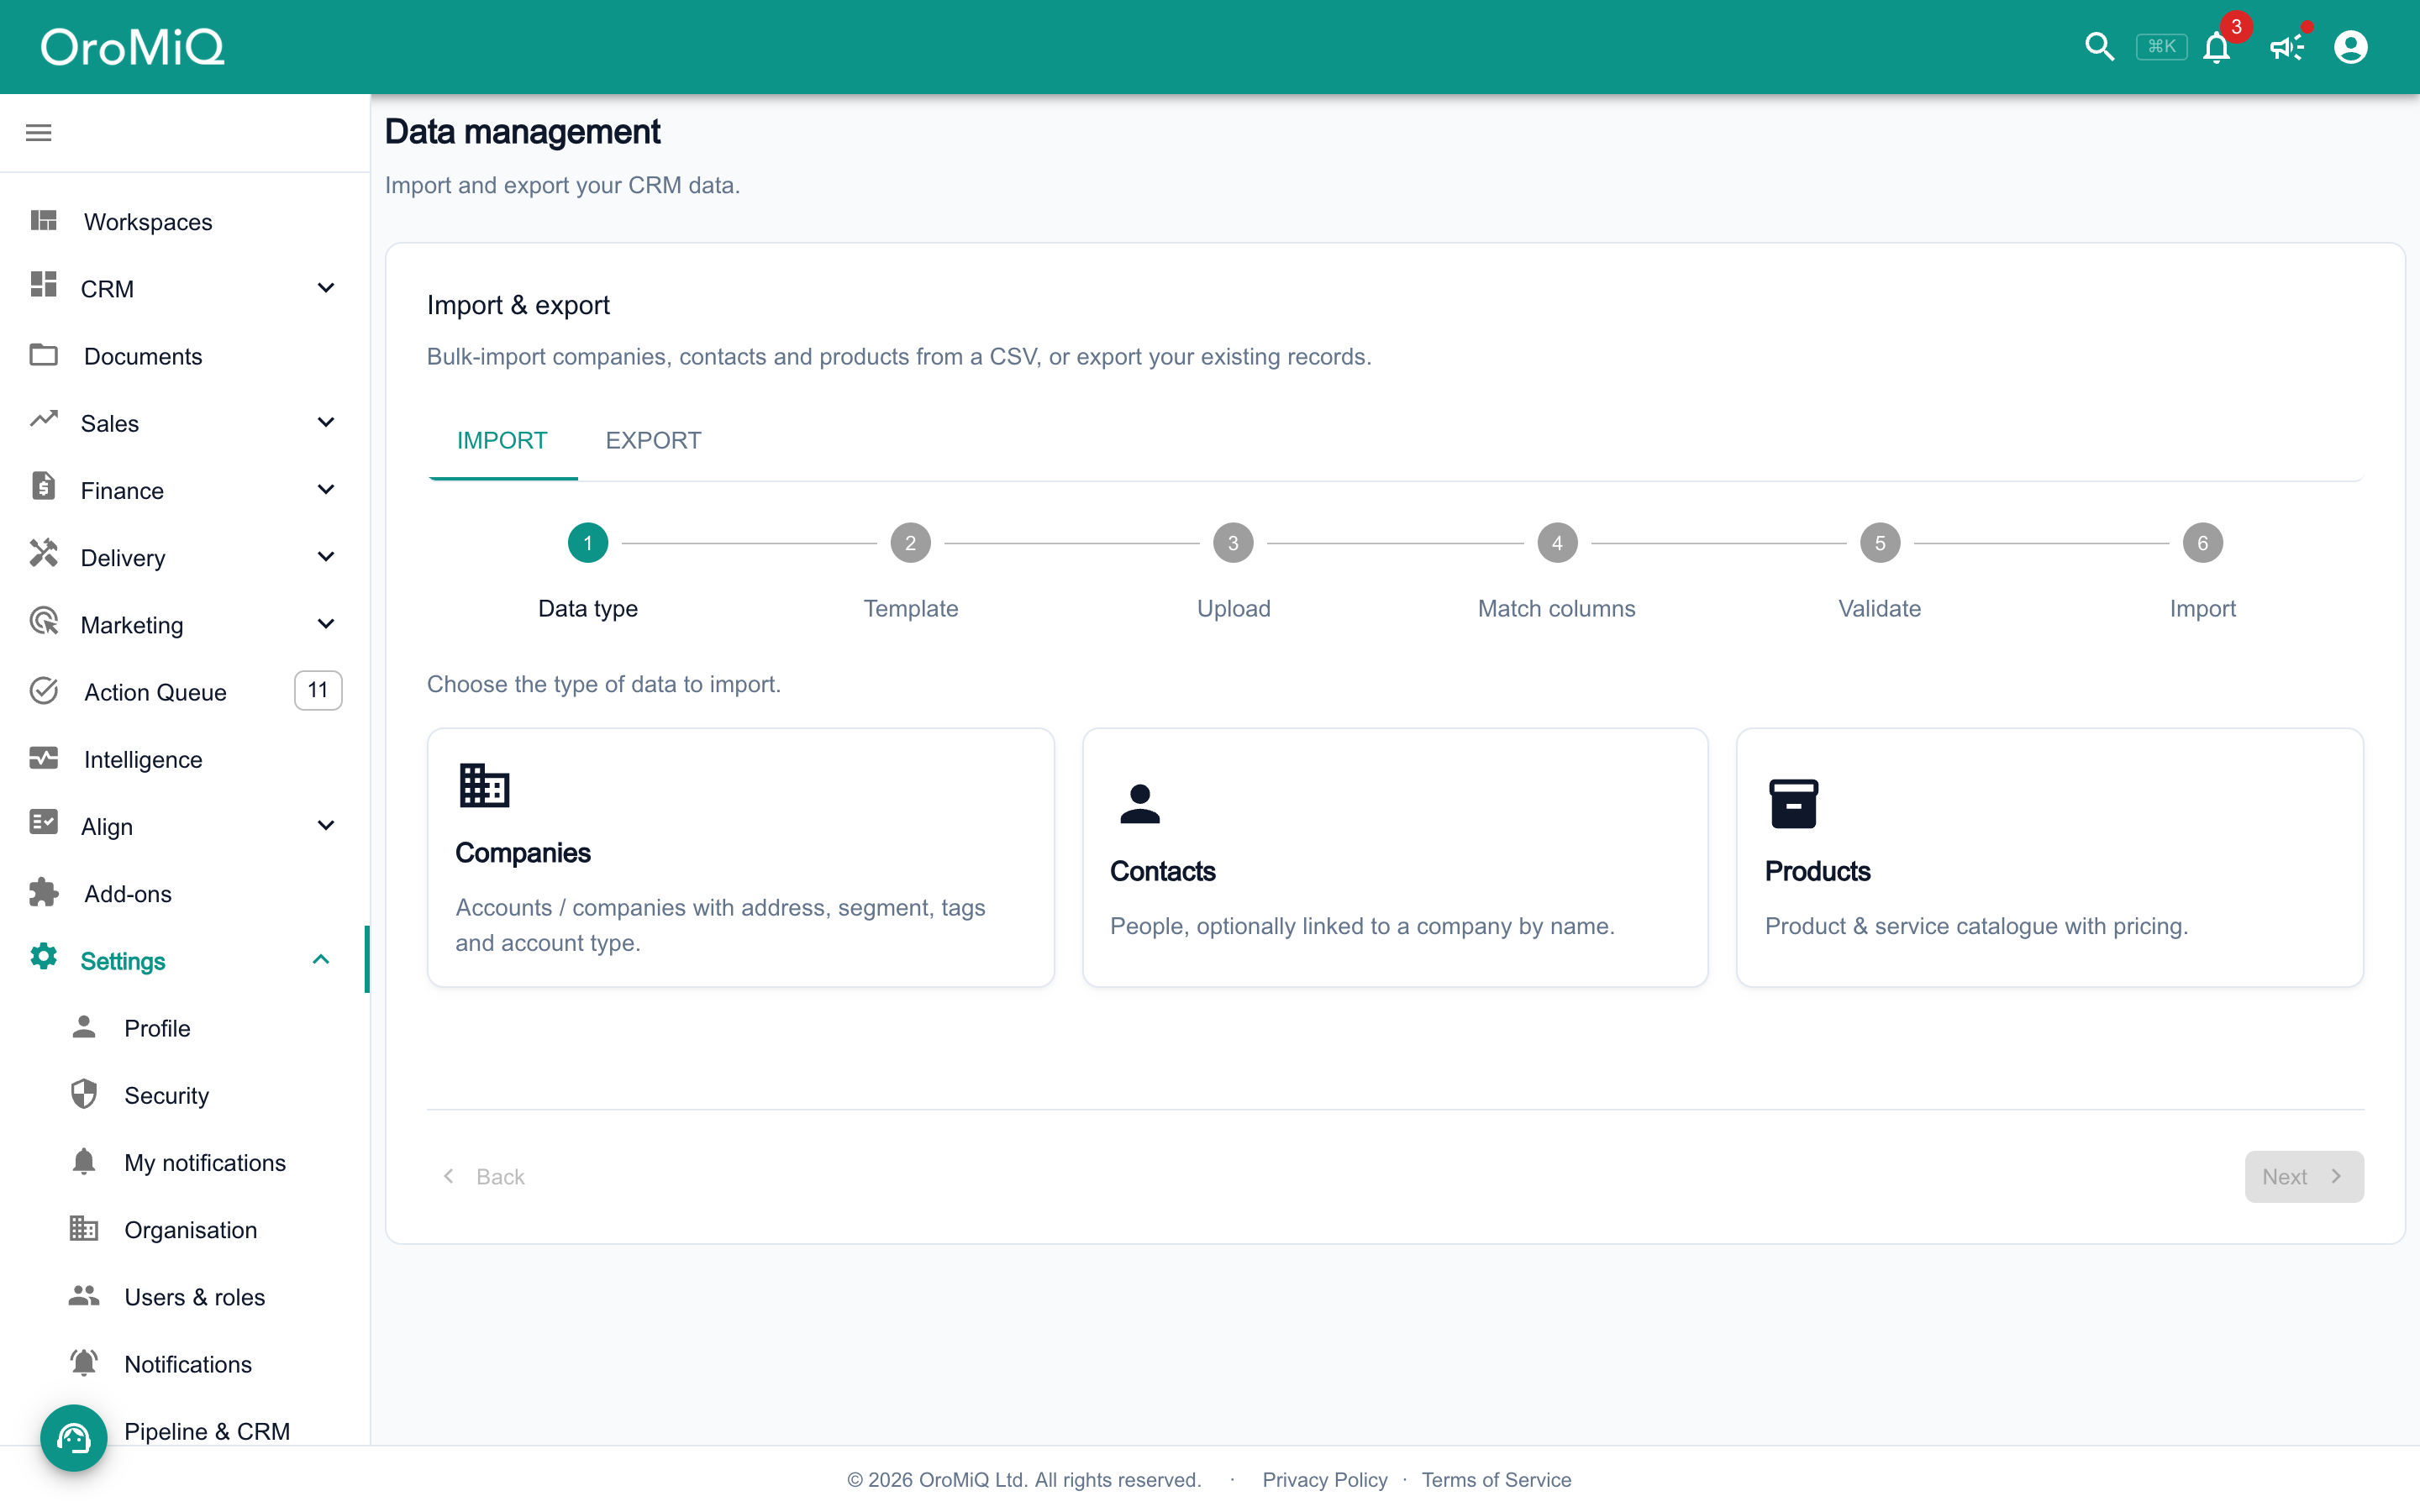
The Data management page in Settings with the Import & export panel open on the Import tab: the Data type, Template, Upload, Match columns, Validate and Import steps, and cards for Companies, Contacts and Products.

Choose what to import and get the template

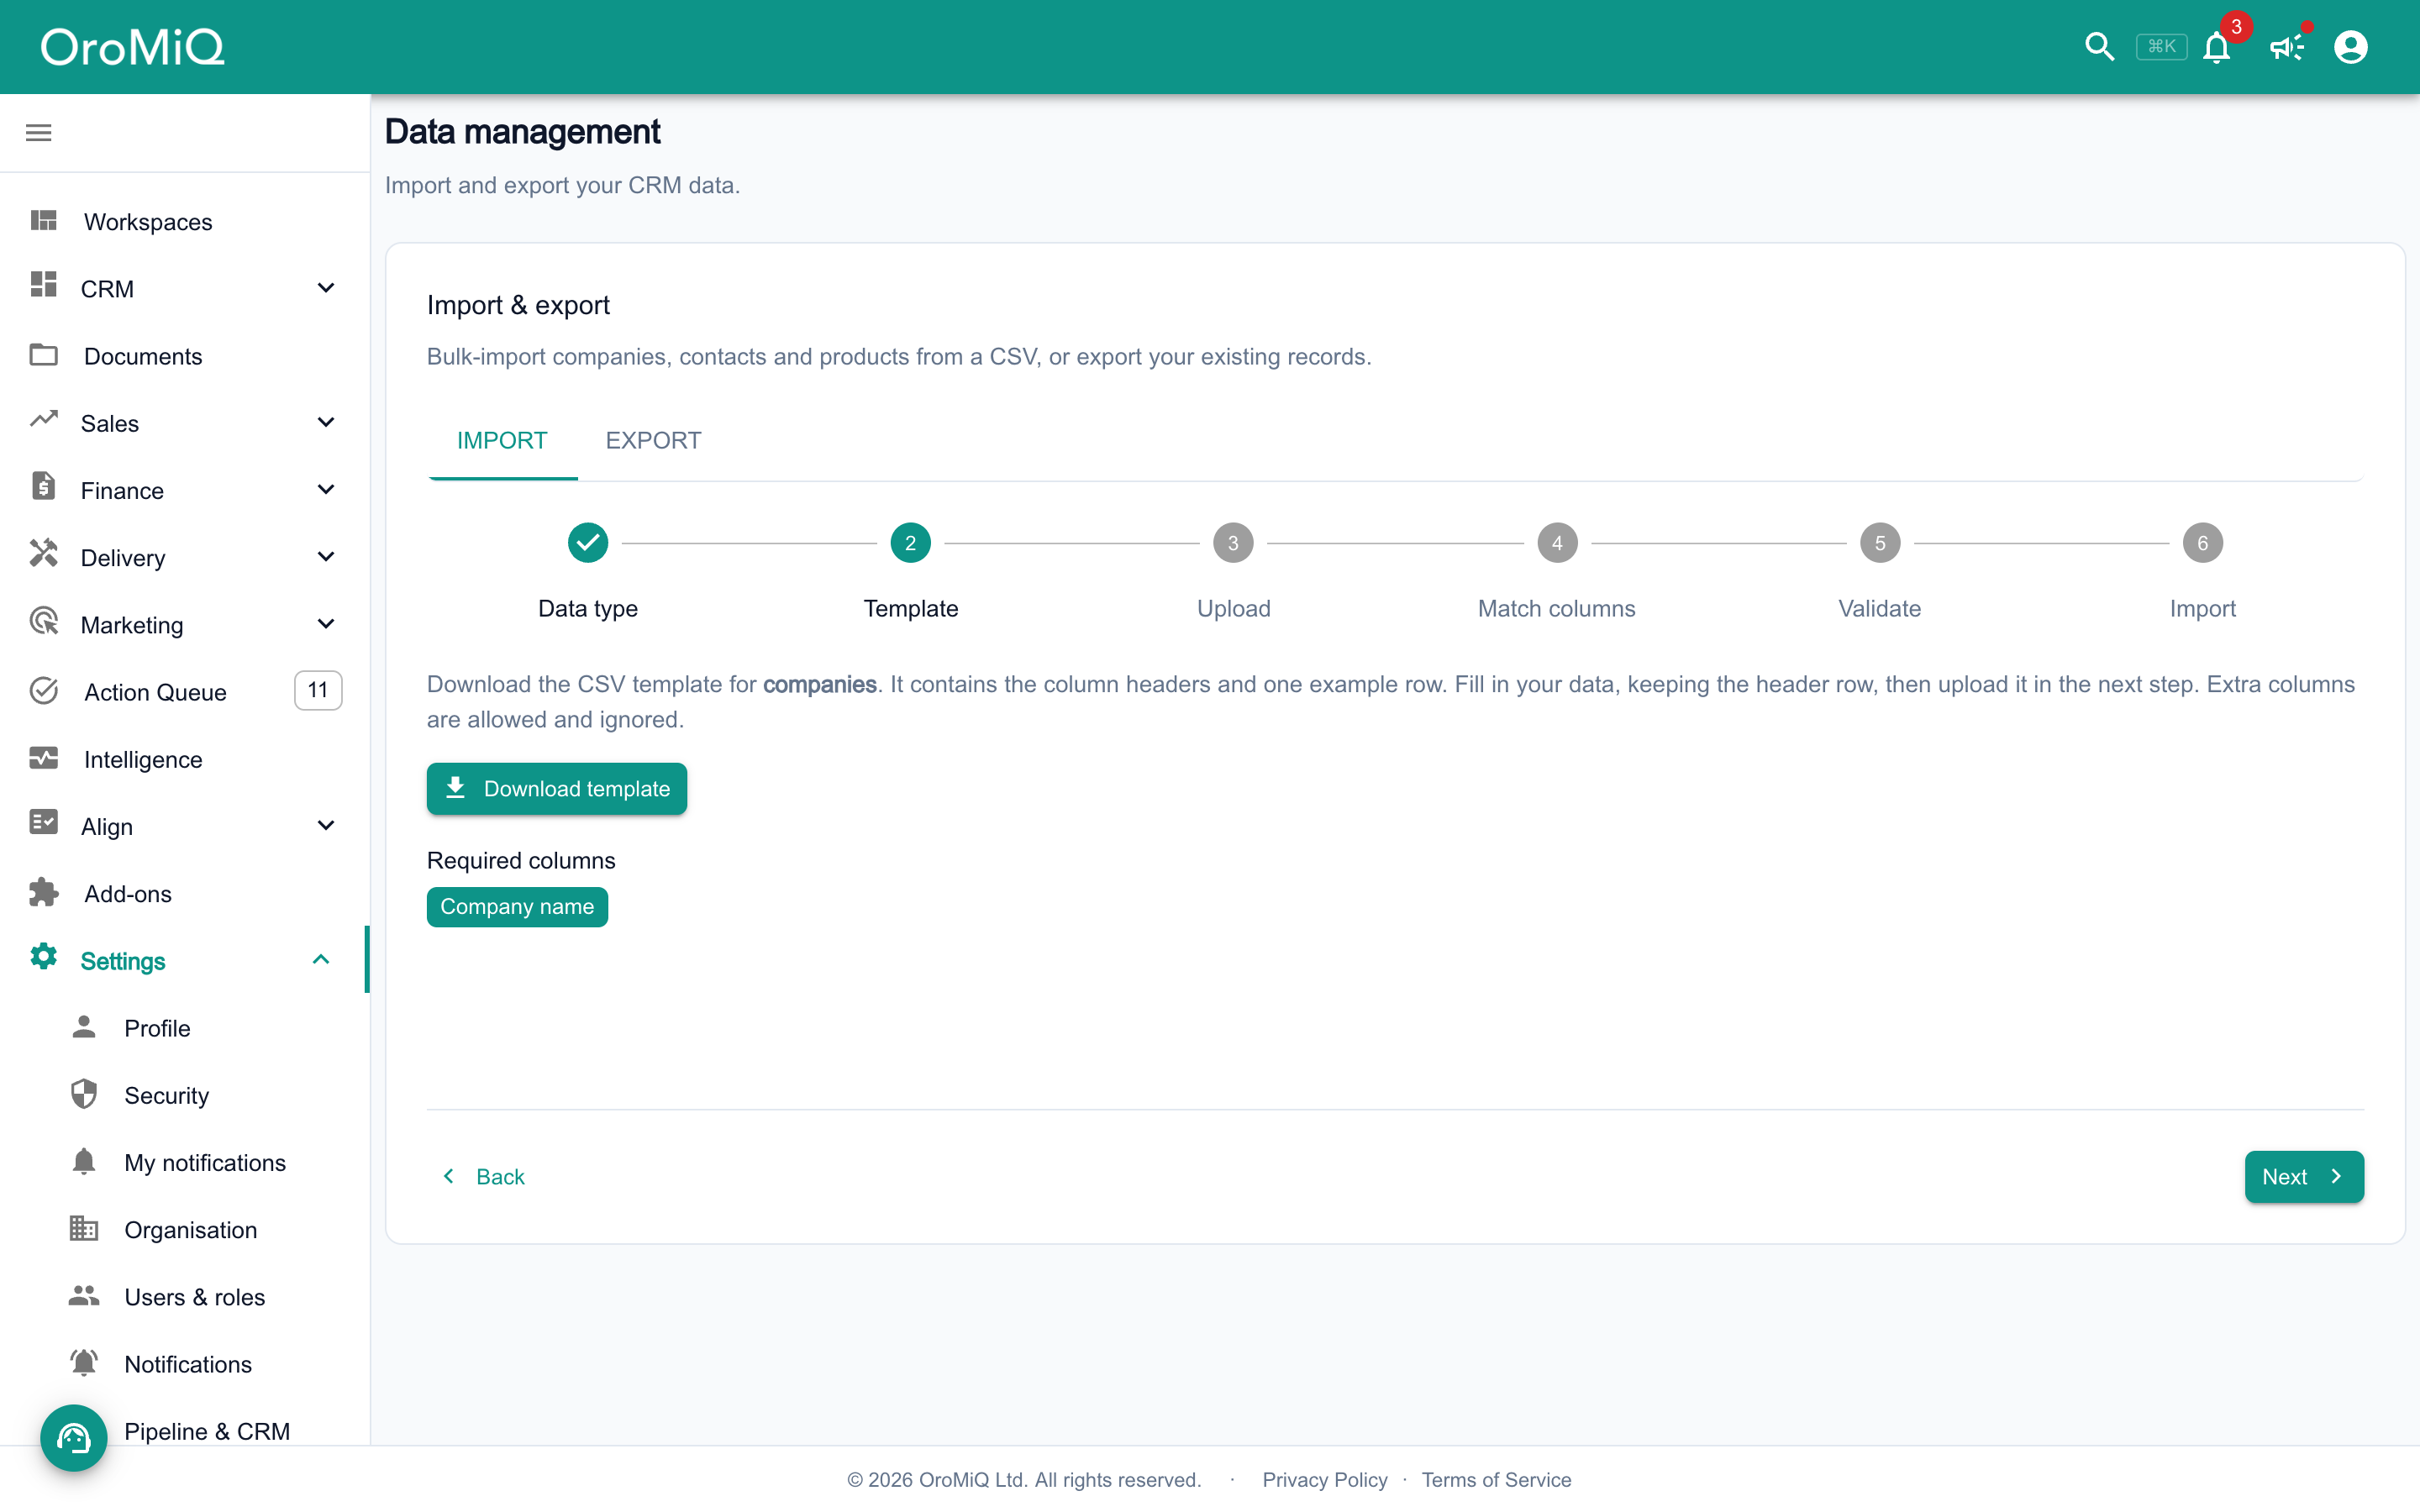
Pick Companies, Contacts or Products, then click Next. On the Template step, click Download template for a CSV with the right headings and one example row. The step also lists the Required columns: Company name for companies and Full name for contacts.

Fill in your data under the headings. Extra columns in your file are fine.

Tip
Import your companies first, then your contacts. A contact with a Company name is linked to the company with that name, so the company needs to exist already.
The Template step for companies, with a Download template button and Company name listed under Required columns.

Upload your file

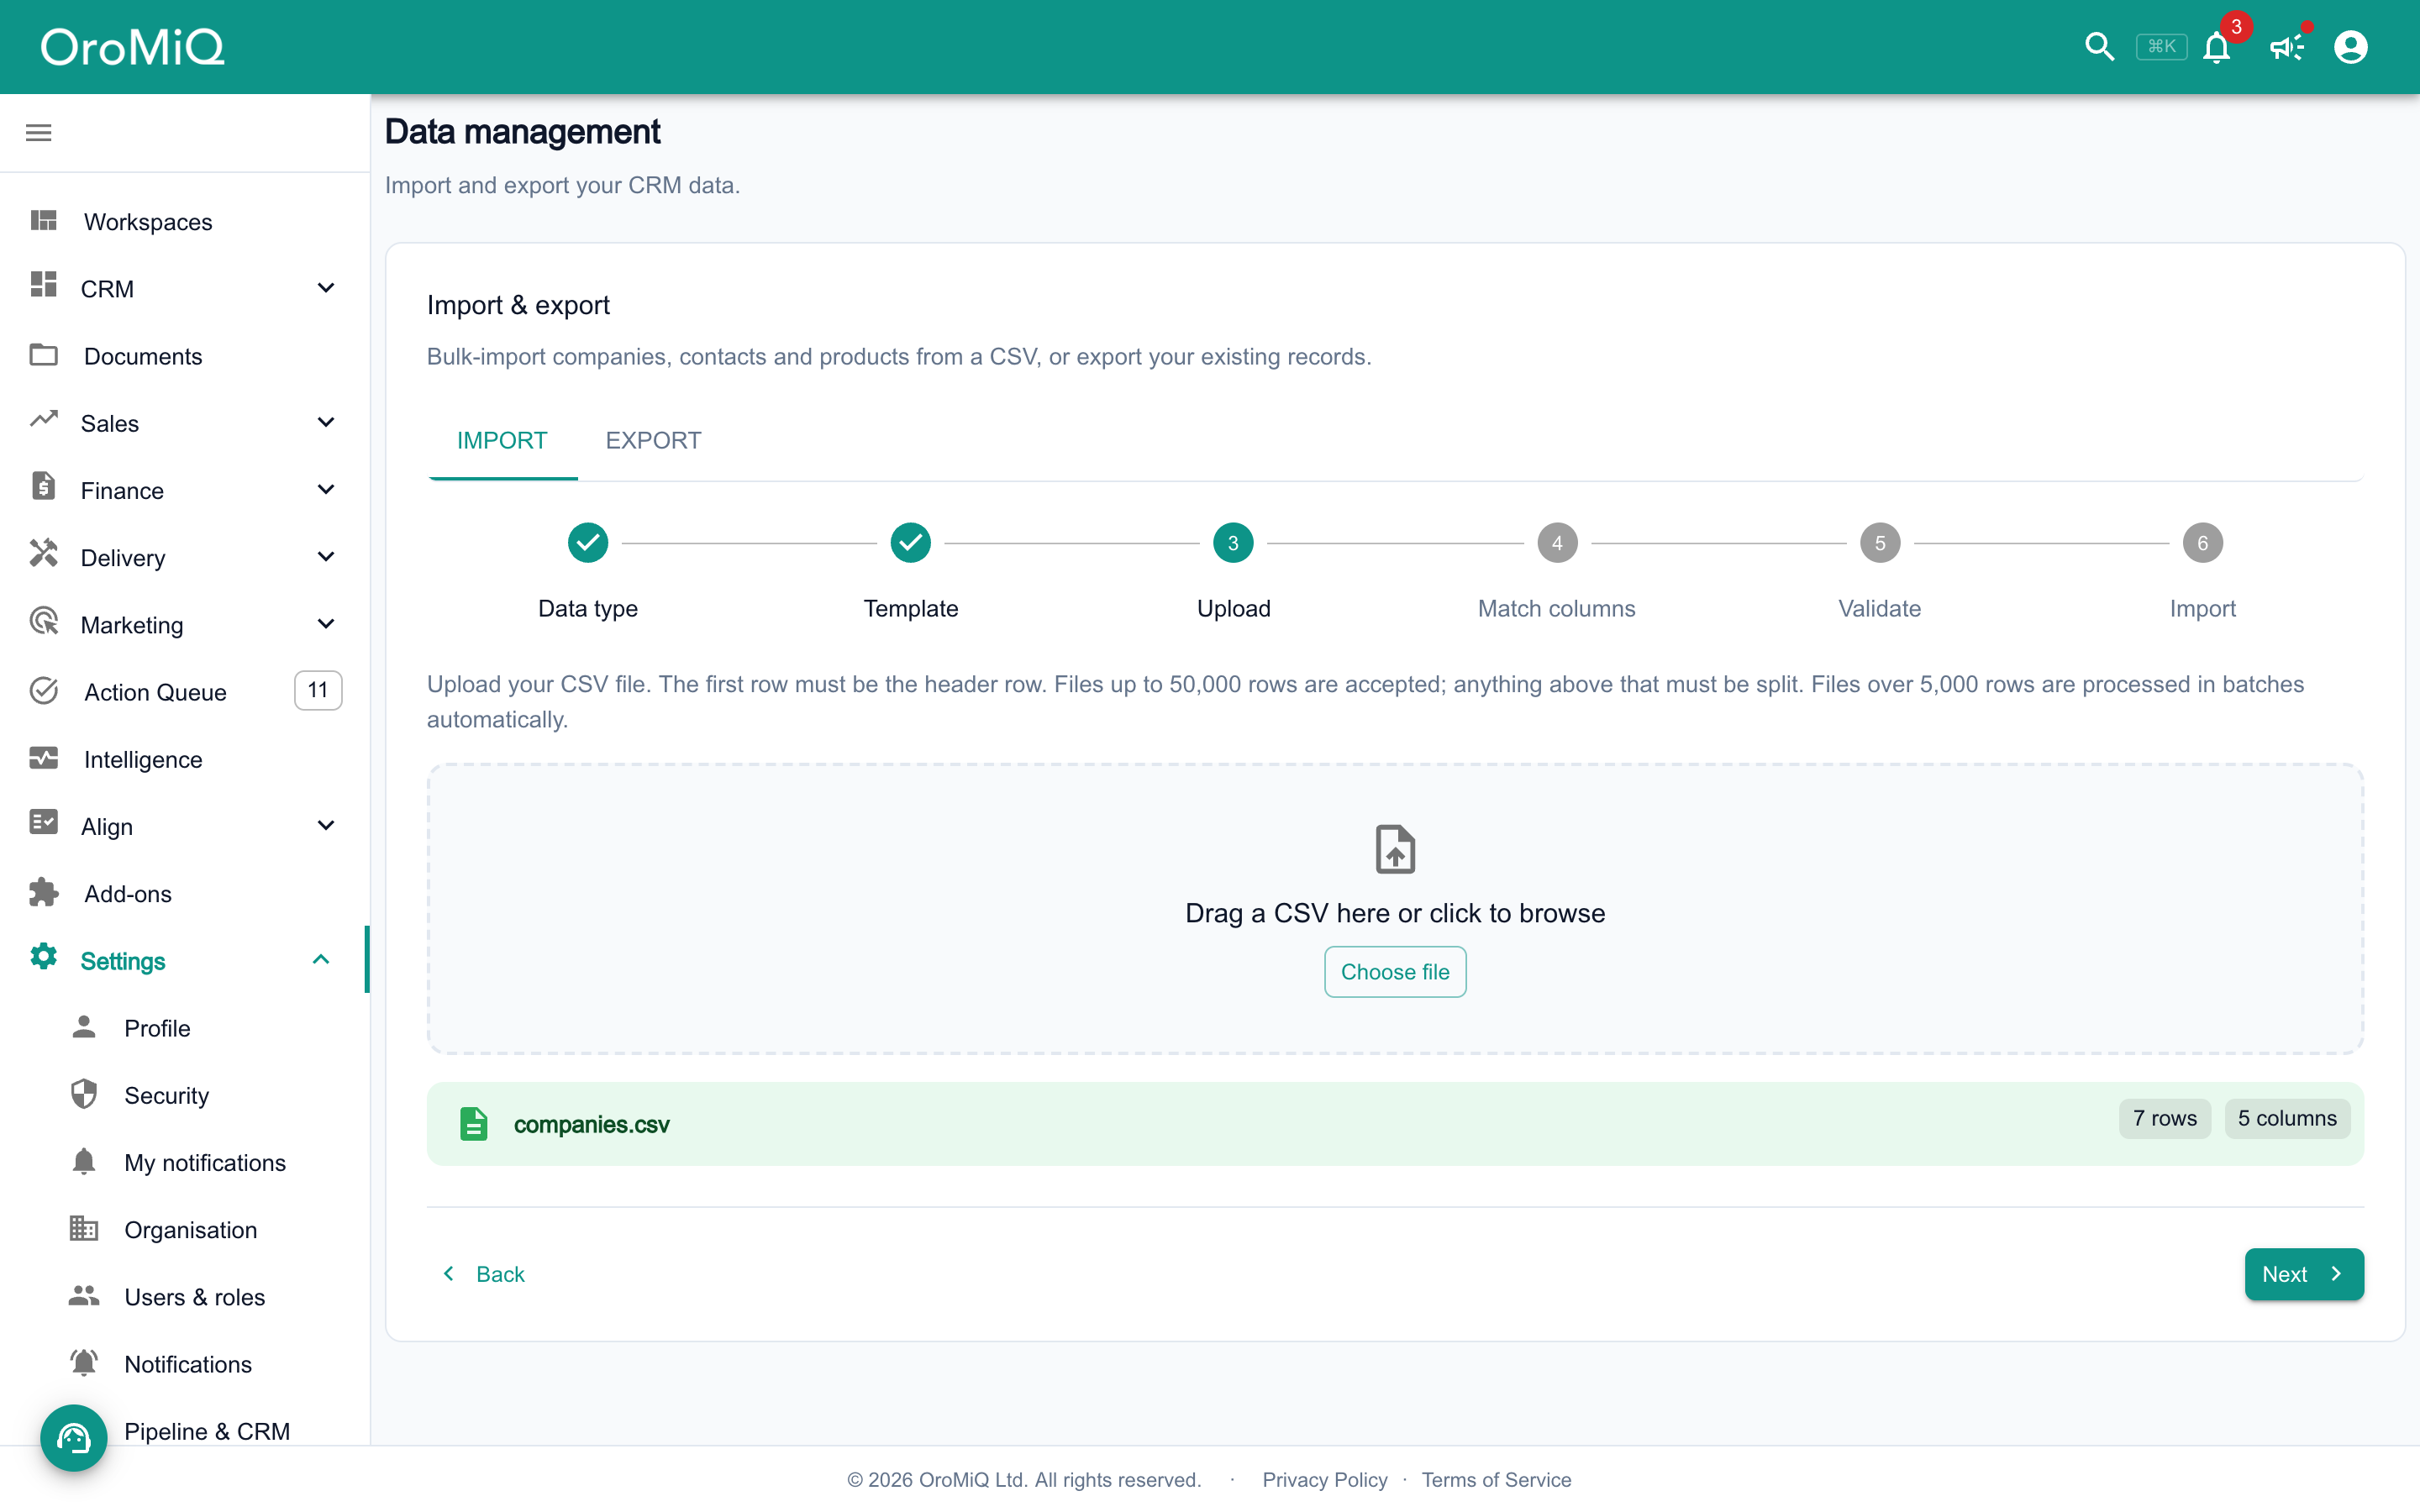
Click Next, then drag your CSV onto the upload area or click Choose file. OroMiQ shows the file name with its row and column counts. Click Next to continue.

Note
Files of up to 50,000 rows are accepted. Anything over 5,000 rows is processed in batches automatically, so you do not need to split it.
The Upload step with a drag-and-drop area and a Choose file button, and the uploaded companies.csv shown with 7 rows and 5 columns.

Match your columns

Each column in your file is listed with a sample value. Columns whose headings match an OroMiQ field are matched for you. Check each one, and use the Maps to field menu to fix any that are wrong, or choose Ignore this column to leave it out.

Required fields are marked with * and must be matched before you can click Validate.
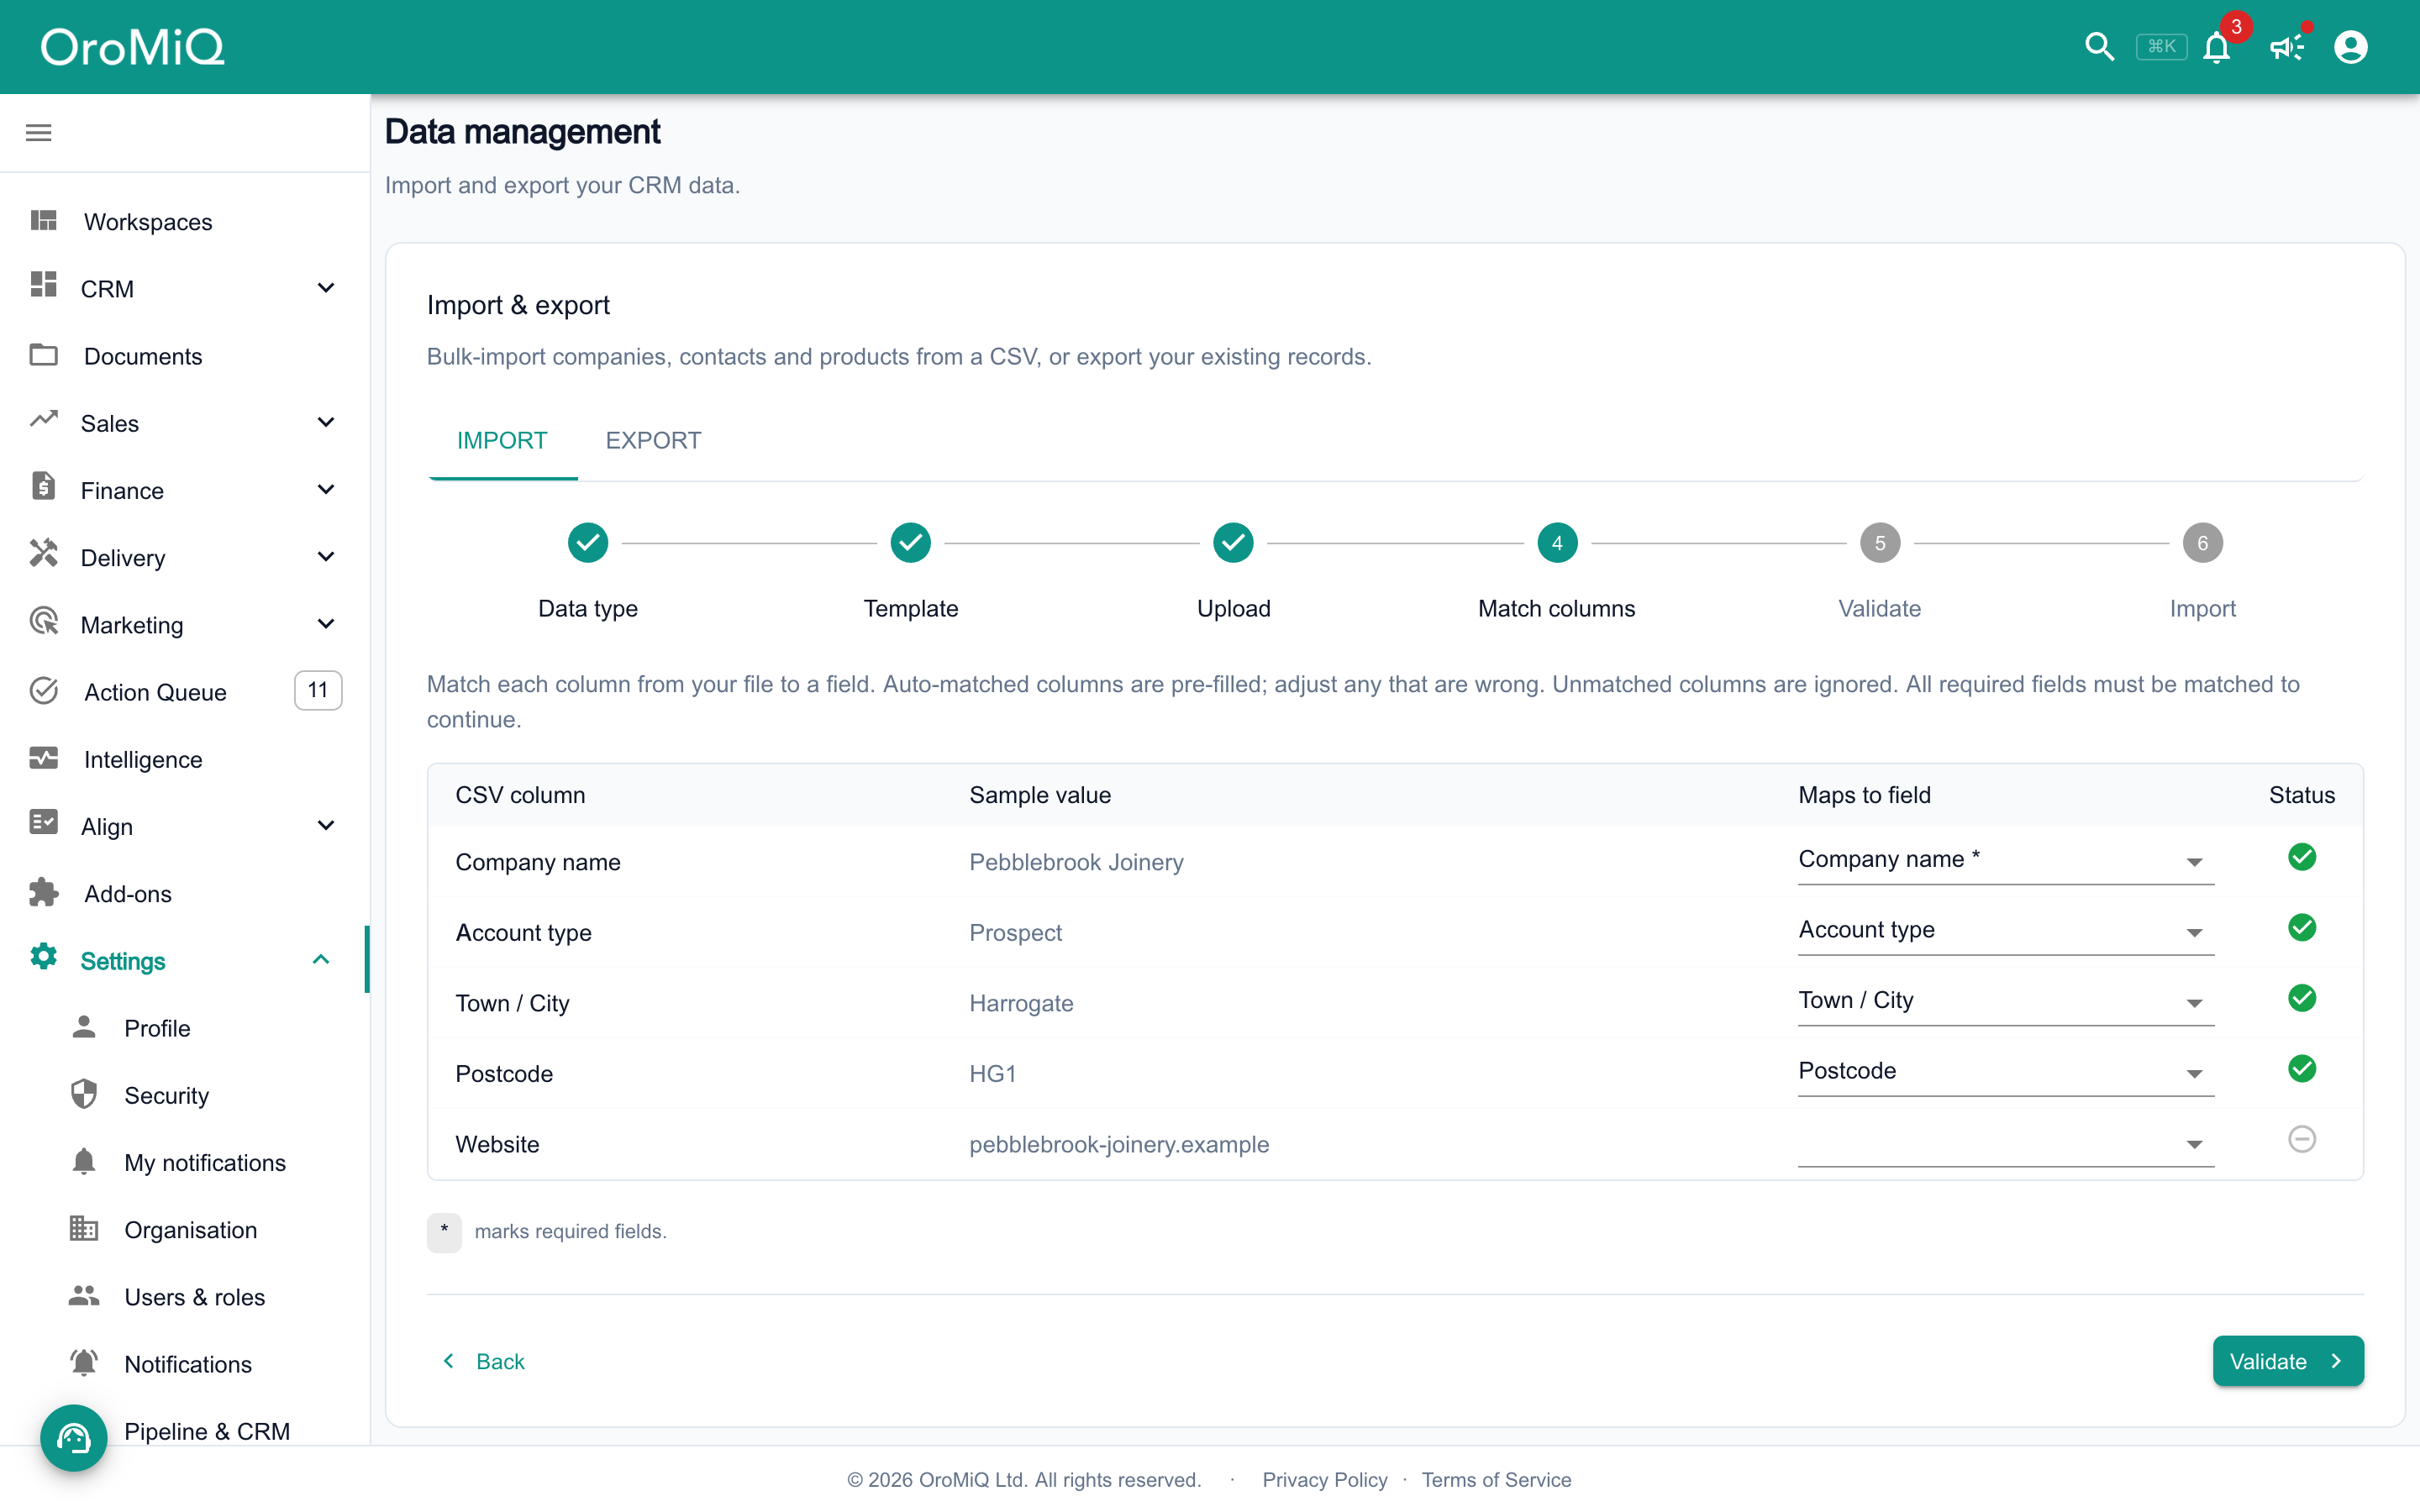
The Match columns step listing each CSV column with a sample value, the field it maps to and a status tick, with the Website column left unmatched and a Validate button.

Check errors and duplicates

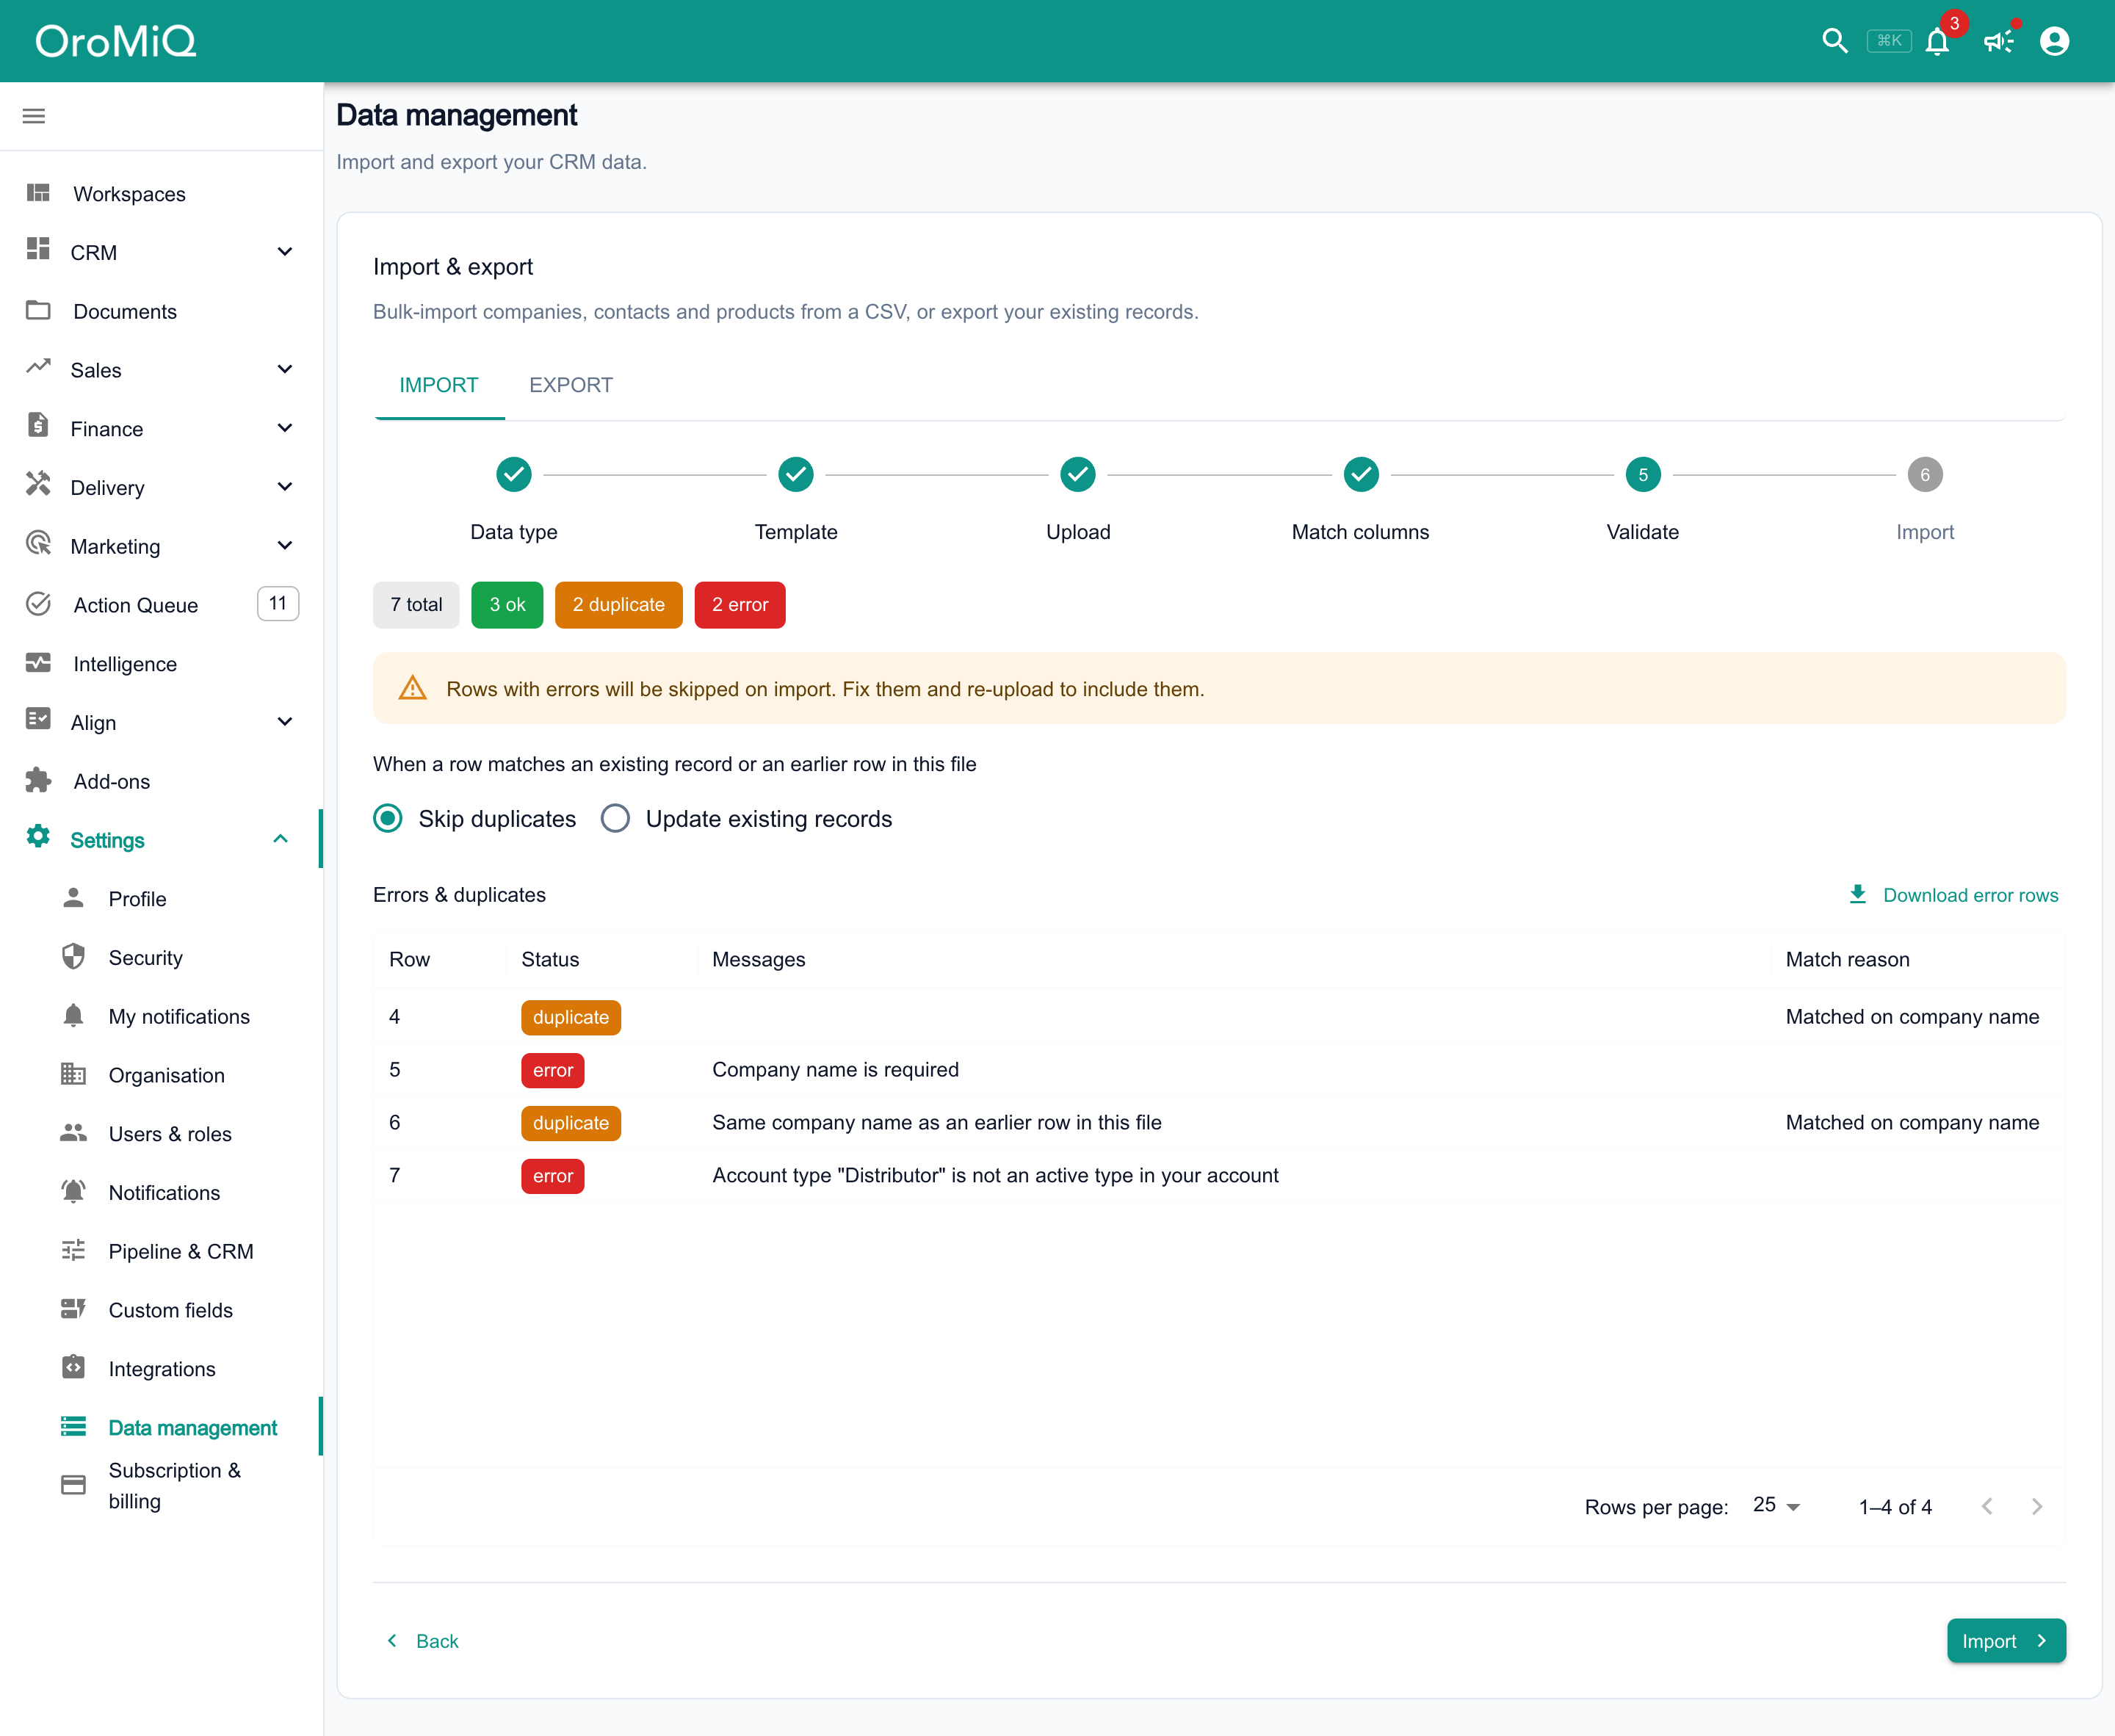
Validating checks every row without saving anything. You see a count of rows that are ok, duplicate or error, and a table of the rows that need attention with the reason for each.

  • Errors are skipped on import. Common causes are a missing required value, an invalid email address, or an Account type that does not match one of your active account types. Click Download error rows, fix them in your spreadsheet and import them again.
  • Duplicates match a record you already have, or an earlier row in the same file: companies by company name or company registration number, contacts by email address, and products by SKU. Choose Skip duplicates to leave your existing records alone, or Update existing records to fill them in from your file.

Note
OroMiQ never guesses or fixes a bad value for you. A row with a problem is held back until you correct it, so nothing half-right lands in your CRM.
The Validate step showing 7 total, 3 ok, 2 duplicate and 2 error, the Skip duplicates and Update existing records options, and an Errors & duplicates table with a Download error rows link. It lists a row matched on company name to an existing company, a row missing its company name, a row with the same company name as an earlier row in the file, and a row whose account type is not an active type in the account, above the Back and Import buttons.

Import

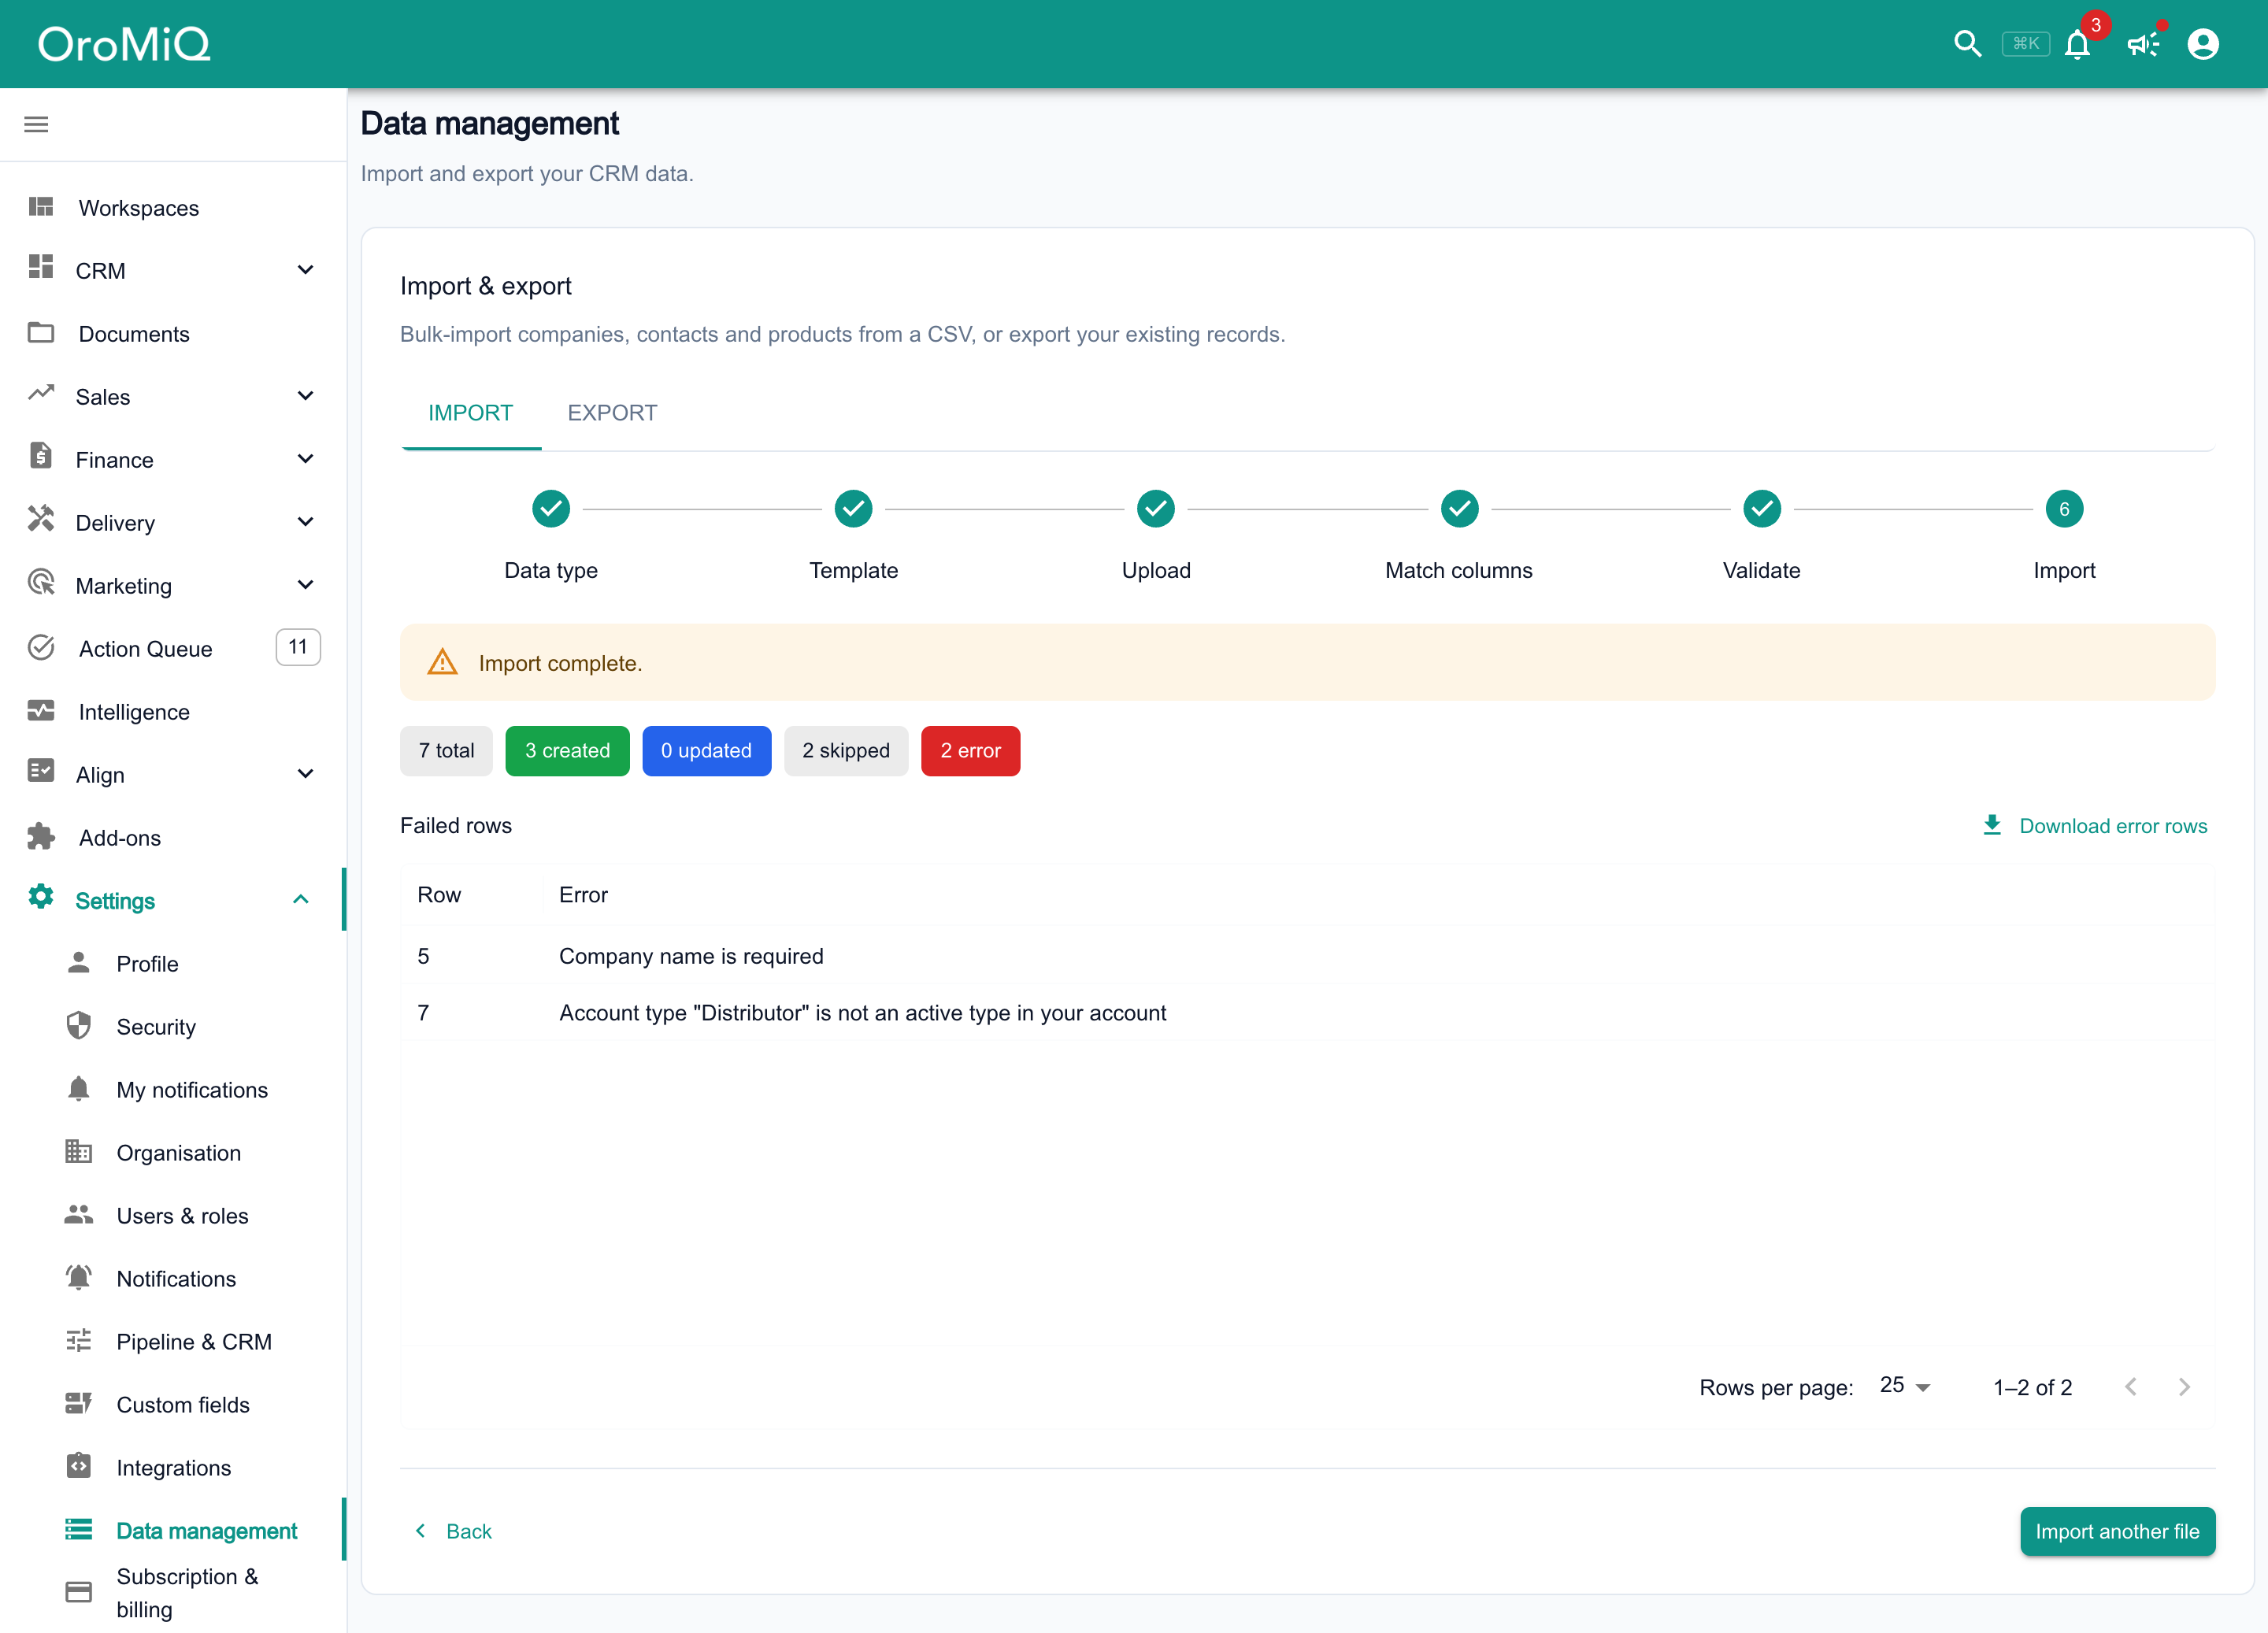
Click Import. When it finishes you see Import complete with counts of rows created, updated, skipped and in error. Any Failed rows are listed with a Download error rows button. Click Import another file to start again.

Tip

If a contact’s company name matches no company, or more than one, the contact is still imported, just without a company link. You can link it by hand afterwards.

Note

Contacts are matched by email address. If you choose Update existing records, any contact row without an email address cannot be matched and is reported as an error.
The Import step after an import: an Import complete message, counts of 7 total, 3 created, 0 updated, 2 skipped and 2 error, a Failed rows table listing the row with no company name and the row with an account type that is not active, a Download error rows link, and an Import another file button.

Export your records

Switch to the Export tab. Next to Companies, Contacts or Products, click Download CSV.

Note
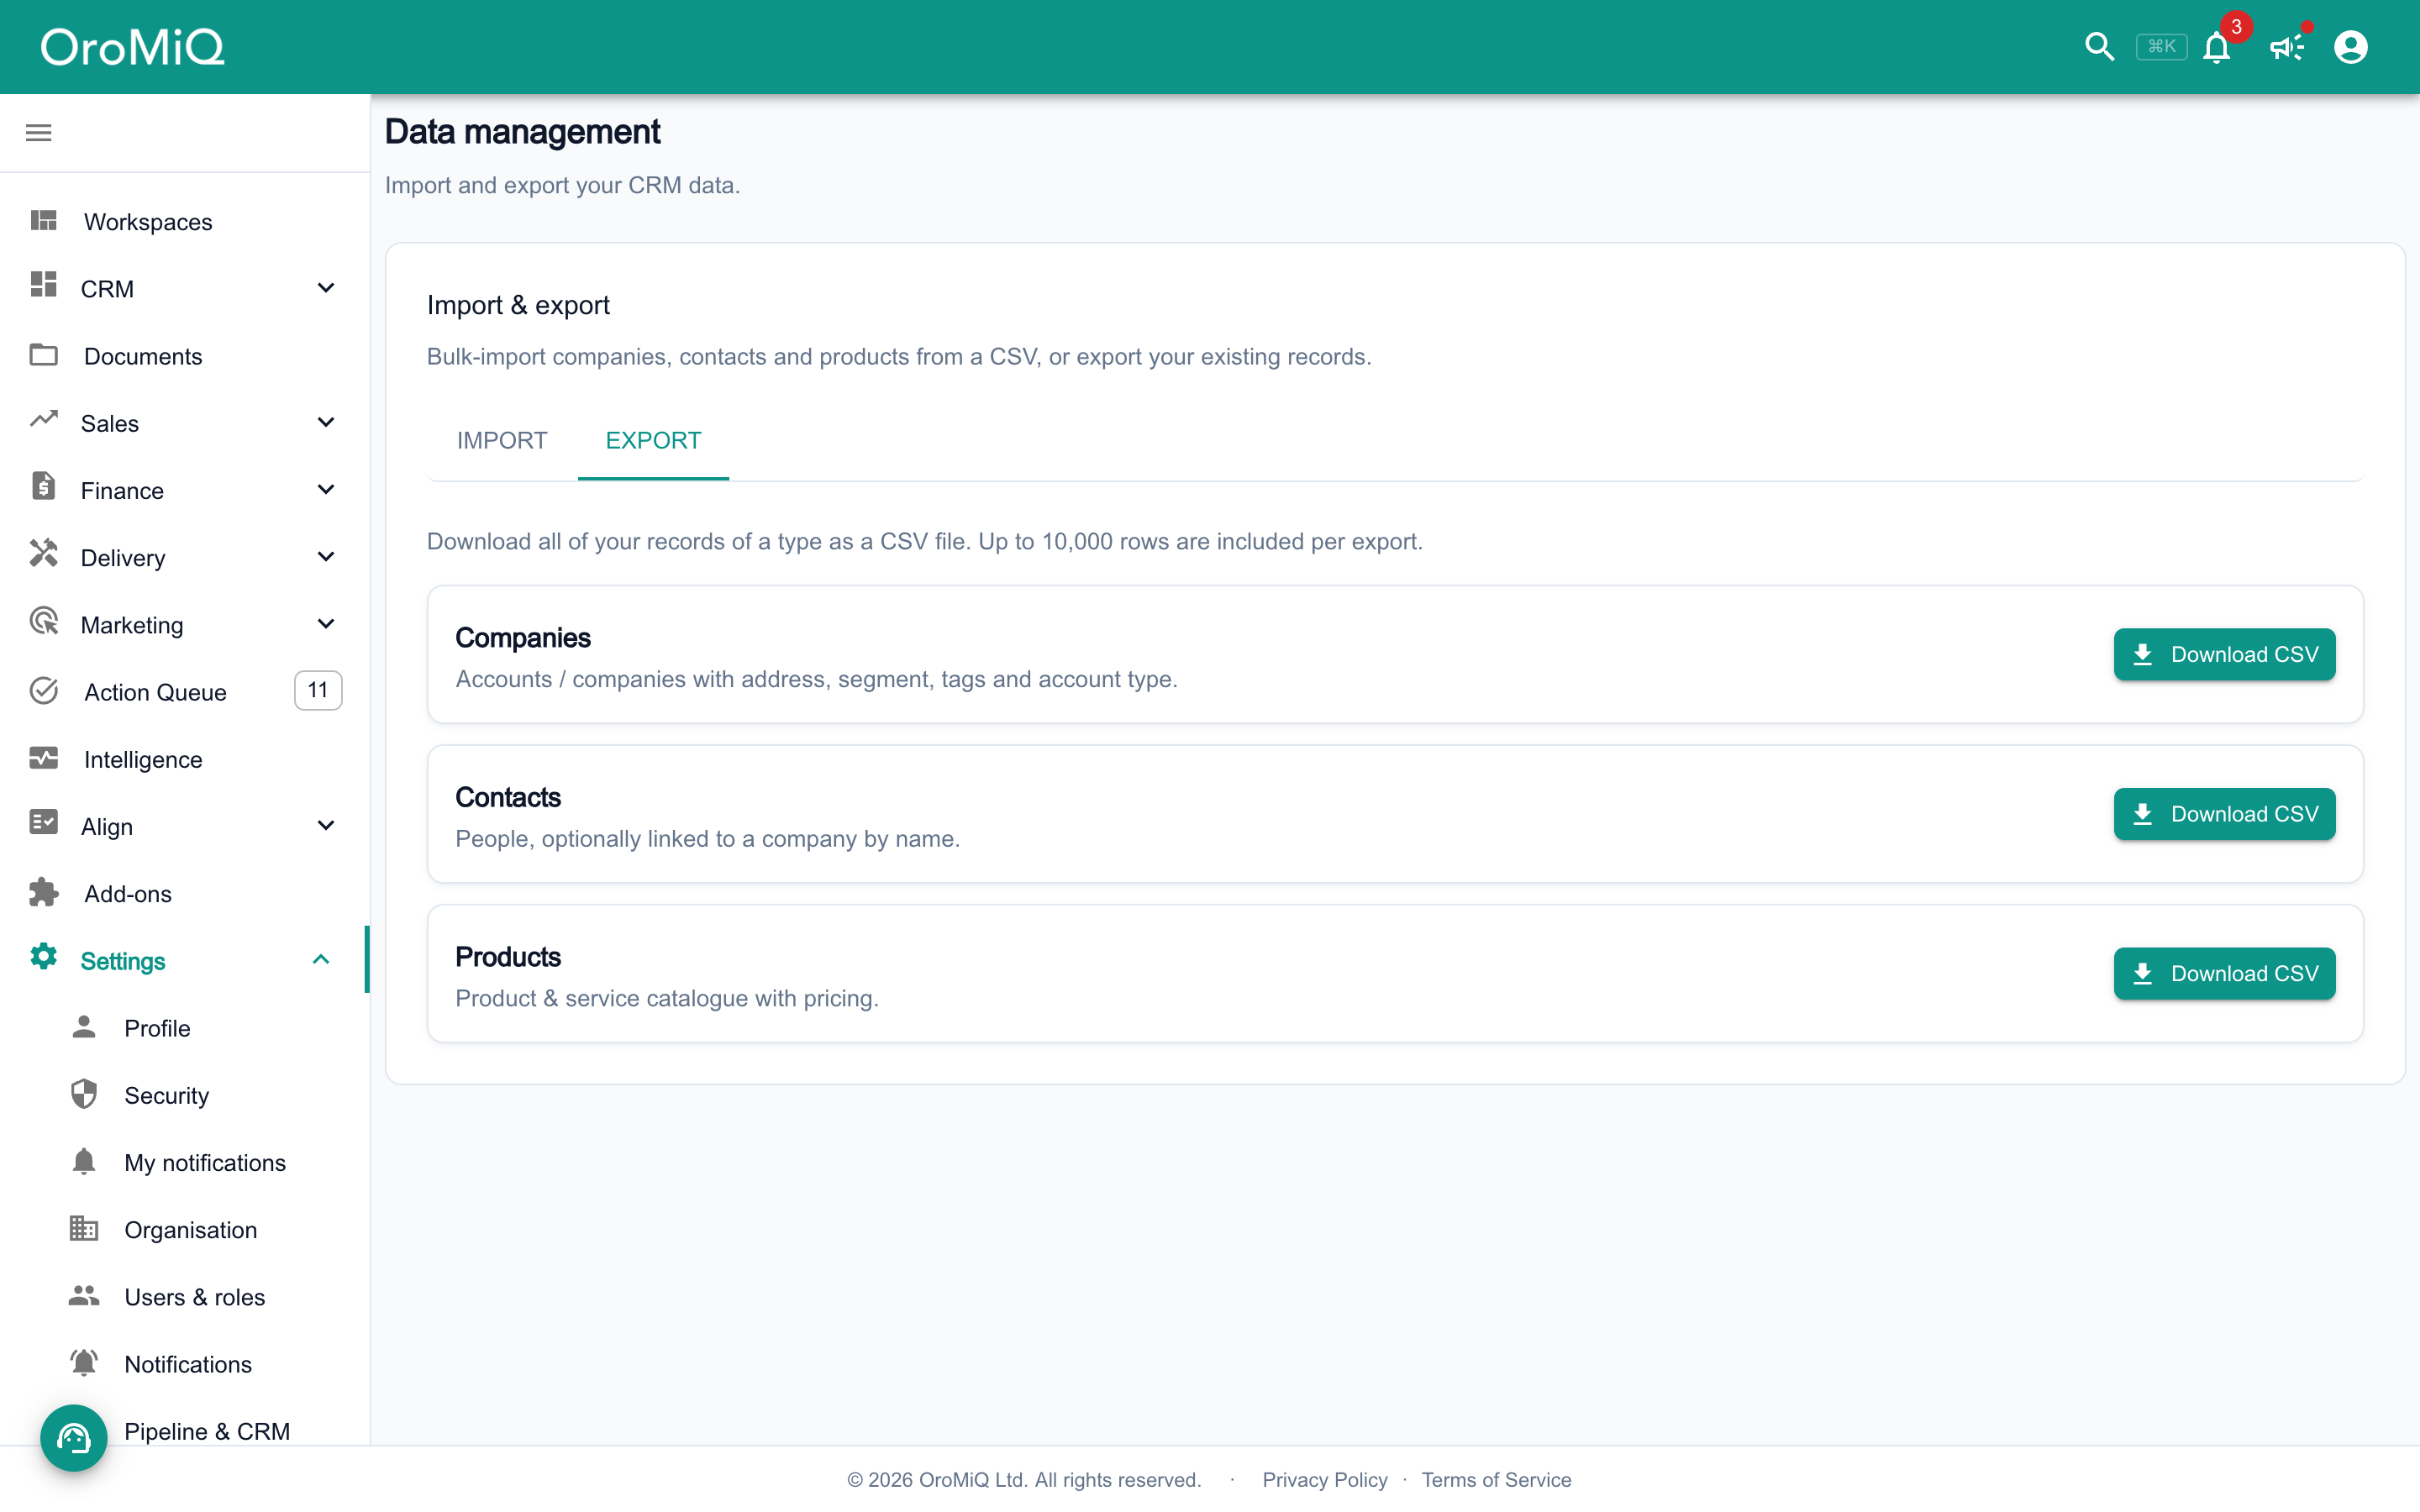
Your organisation can download up to 5,000 rows a day from the Export tab. If a download would go past that, you get the rows that fit and OroMiQ tells you the file is incomplete. Once the limit is used up, downloads stop until it resets at midnight UTC.
The Export tab with Download CSV buttons for Companies, Contacts and Products.